Dreadnought
A type of battleship introduced in the early 20th century, larger and faster than its predecessors and equipped entirely with large-caliber guns.
Overview
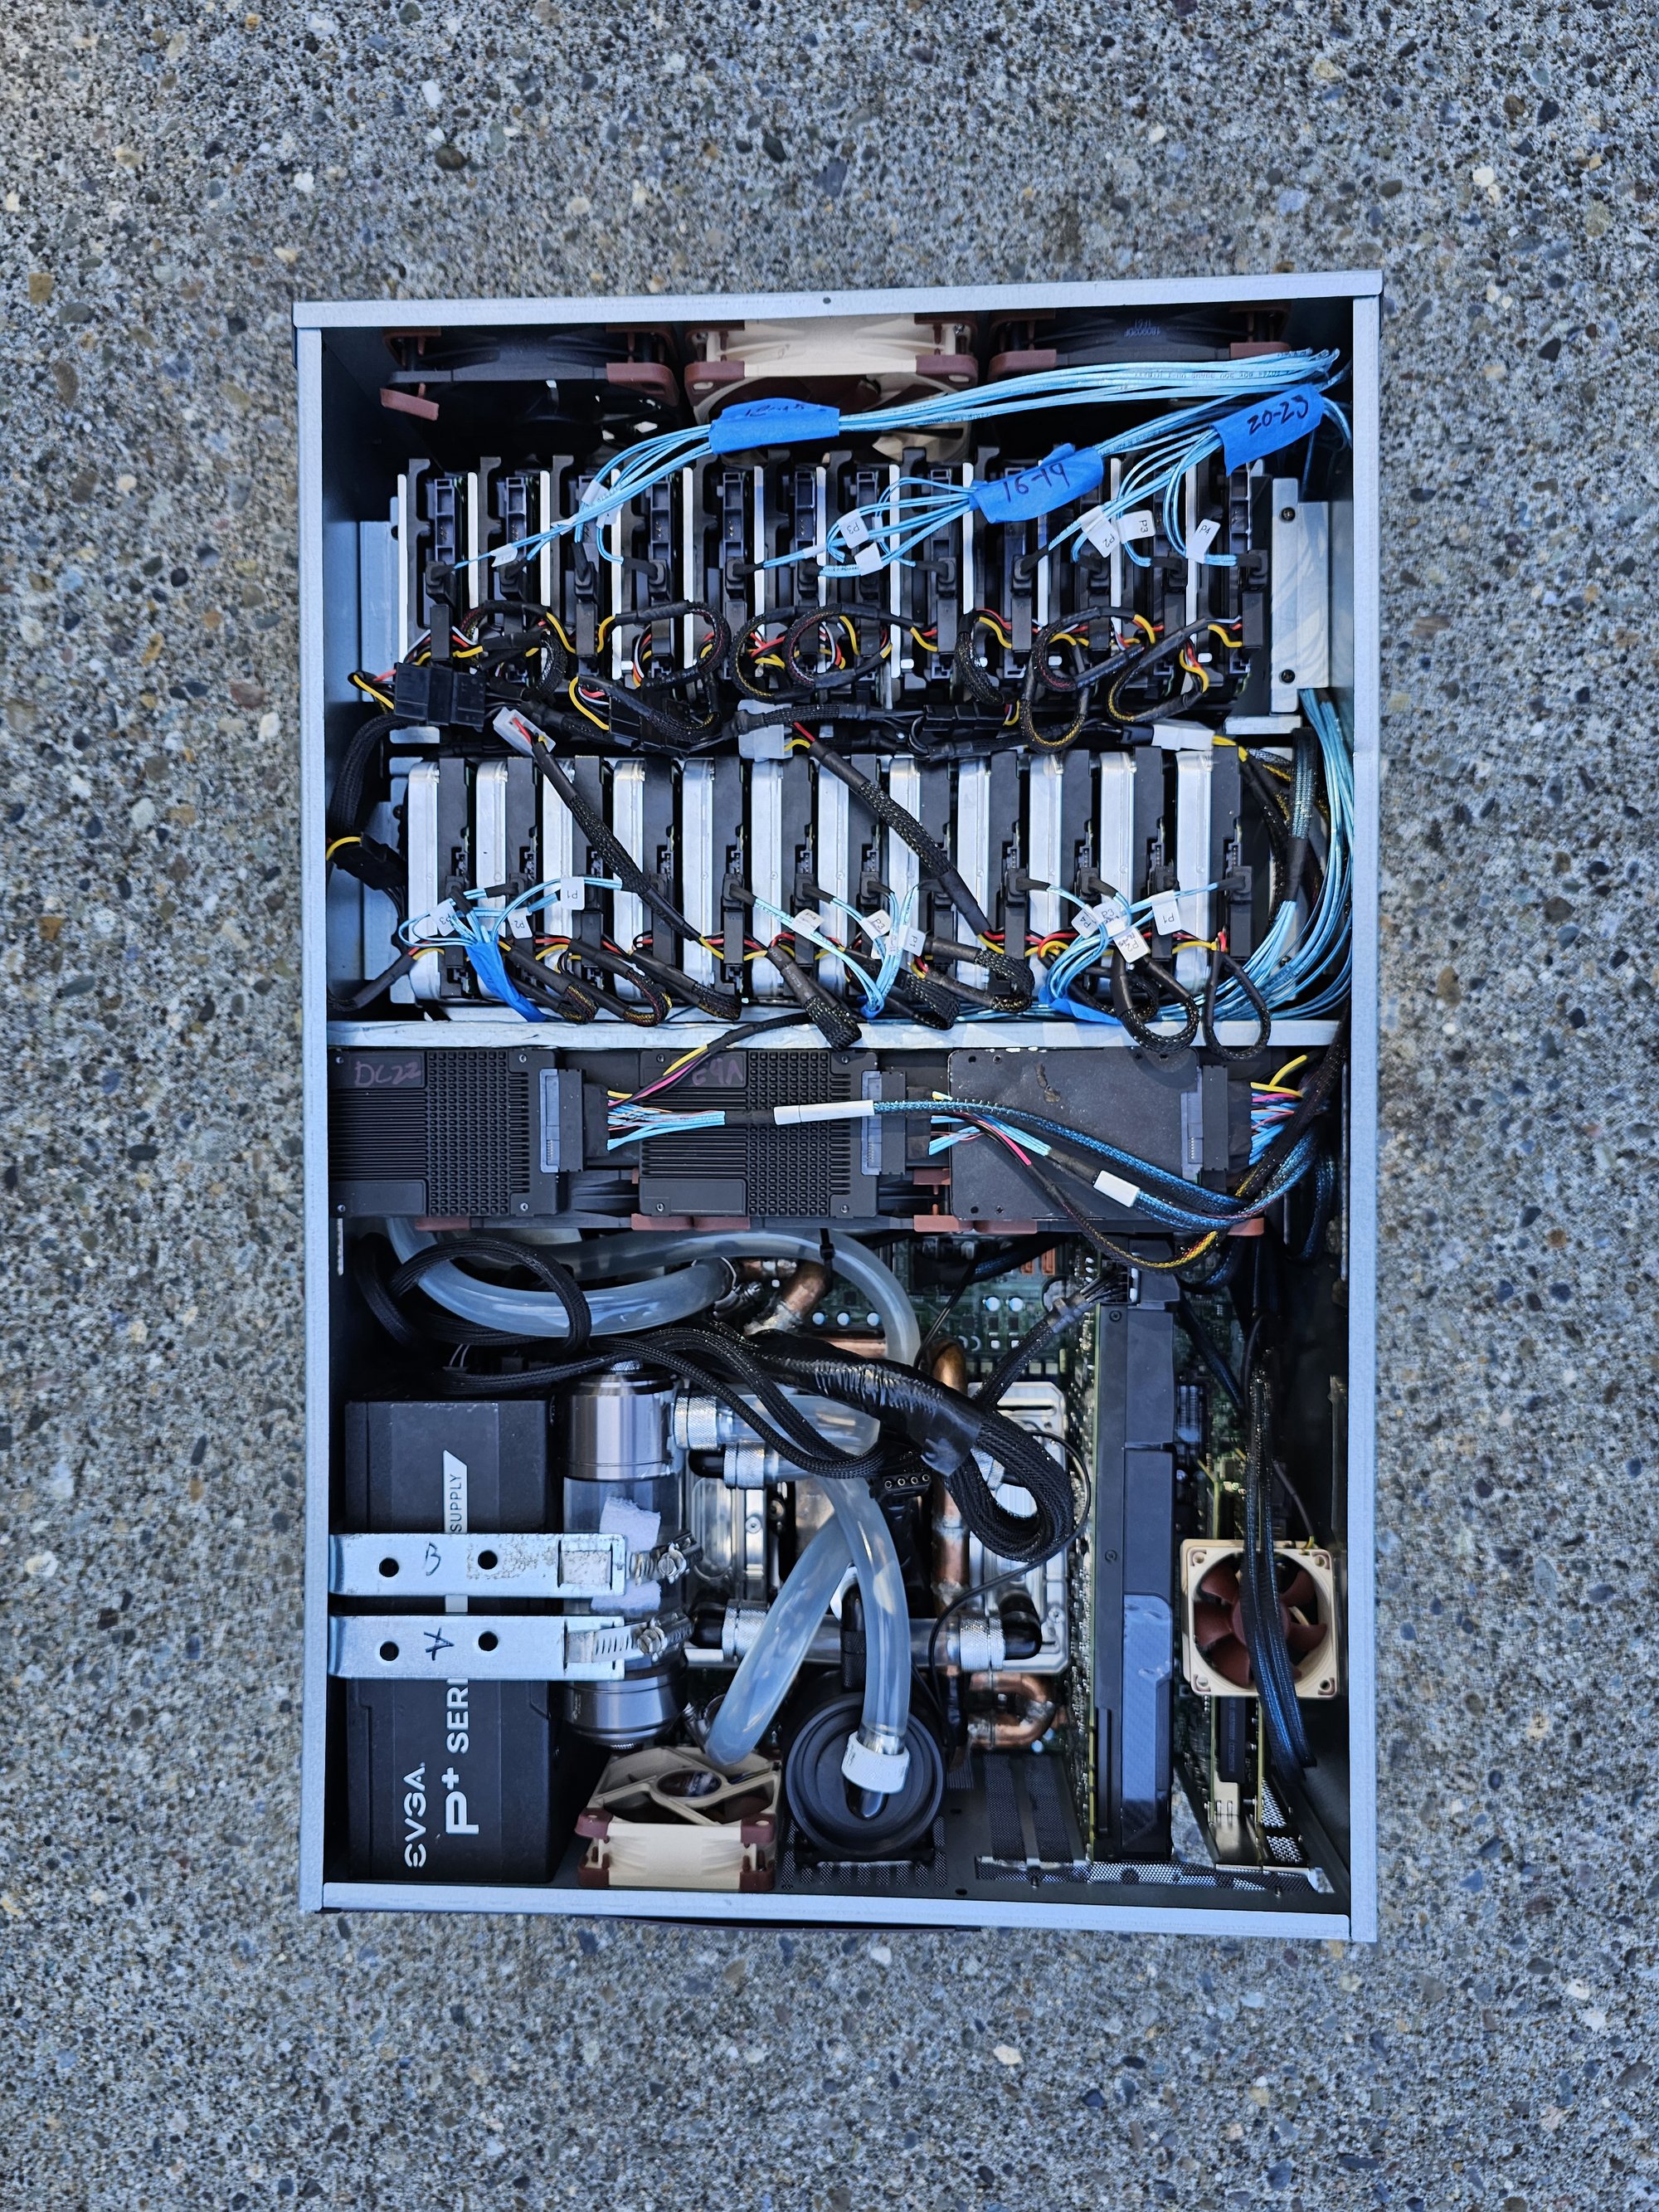
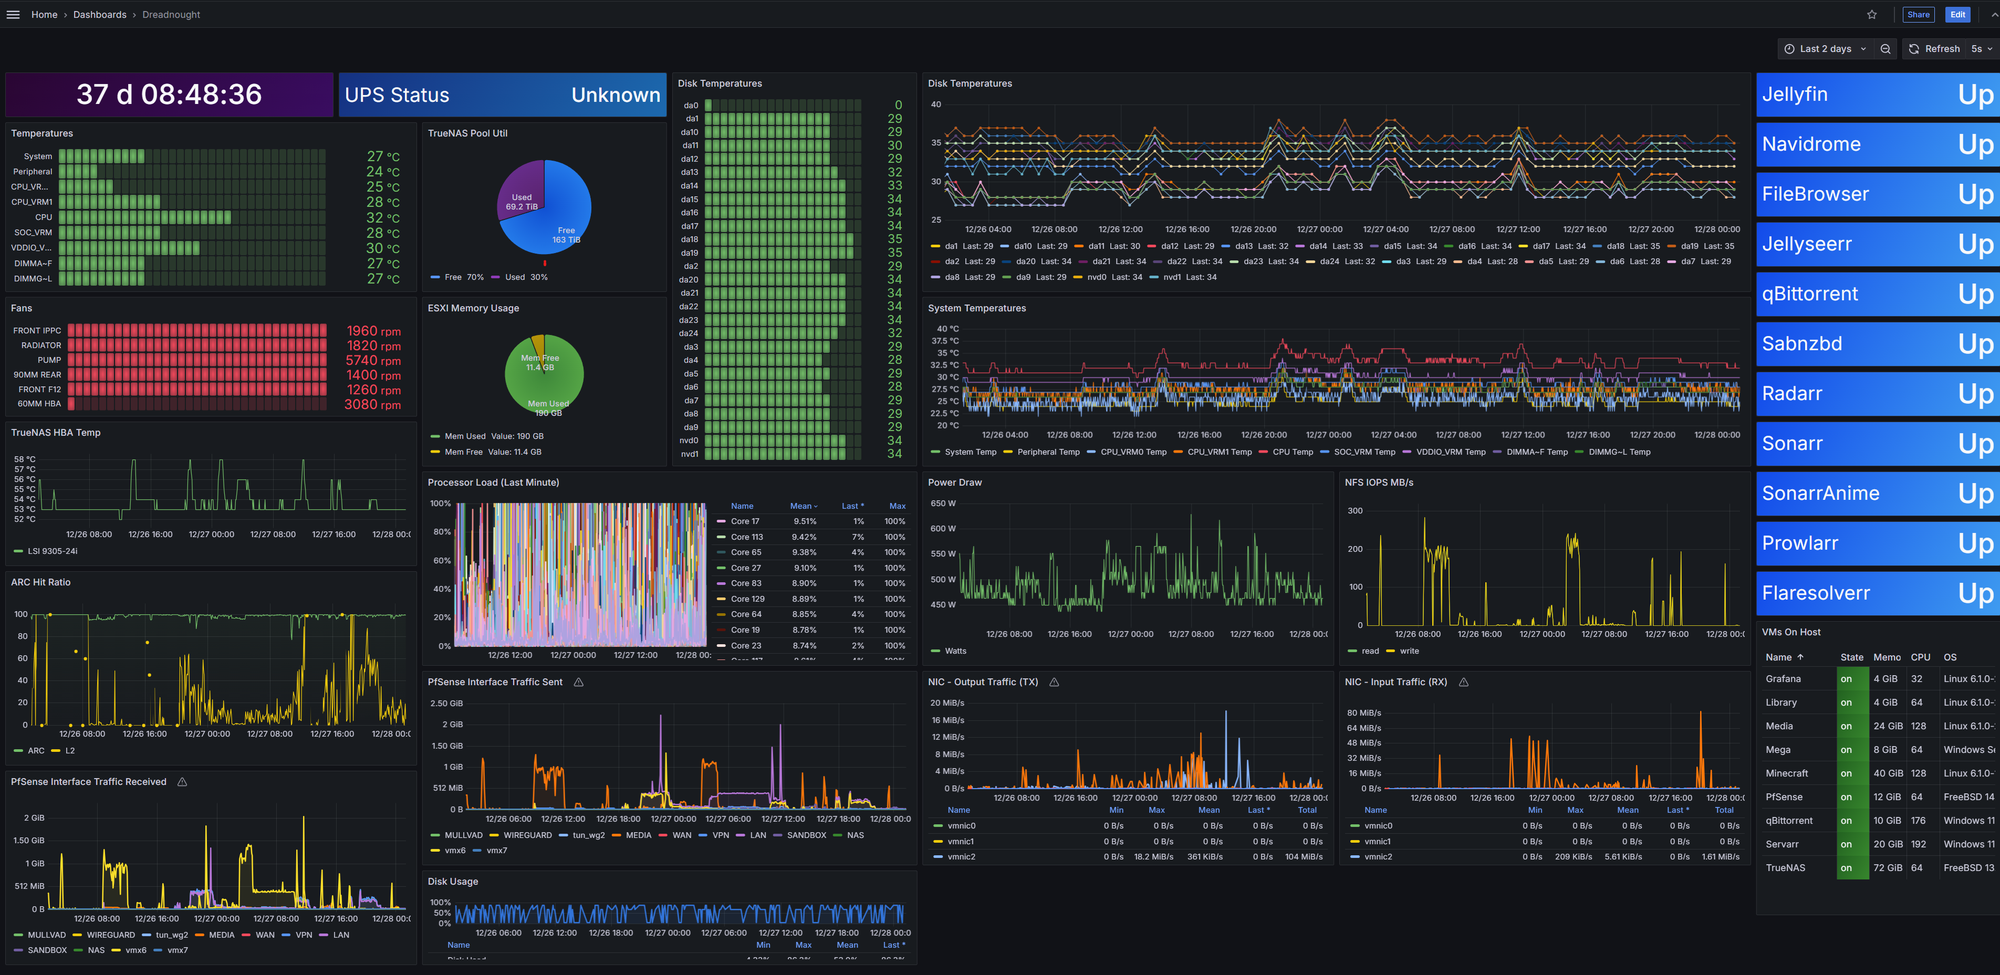
This project's goal was to consolidate multiple servers into one machine via virtualization. This allows for greater utilization potential through dynamic allocation of resources. This machine occupies a 4U rack compatible chassis and is liquid cooled on the CPU, VRMs (x4), and RAM (x12).
This docs project covers the hardware and OS software. Specific apps etc. can be found in the SelfHosted project.
Specs at time of writing:
- EPYC 9654 ES (4.4ghz single, 3.2ghz all core)
- 384GB DDR5 4800CL40
- 2TB 670p, 2x 1TB 970 evo, 500GB 970 evo
- 2x p4800x 375GB
- 24x 14TB RED Pro / Exos
- LSI 9305-24i
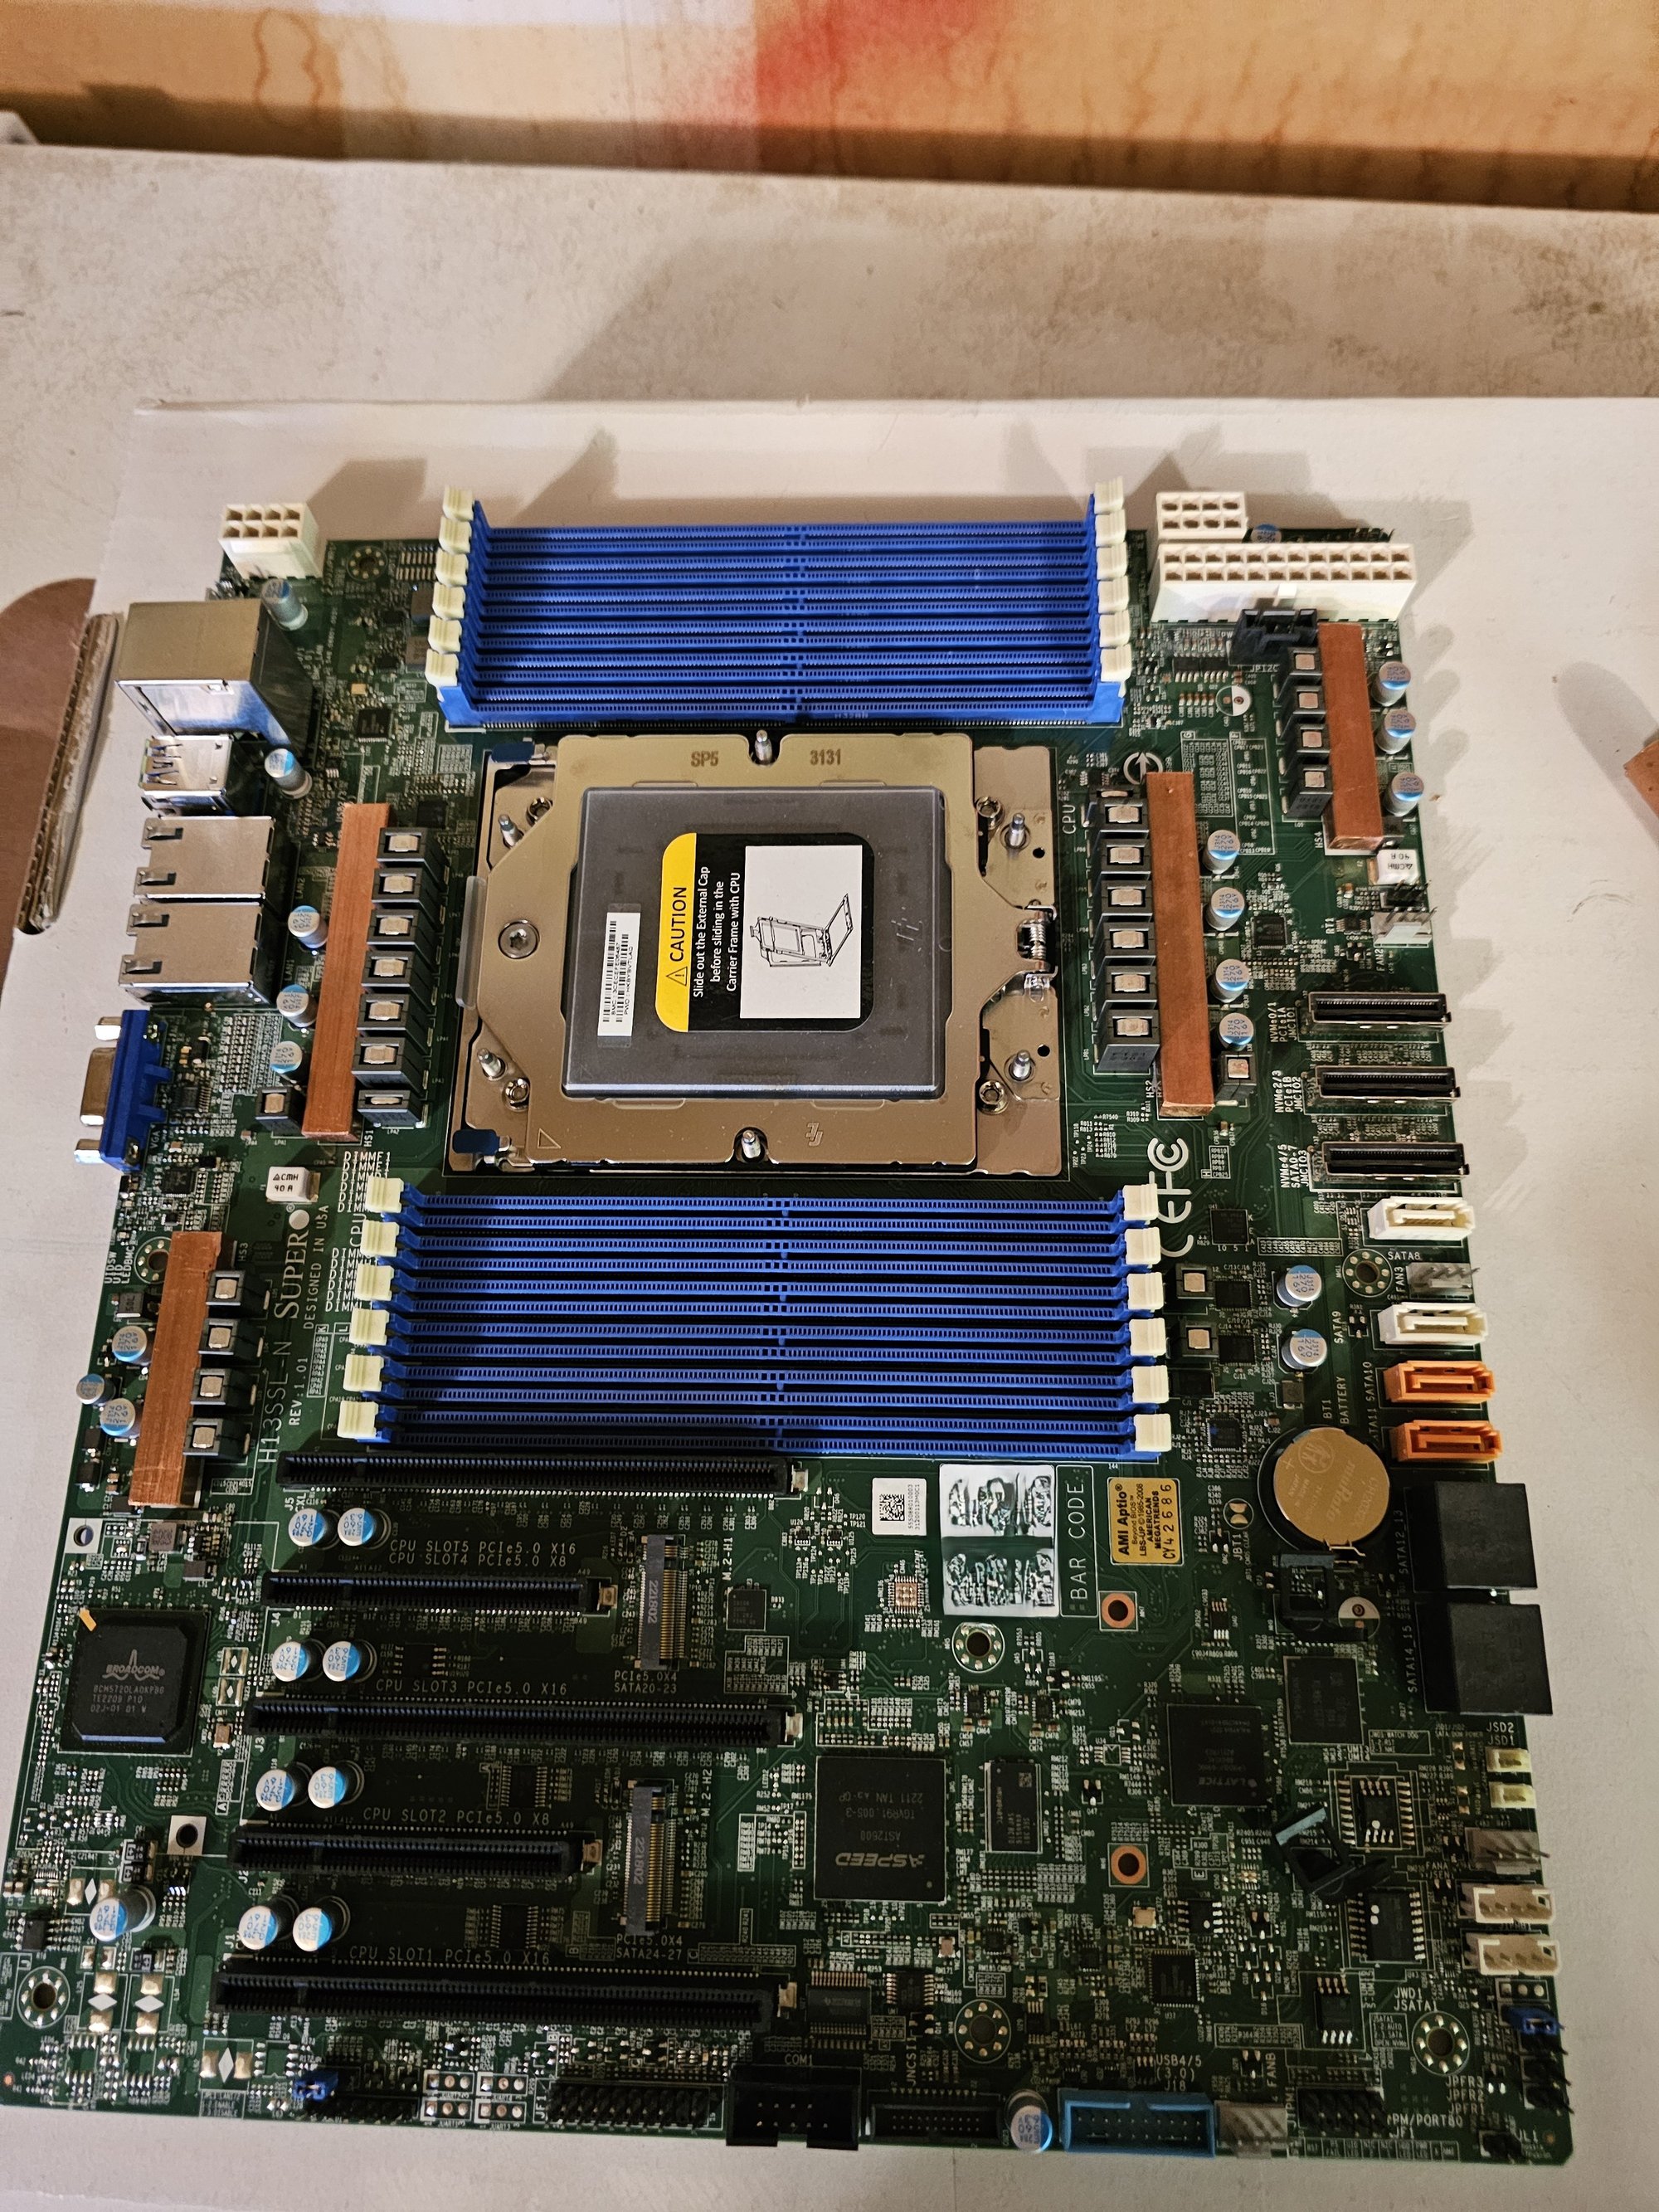
- H13SSL-N
- 1600w P+
- GTX 1080
- 2x 540T2
REDACTED
Processor
ES: engineering sample QS: qualification sample
Pros:
- Much cheaper than production hardware
- Potential for unlocked multiplier (like on this 9654)
Cons:
- Can have missing cache / cores / pcie lanes, etc.
- Will almost certainly run at lower clock speeds (by default)
- Only a few, possibly just one motherboard, will have preprod microcode
- getting an ES/QS CPU to "light" is a challenge among enthusiasts
- Generally look for the earliest / oldest mobo's in the CPU's compatible chipset(s) as these are the most likely to have BIOSes with preproduction ucode available.
- Preprod ucode can be removed in later BIOS releases like what happened with my H13SSL-N
Overclocking
I used Smokeless UMAF to unlock the CPU from its preproduction base clock, and generally enable turbo. I also had to set the RAM to its rated specs manually. Smokeless UMAF Github.
Overclock testing and validation should be performed ideally on bare-metal Windows to ensure frequency and other fields are being reported properly. VMware does not show turbo frequencies outside of a freak ssh command. ServeTheHome Genoa QS OC Thread
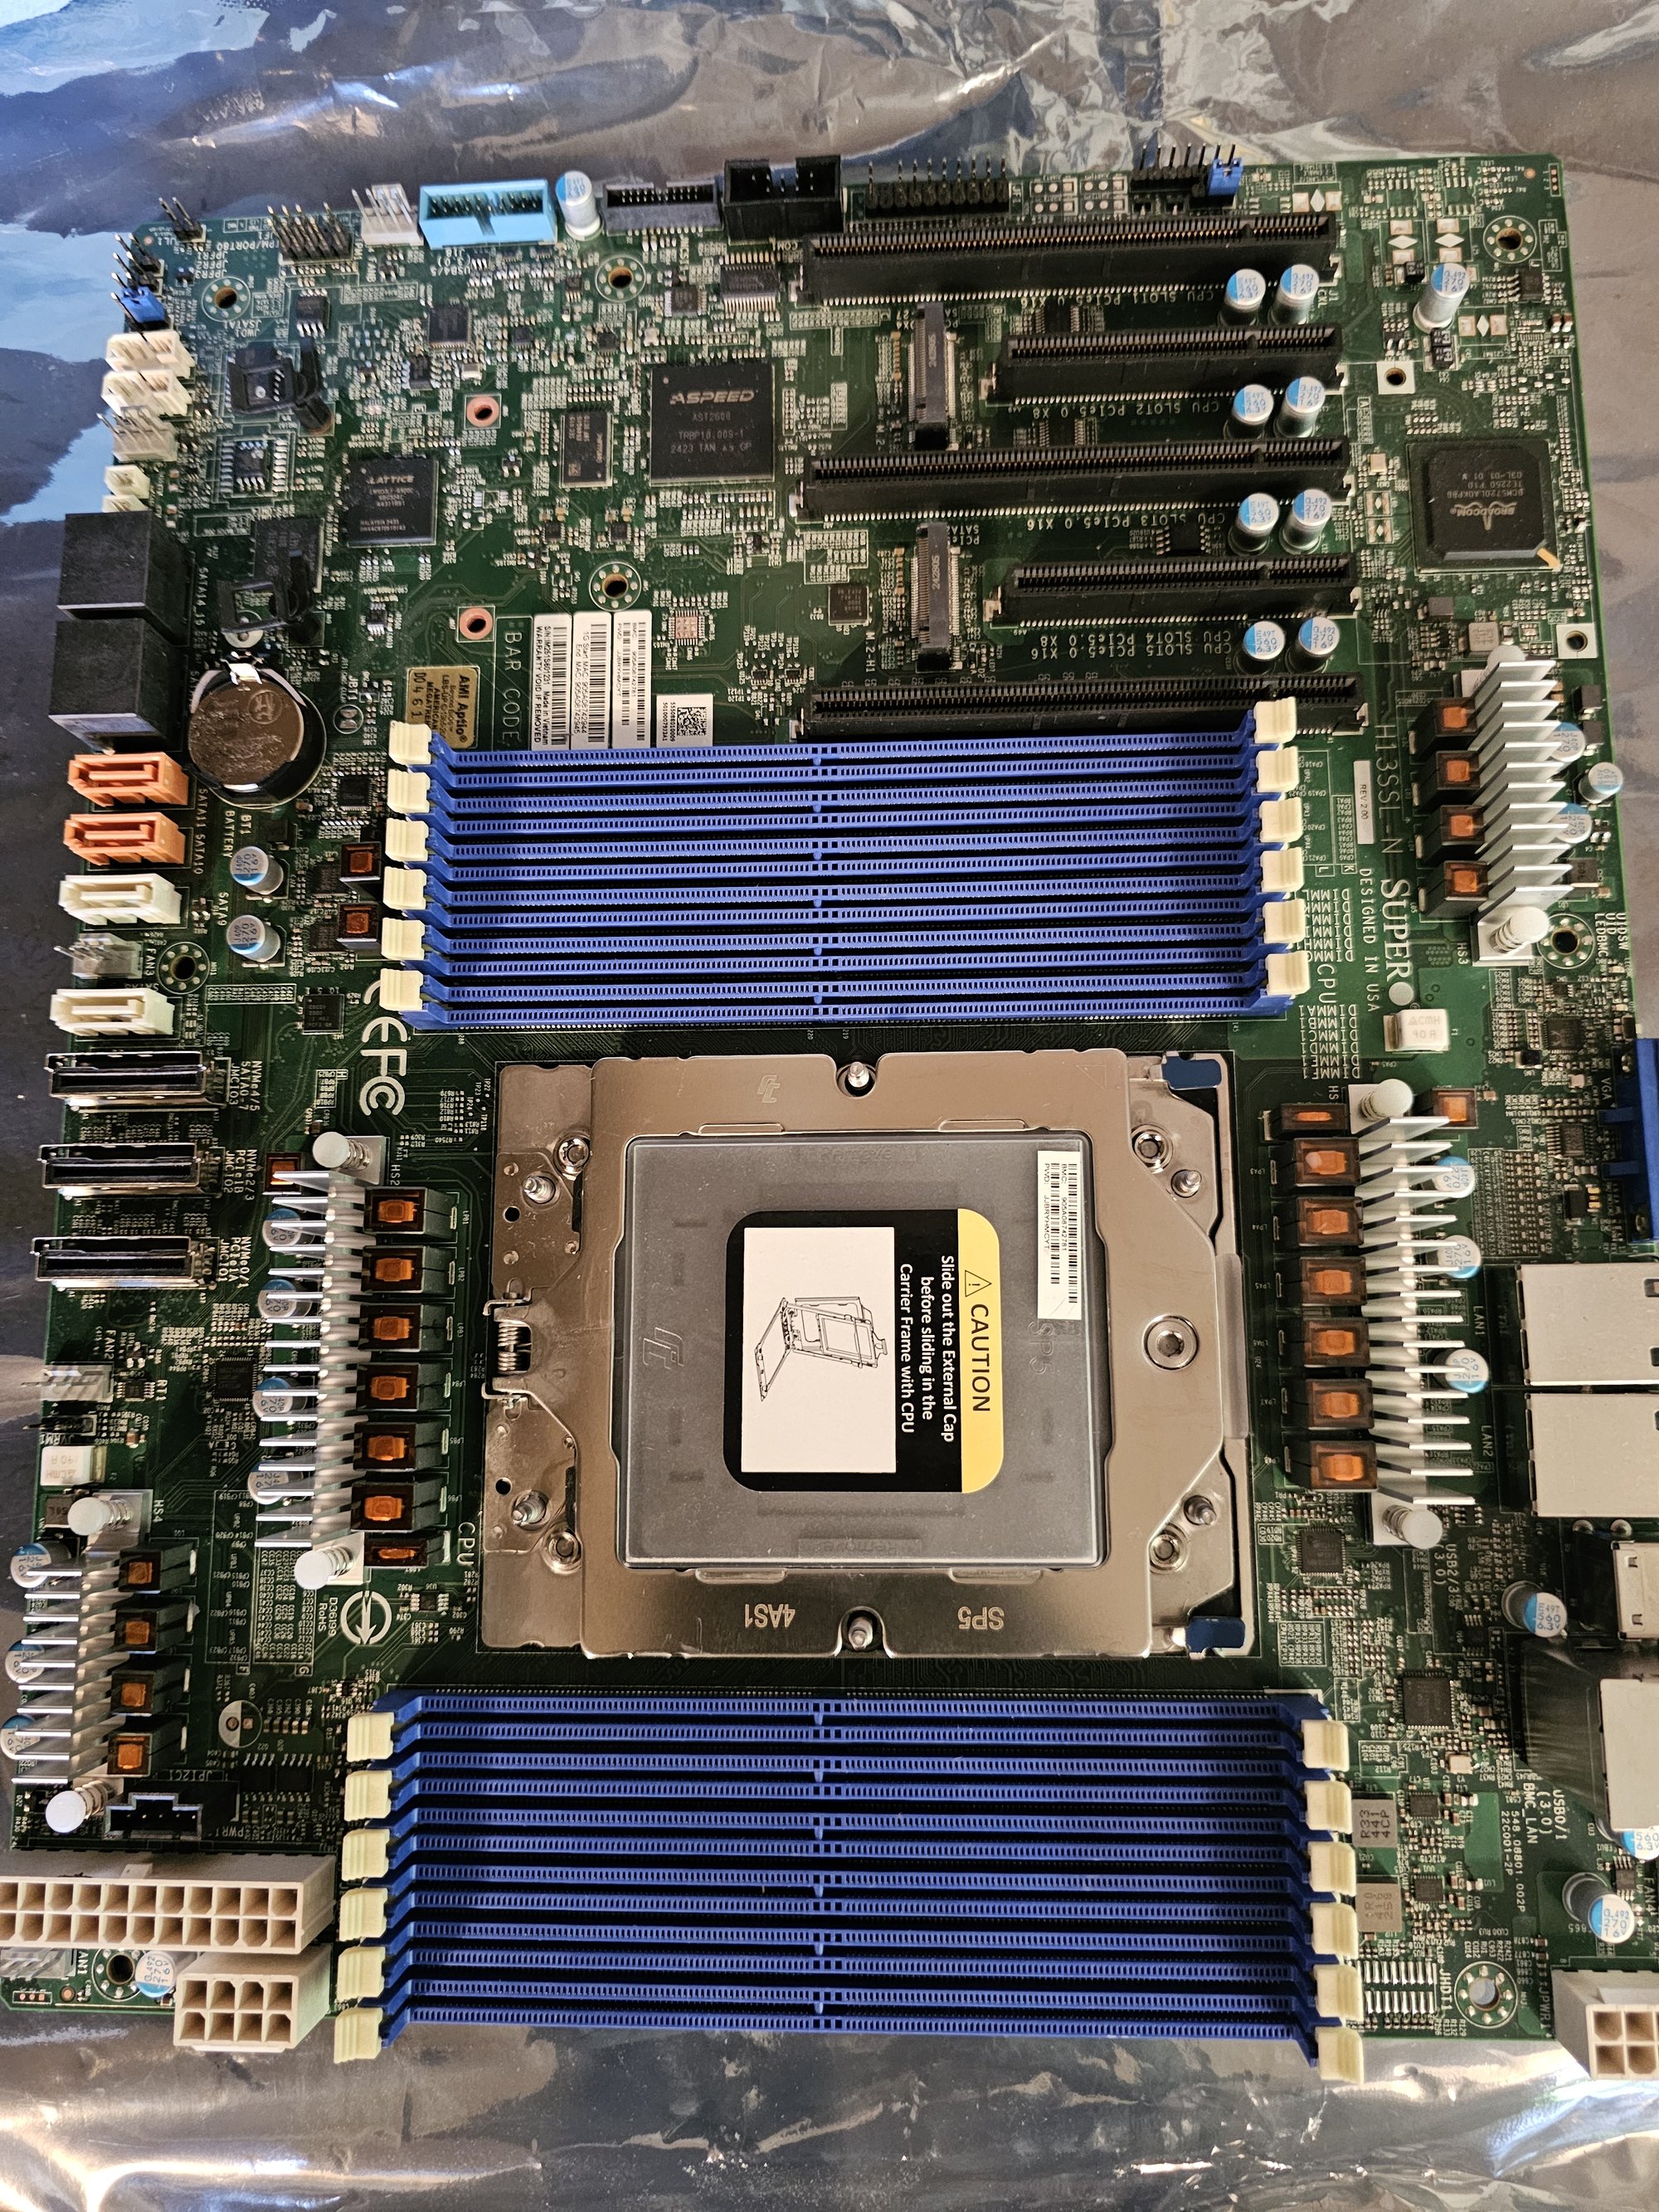
SP6 Socket
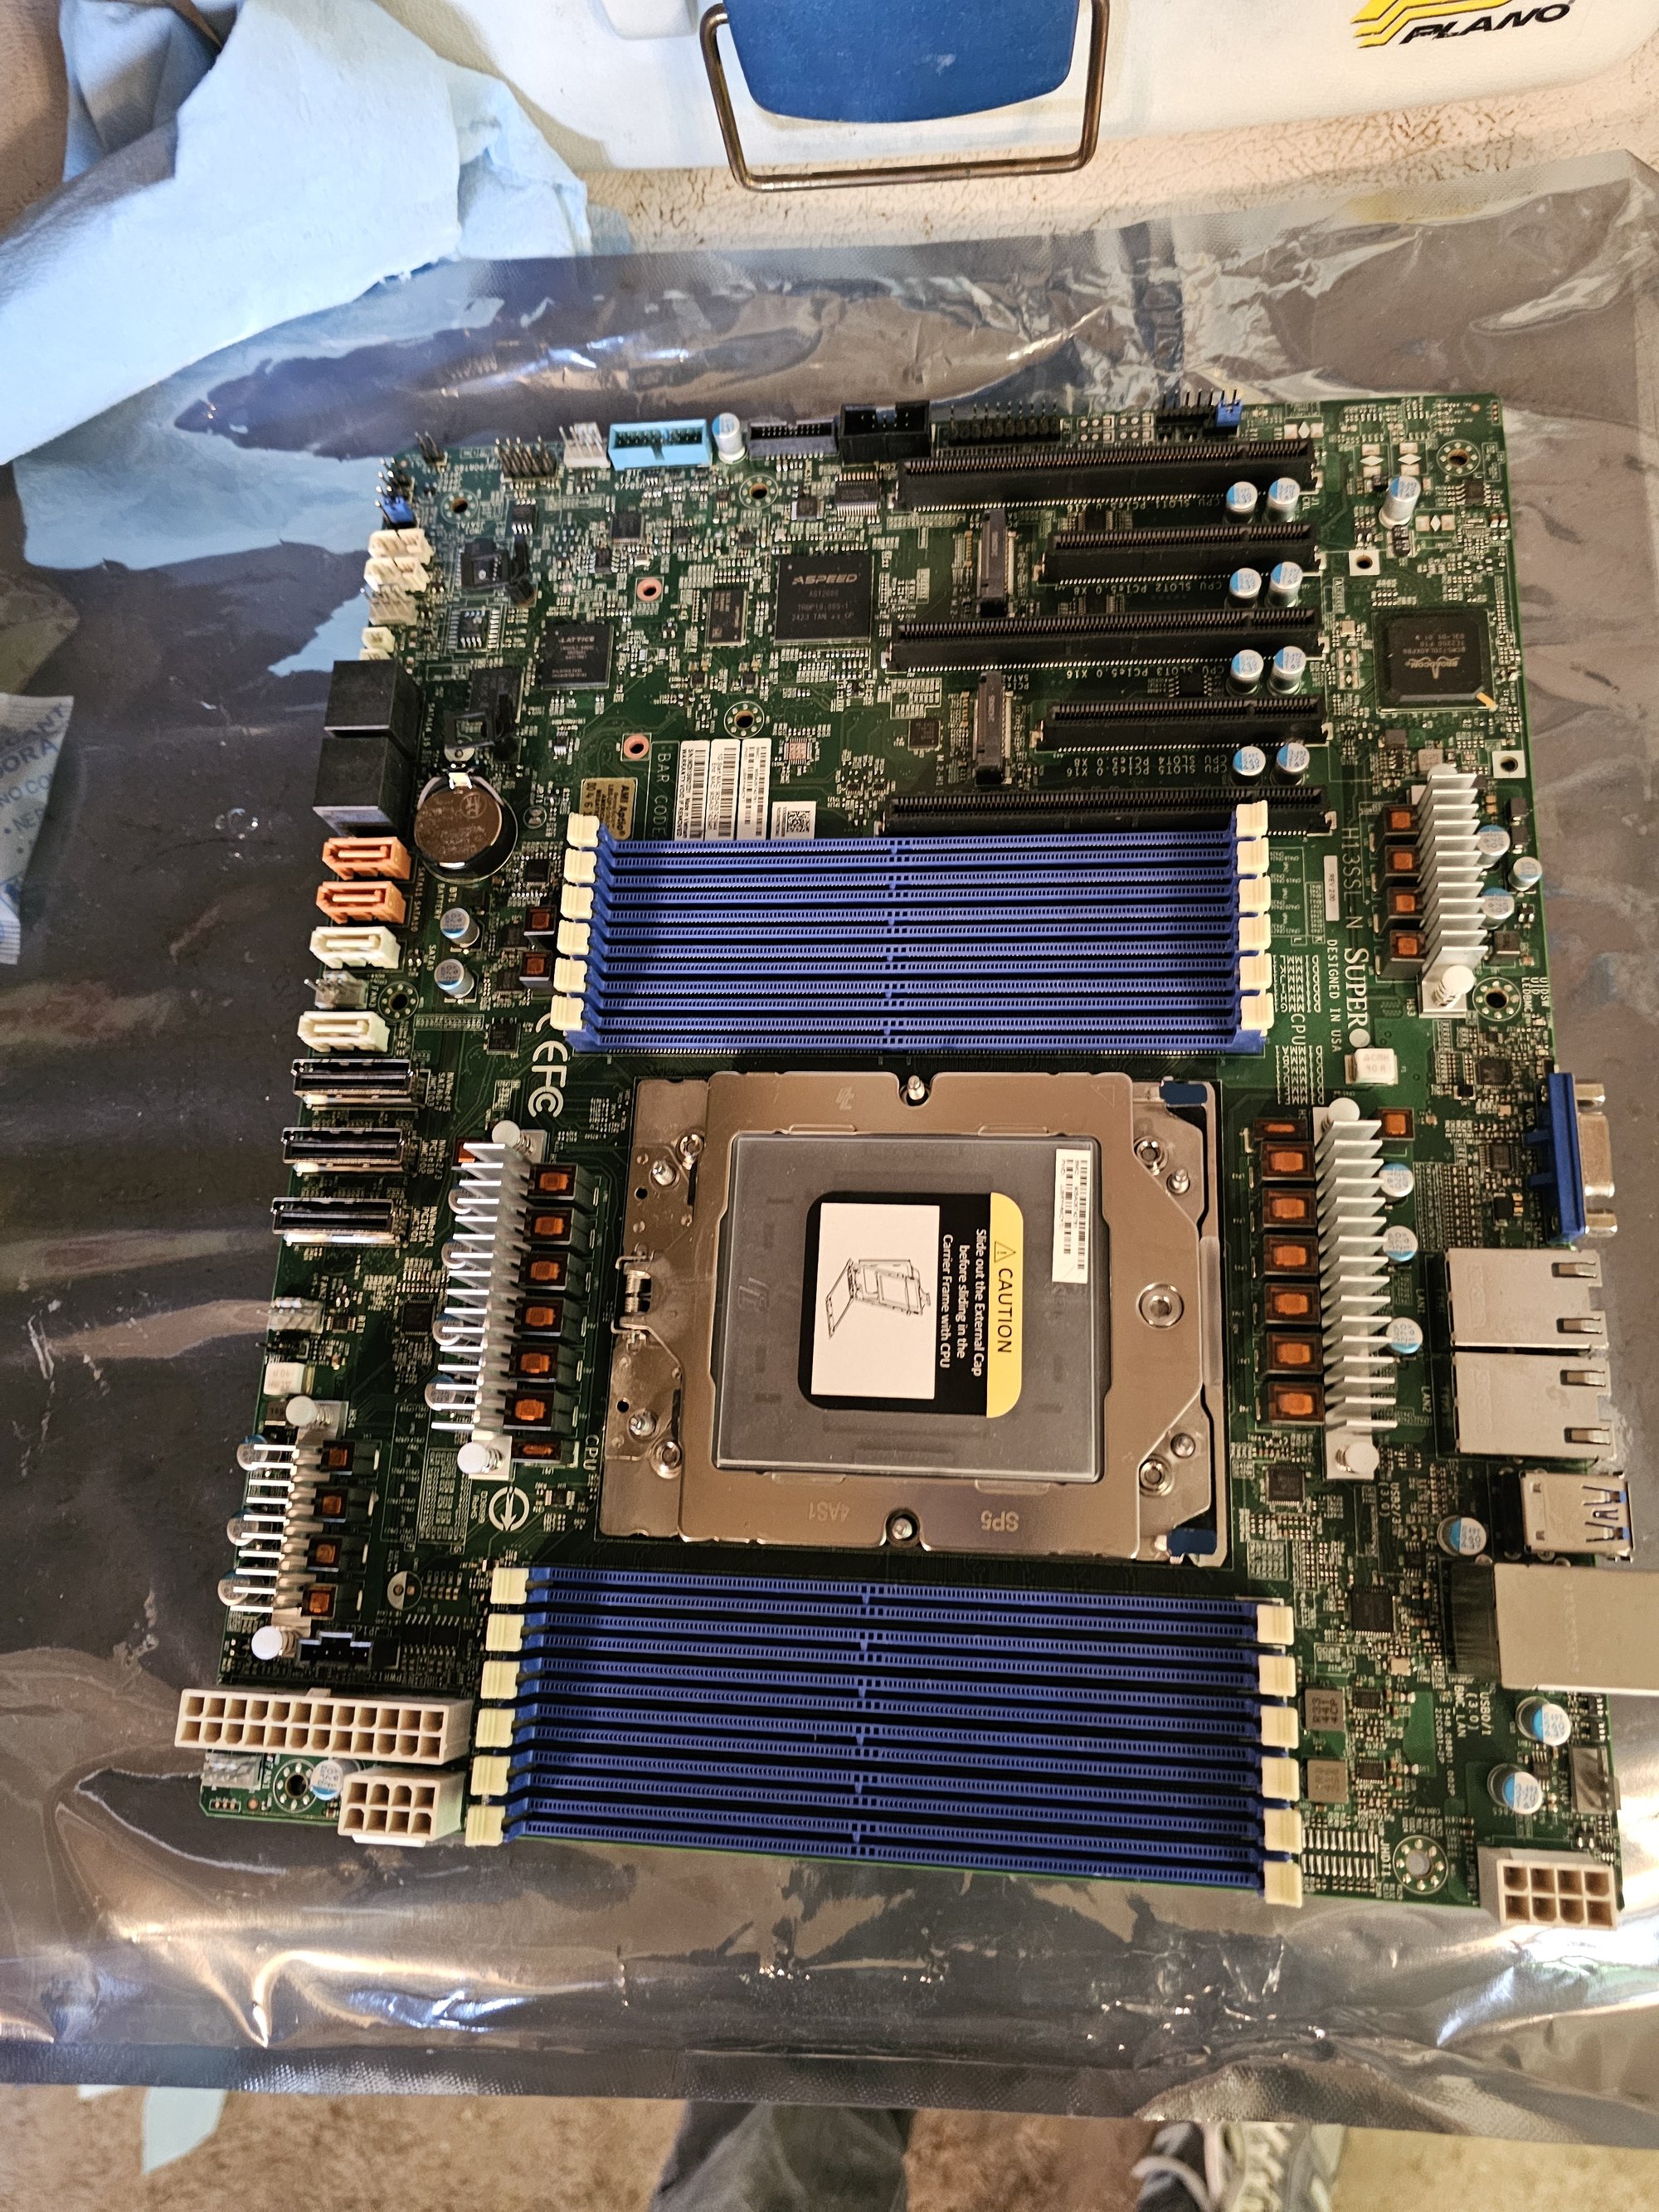
The SP6 socket is extremely finnicky about alignment and pressure. It might take a couple tries to get it seated correctly. A symptom of bad seating is missing memory channels and or pcie lanes / init problems. Post codes 90-99 are related to pcie stuff, and typically hangs here mean the CPU isn't seated properly.
My method for seating the CPU (and in fact for any large CPU from now until the end of time) is to do what used to be considered a novice maneuver - I install the motherboard first, then the CPU. Server motherboards are especially flimsy since they aren't ruggedized the way consumer stuff is, and with the mounting pressure required, you'll end up heavily warping the board. If you screw it all in first, the socket, thermal material, CPU pins etc, will all have to conform to the flat board instead.
Genoa Cold Boot Slowness
Genoa Processors have a fun cold boot problem where they take 15 actual minutes to re-train memory and finally boot. This is something fun to watch out for. You'll notice POST code 15. This is memory training. There is a setting in various MOBOs (H13SSL-N exposed via smokeless umaf) that allow for warm memory training rememberance to keep this from happening on restart. This is apparently remedied in later BIOS releases, but those don't have the ucode for my preprod CPU.
EDIT: The remediation tip was directly from Supermicro, but I don't know how much improvement they're talking about. My 9960x workstation takes 3-5 minutes with 4x32, albeit 6000CL30 (much tighter than 4800CL40).
I recall my initial post being even longer. Its a lot of fun trying to get that expensive and that off-the-reservation to turn on, thinking its dead, and walking back after lunch to see it just start to post. Its even more fun trying to screw around with undocumented AMI settings and waiting 15+ minutes inbetween each test.
Storage
The server currently has 24 x 14TB drives. half are Seagate Exos, half are WD Red Pro. These are backed by an L2ARC and SLOG P4800x 375GB drives. OS / general NVMe storage is on various 970 evo plus and 670p drives.
HDD Sourcing
Used server hard drives are the best solution. They're extremely cost effective and come with excellent warranties.
https://www.goharddrive.com and https://serverpartdeals.com are in my opinion the two best US/NA used HDD resellers. If pricing is normal, you will never even approach their pricing with shucked drives or Amazon used.
Careful consideration should be taken when constructing an array. You may extend the array in the future, but changing its structure would require offloading all data, and it can become so big that its nearly impossible to do so.
Solid State (NAND and Optane)
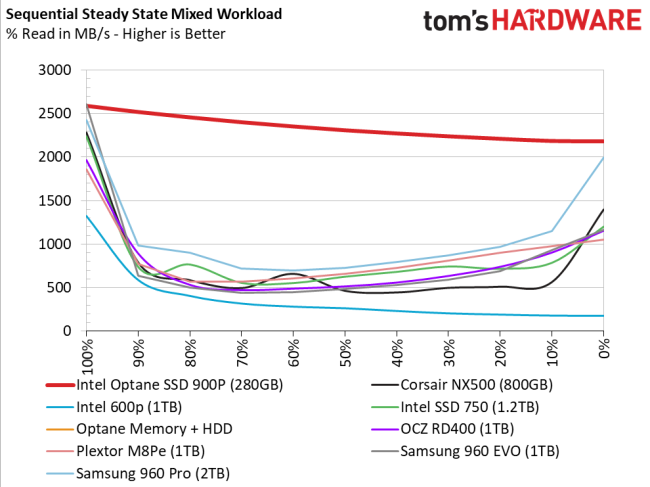
This server is foremost a NAS. ZFS employs a very nice tiered caching system to keep things speedy. You can have a read cache (Level 2 Adaptive Replacement Cache) and a write cache (Static LOG).
Optane drives are the absolute go-to for caching drives. They are immune to "bathtubbing". i.e. they maintain perfect performance in mixed workloads. They also have unreal write endurance ratings. Beyond this they smoke NAND flash in Q1T1 (totally random) file access and obliterate it in latency.
My preferred cost-effective optane drives at time of writing are p4800x 375GB drives.
HBA Card Cooling
I bought an LSI 9305-24i which it seems is pretty much the endgame card, and the only normal not freak expensive HBA card that will run 24 drives. This thing runs hot. I didn't think it'd be as bad as others said but oh boy it is, even with fresh paste. I learned this a couple days into the server being online so I kludged a 1lb novelty copper bar with a dremel for fins and a drill press for holes and lashed it to the card. This helped but I also had to get a 40mm noctua fan and point it at the heatsink. This keeps the temps respectable. It hits ~82C during 5PM weather in summer.
Case
The case is a Shenzen Special, and a complete piece of shit, but I love it. I cannot bring myself to spend $500+ on some garbage server chassis that I'm going to mutilate anyway, especially growing up having access to enterprise tech trash. It is also very abnormal for a case like this to exist as it only fits a niche end user custom build market, being that its a rackmount with large drive capacity yet has ATX form factor motherboard and power supply mounts. You can find this case if you go dig around ebay and look for things like "4U rackmount server case mining AI" etc.
Cooling
The party piece.
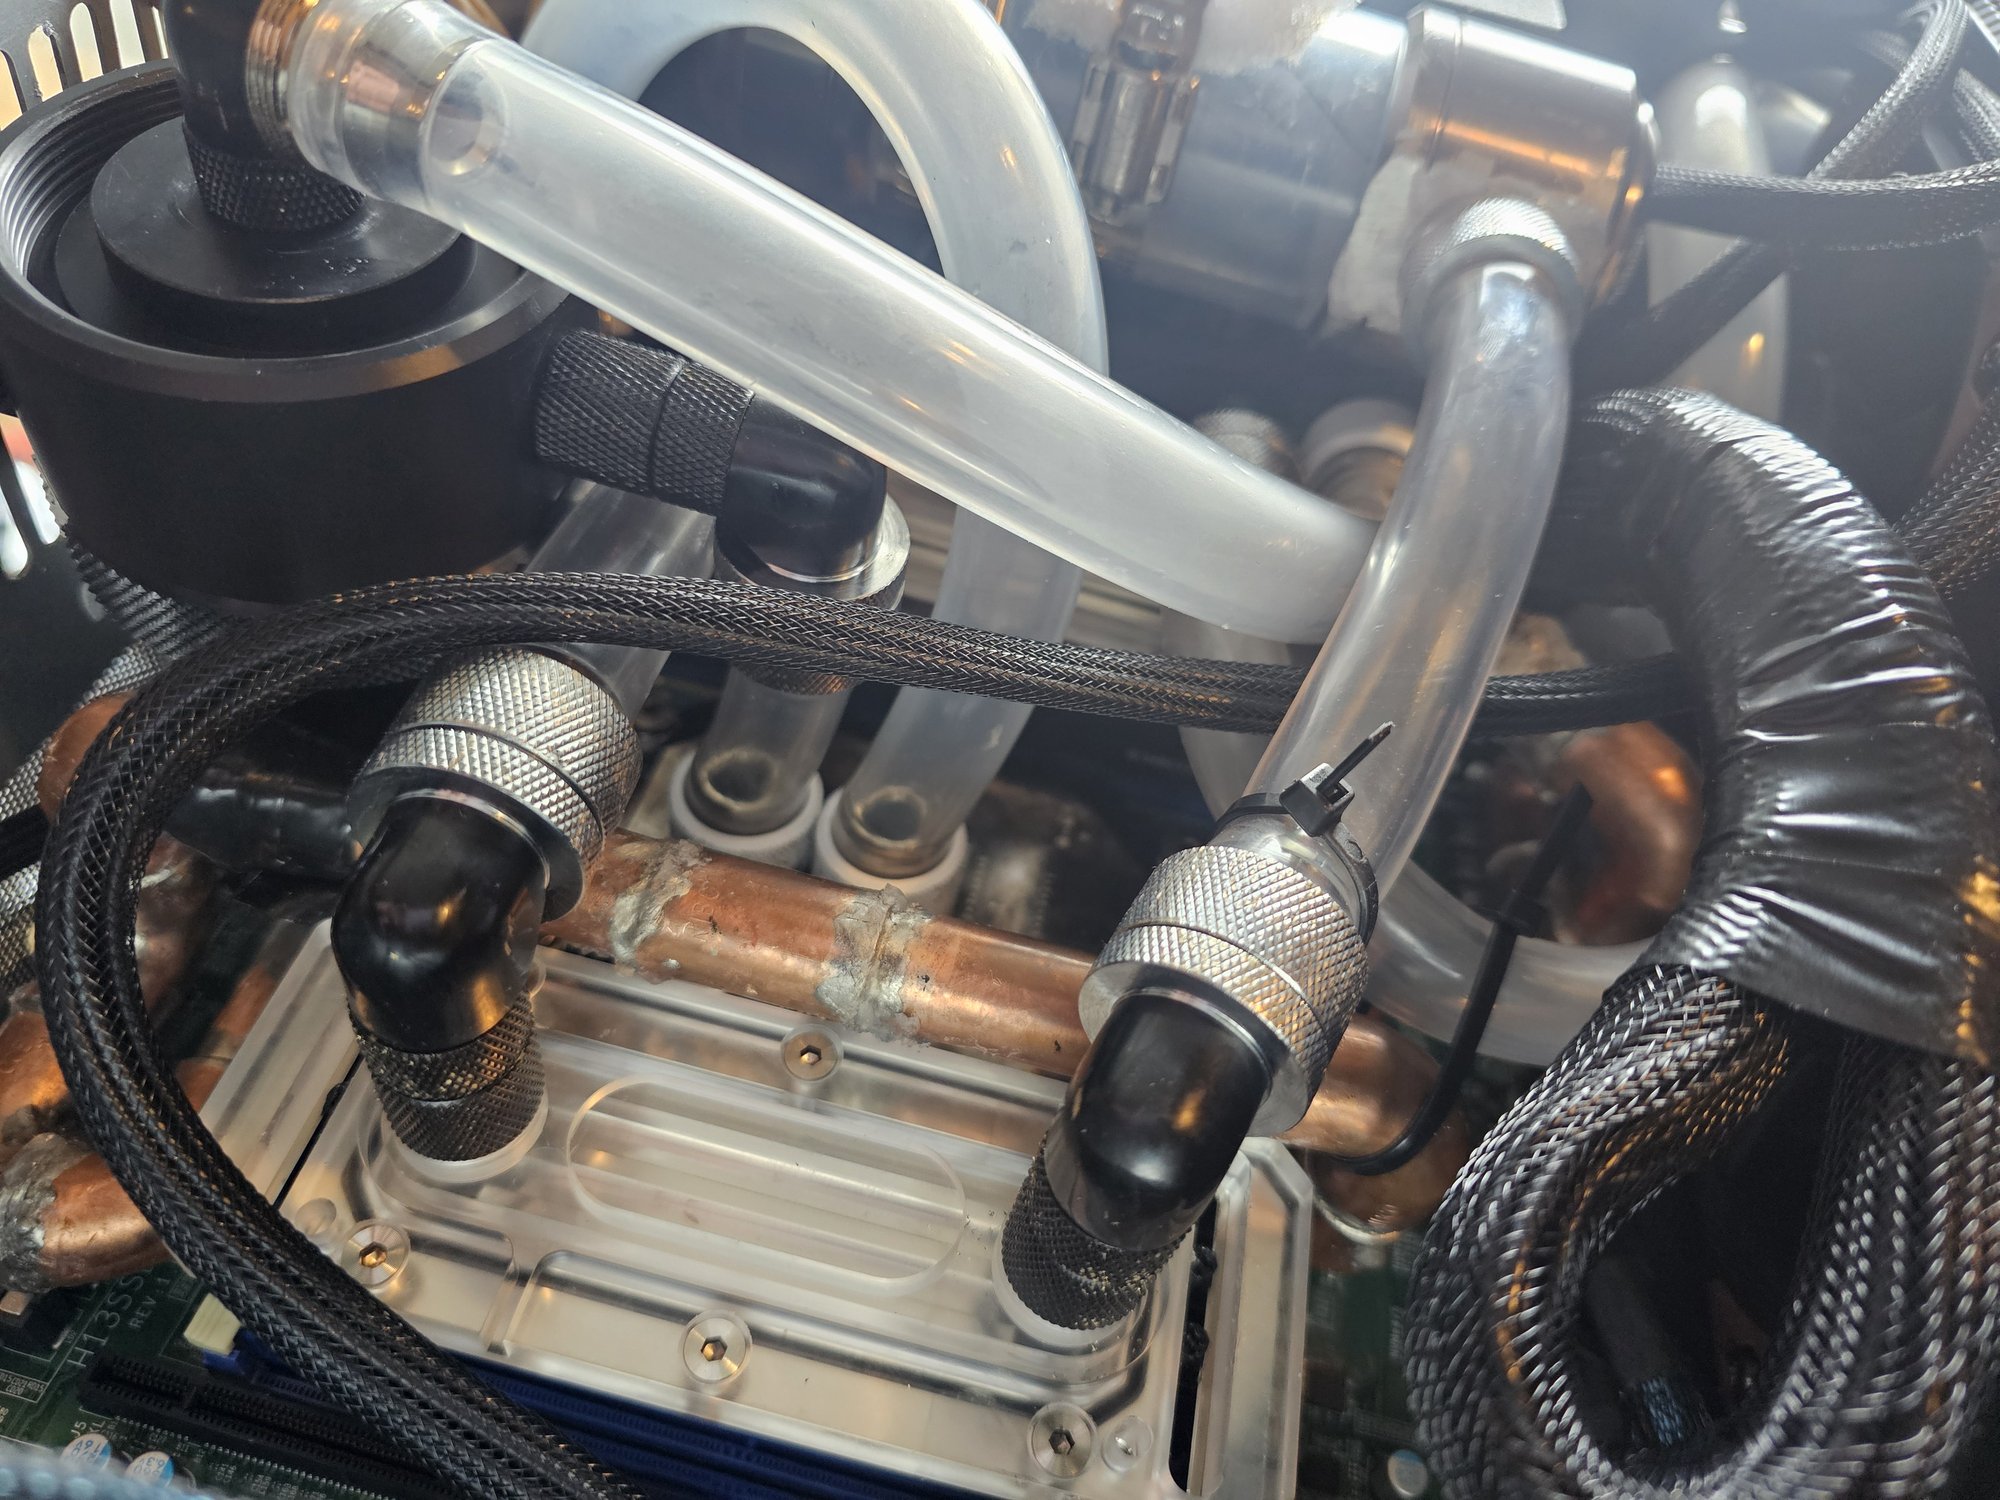
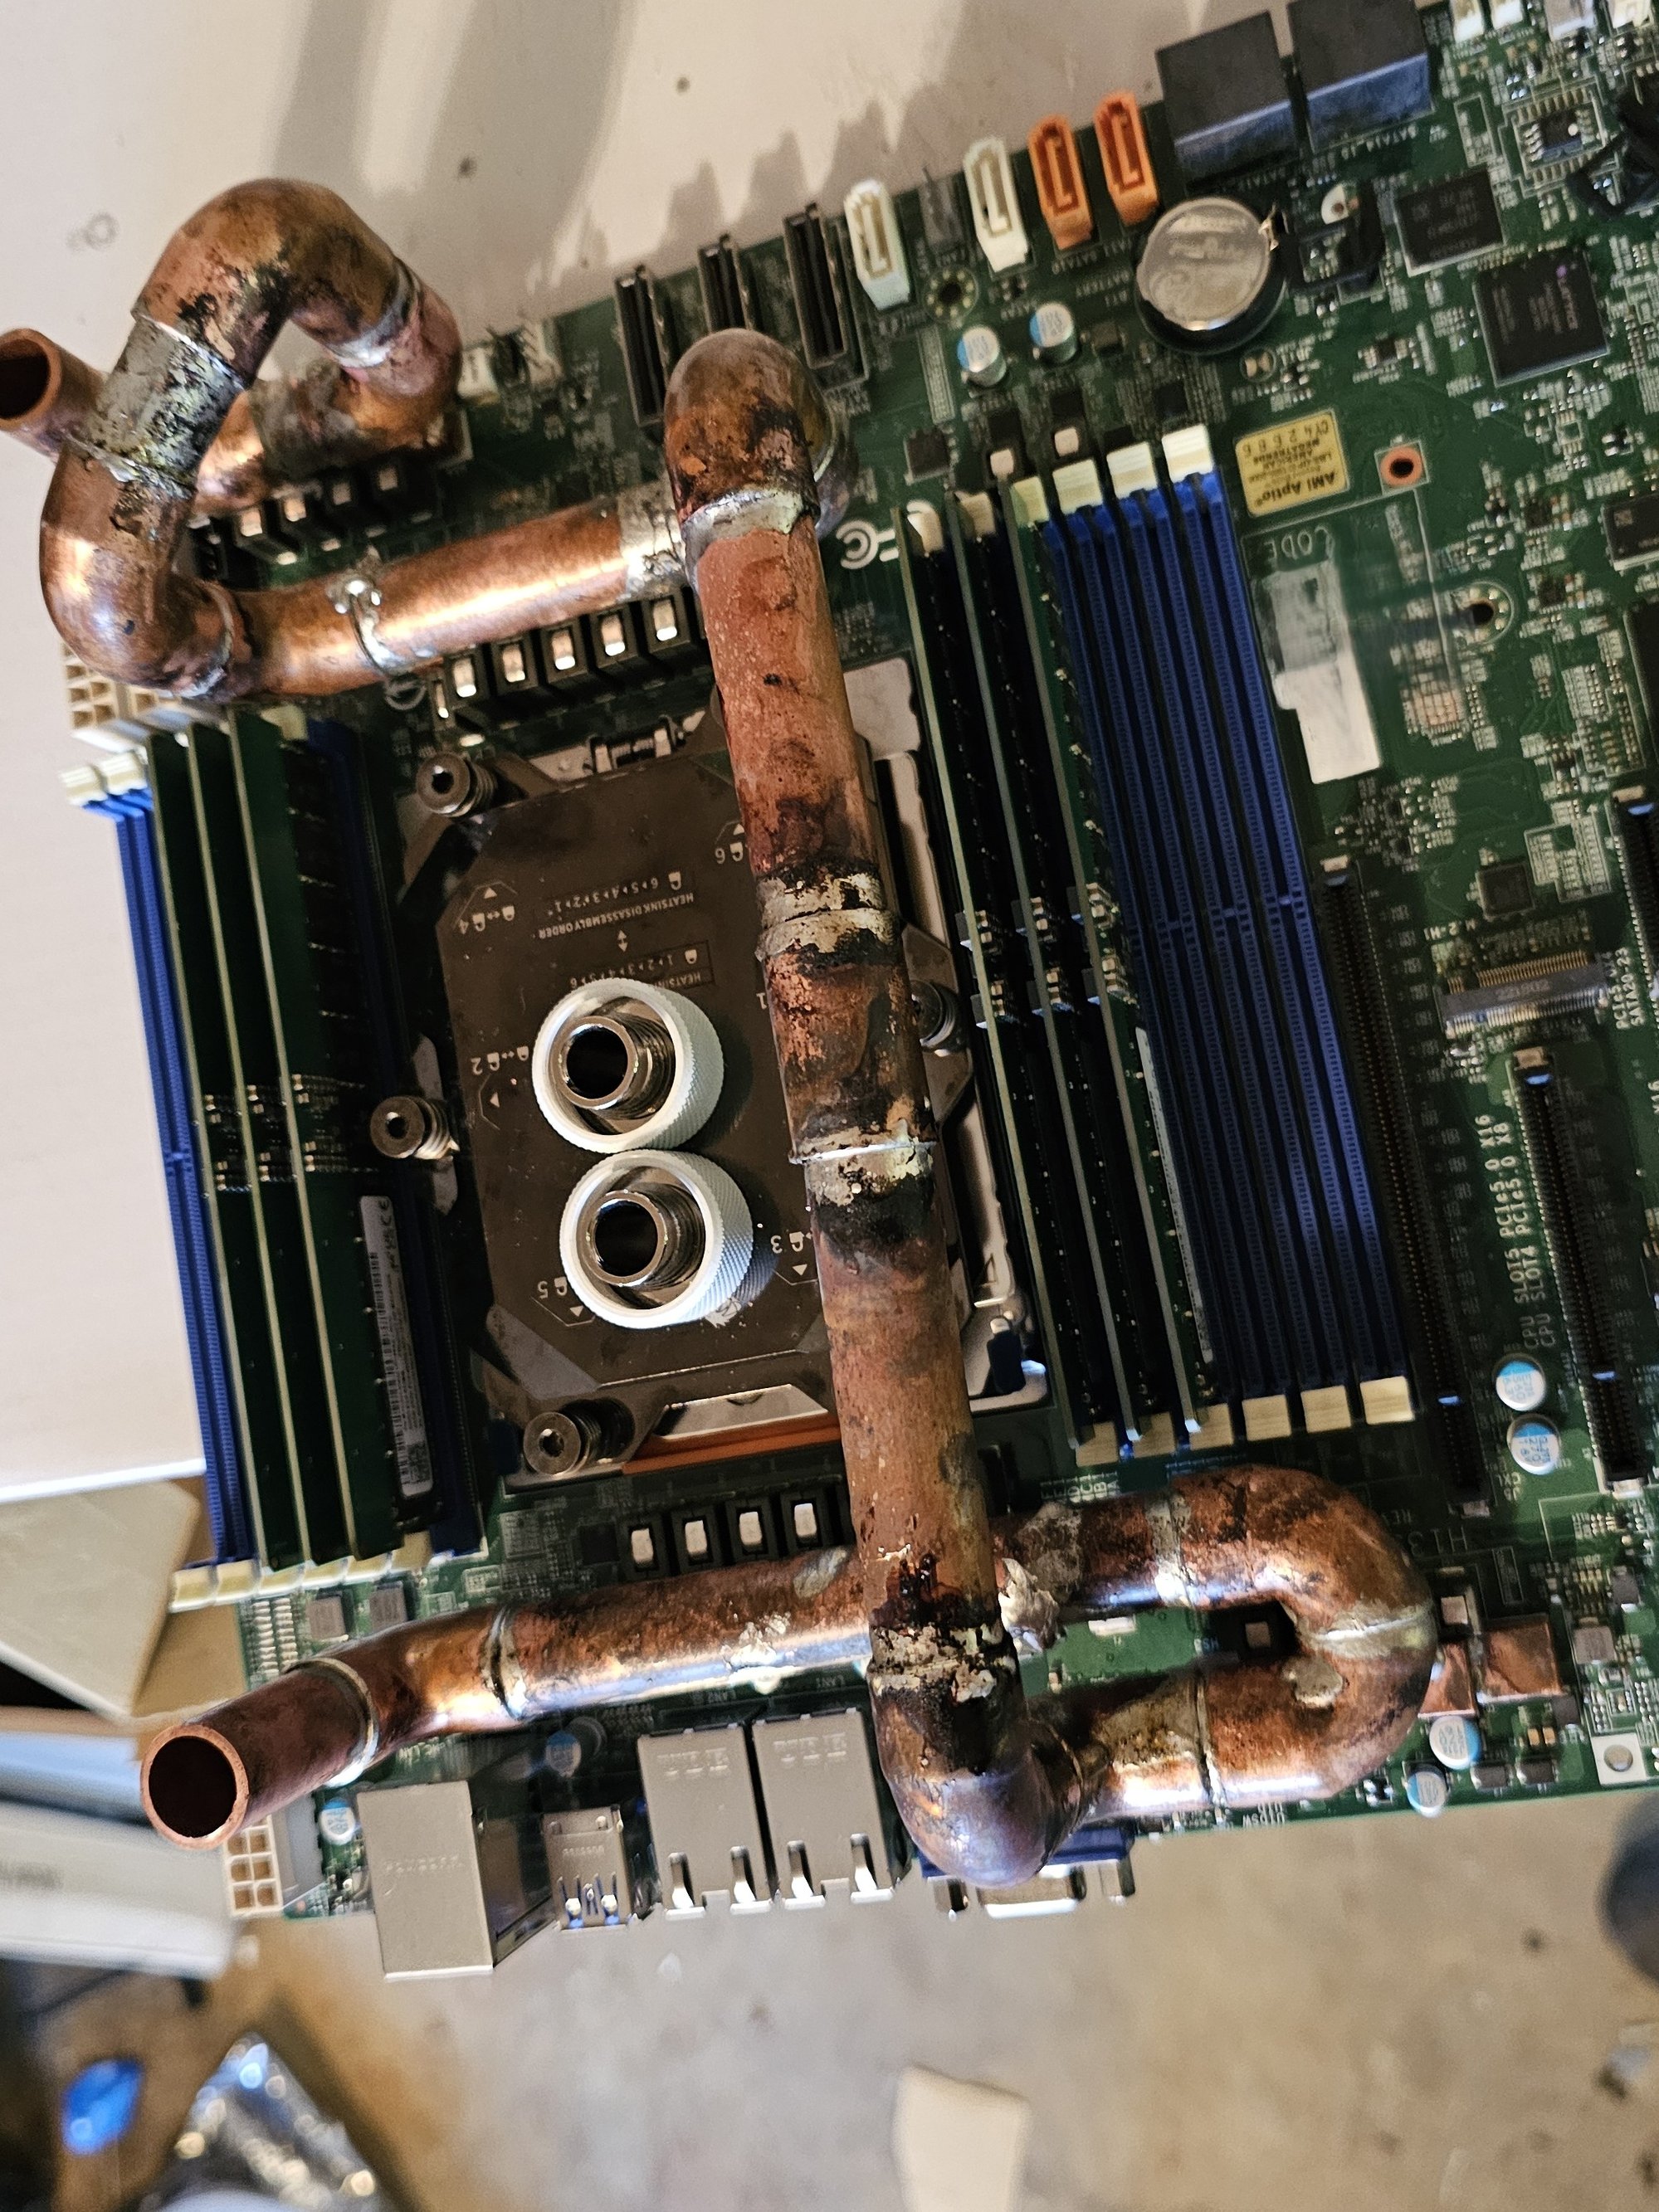
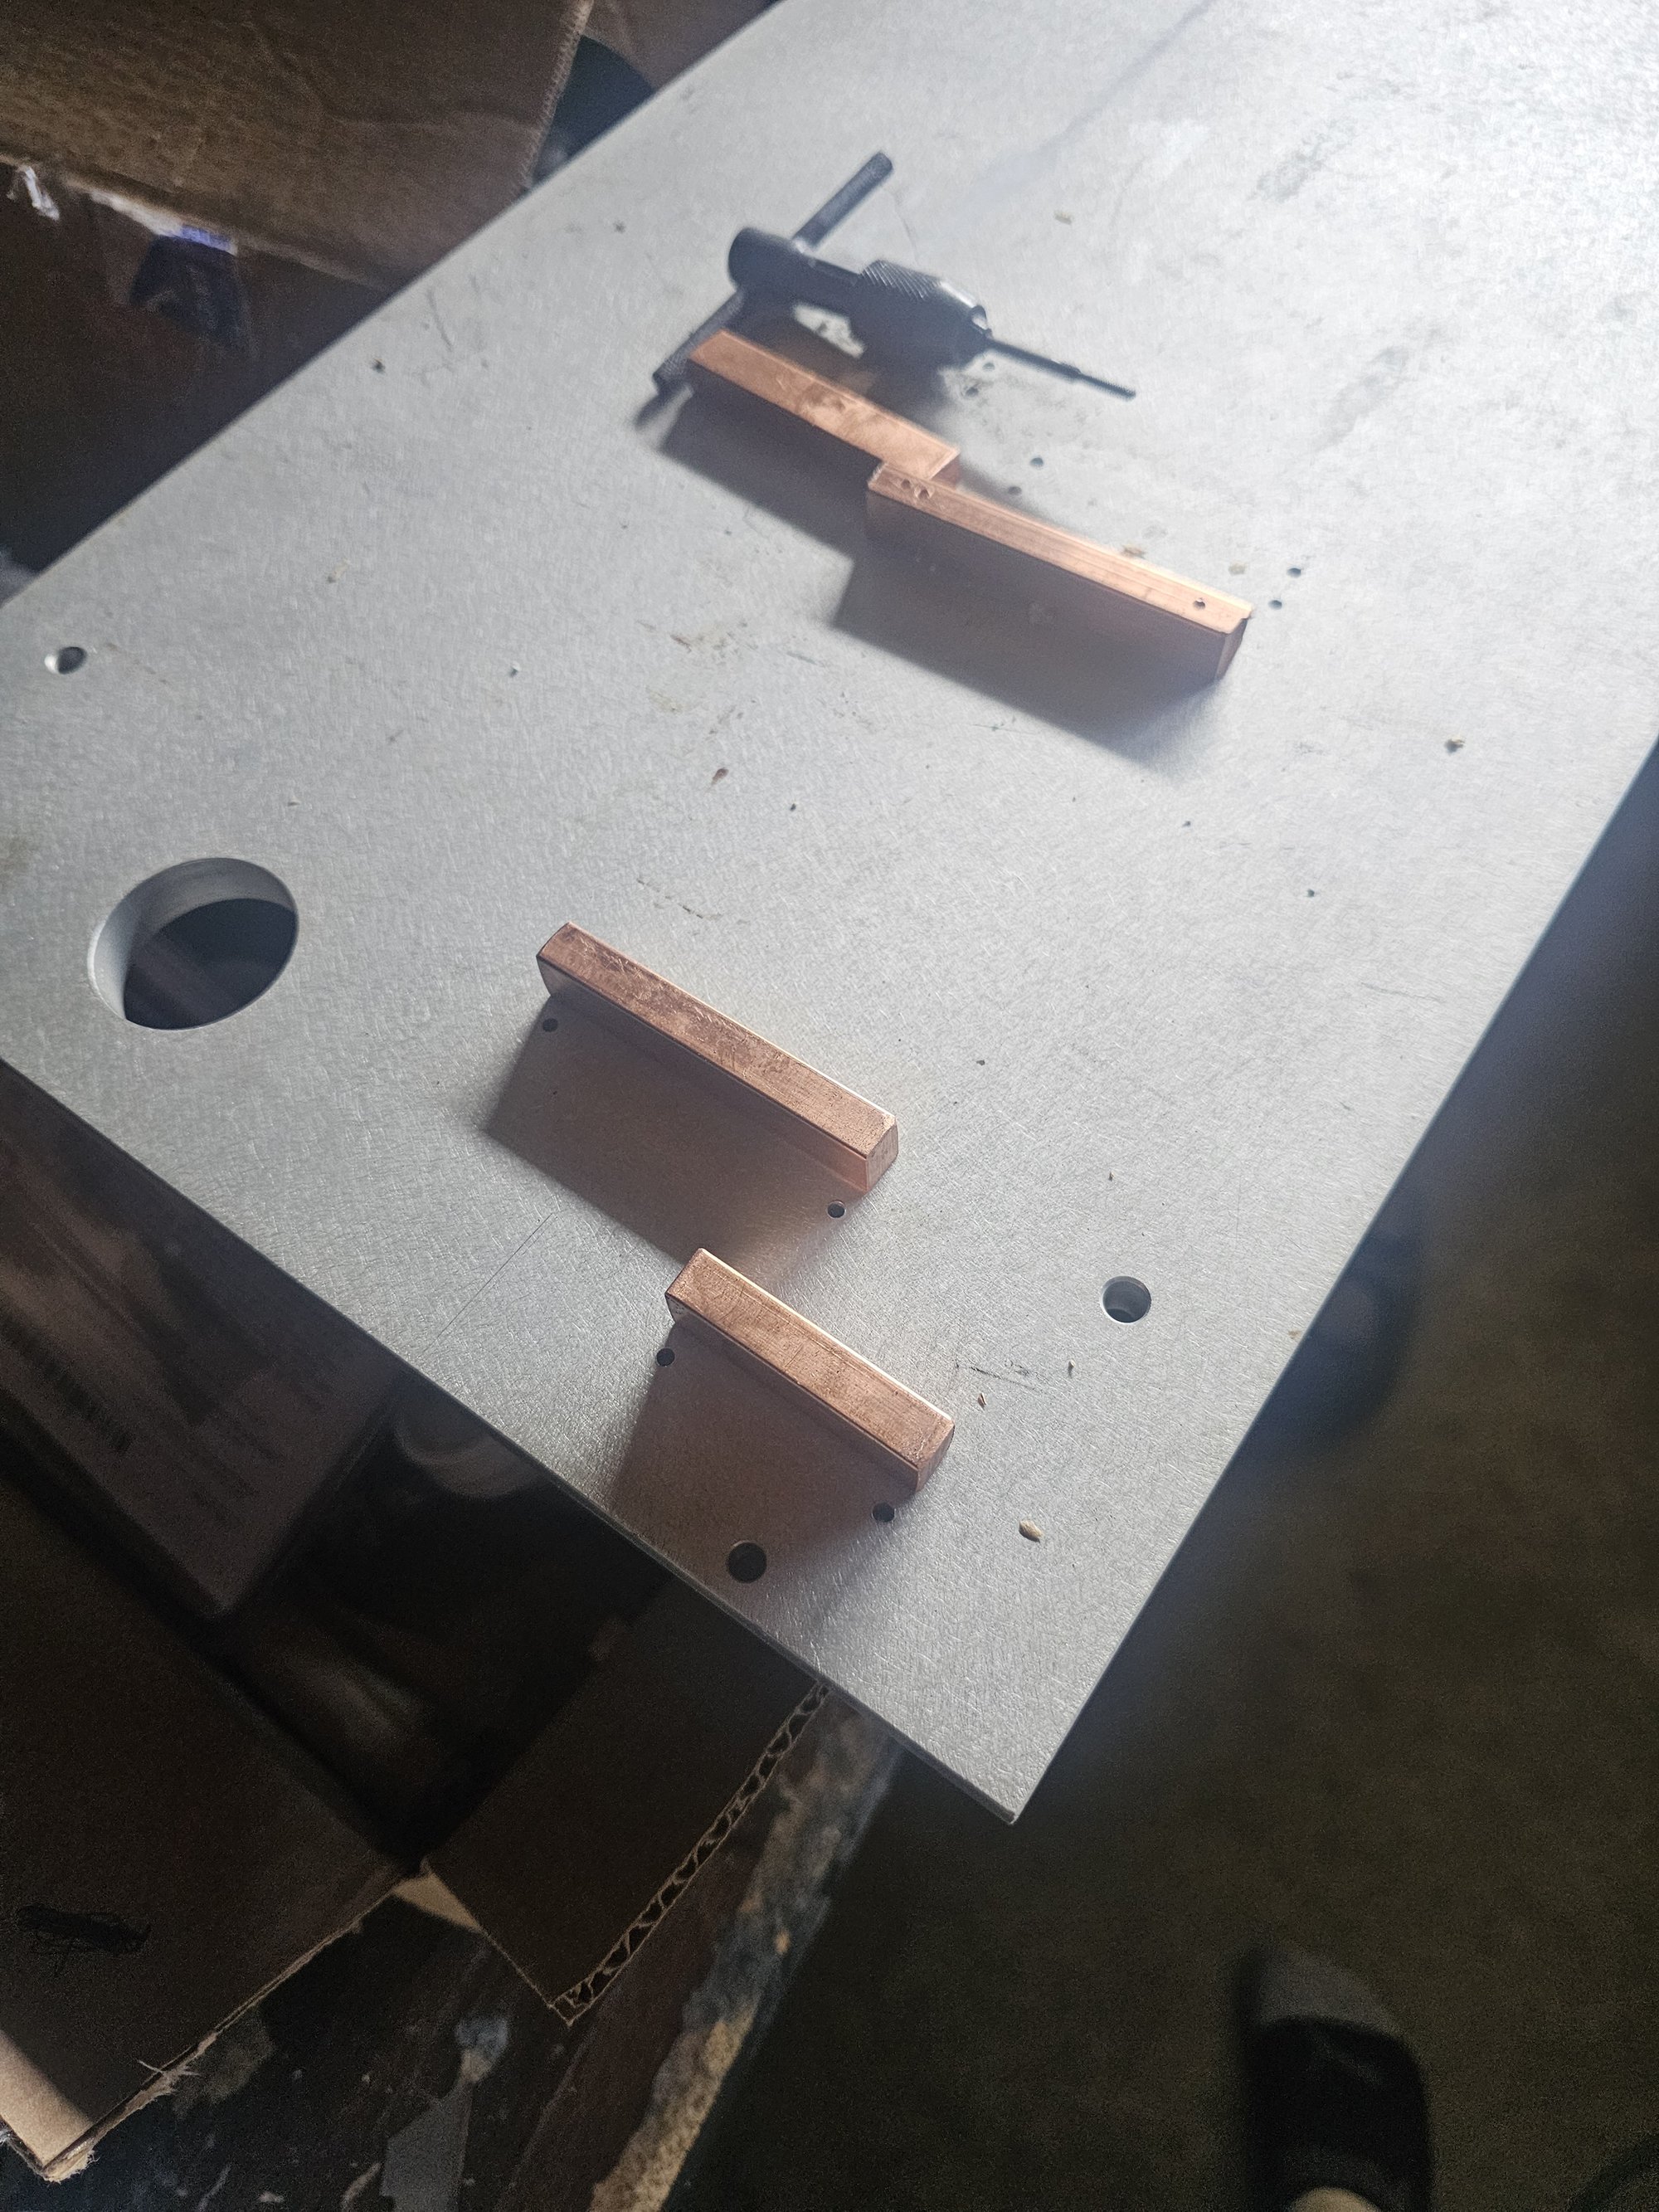
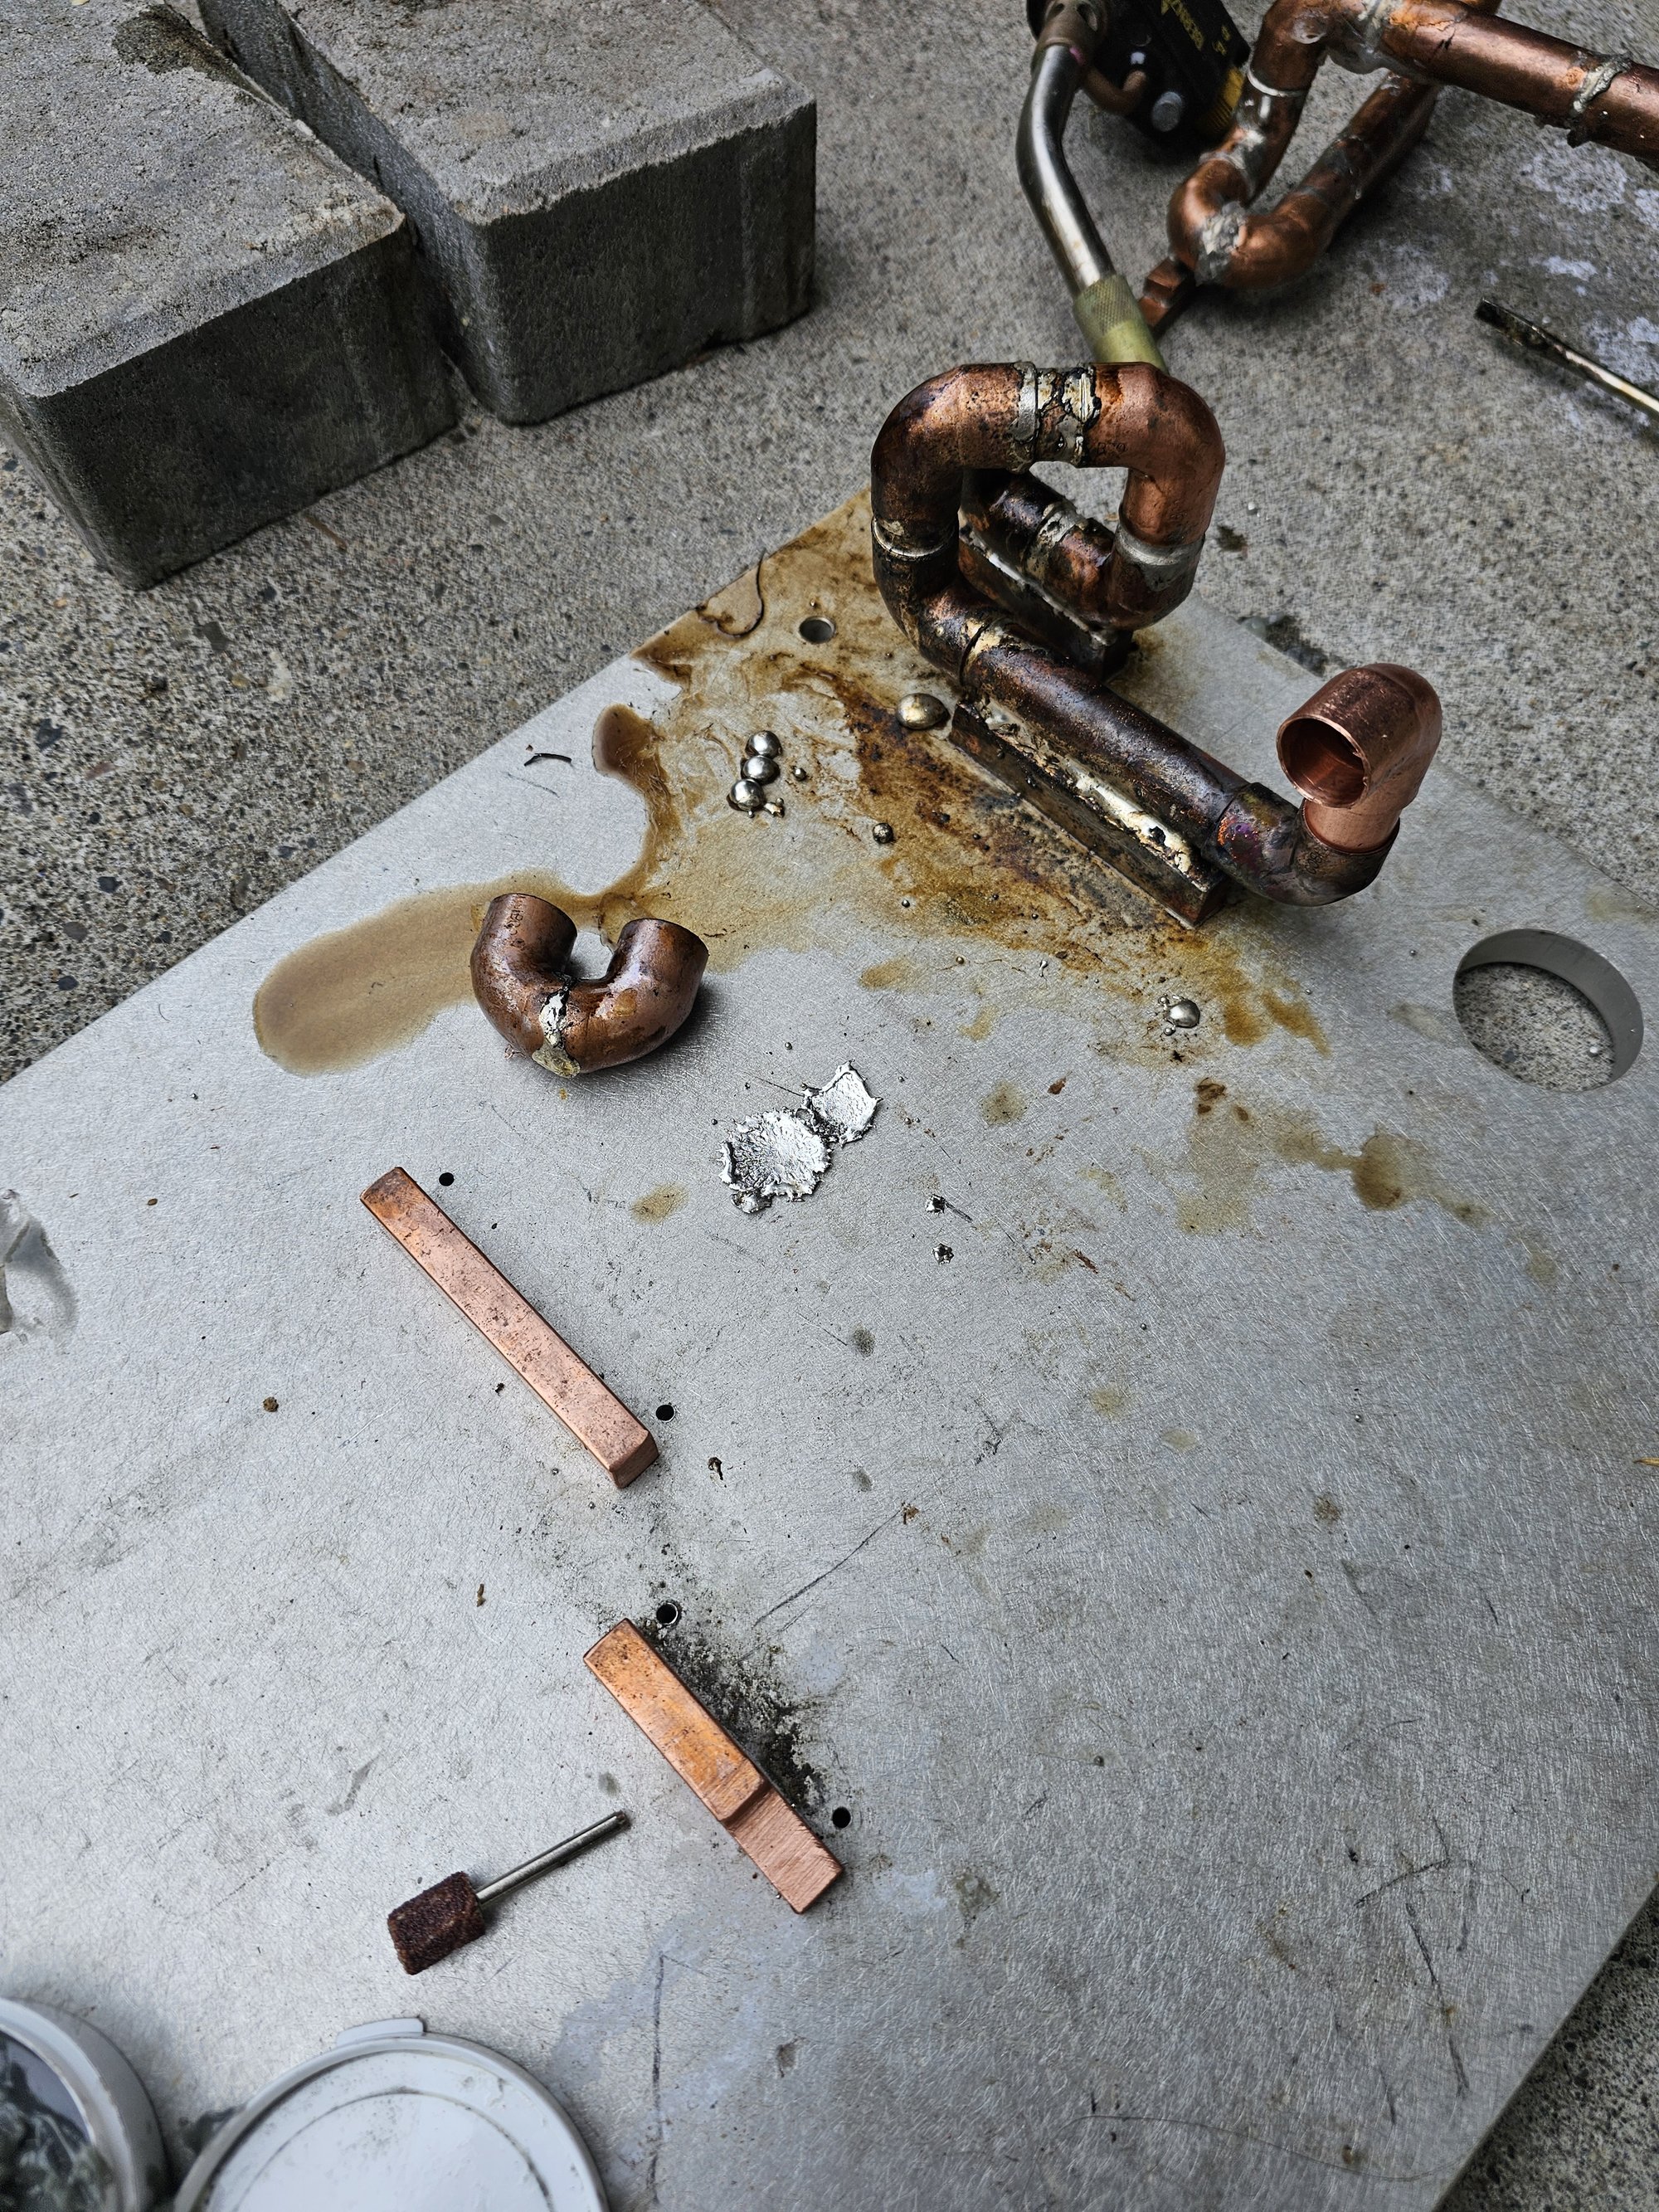
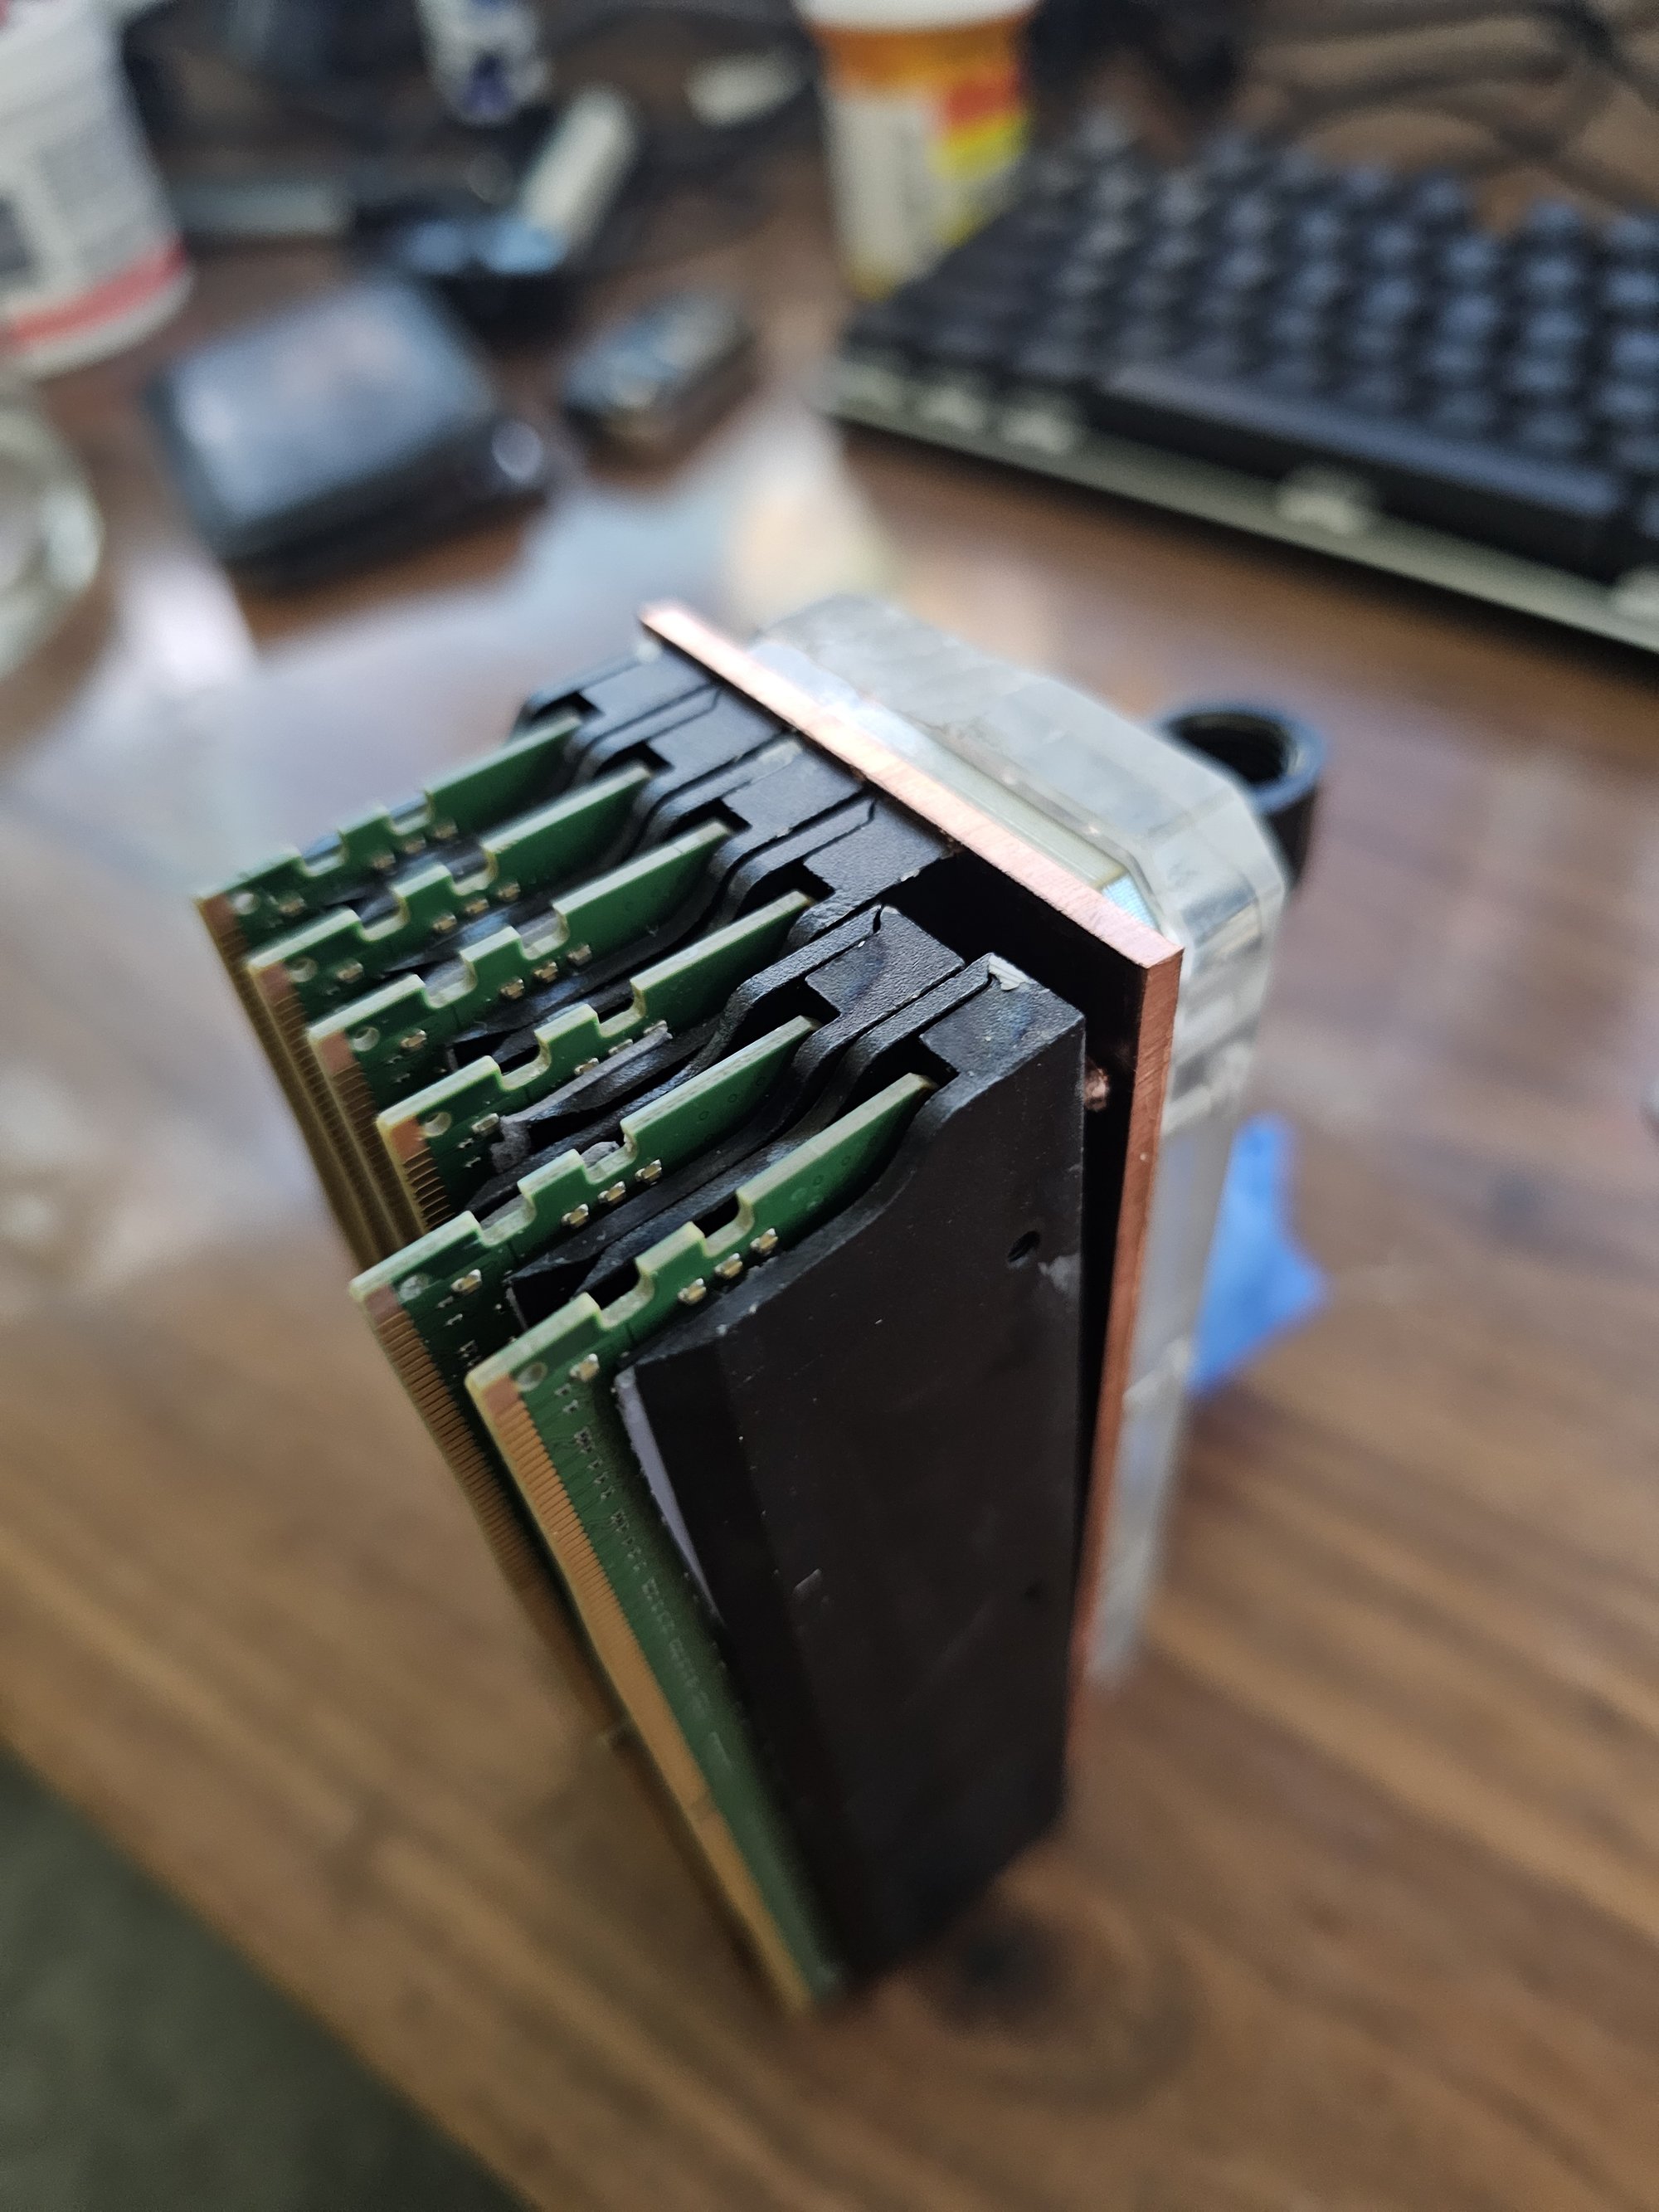
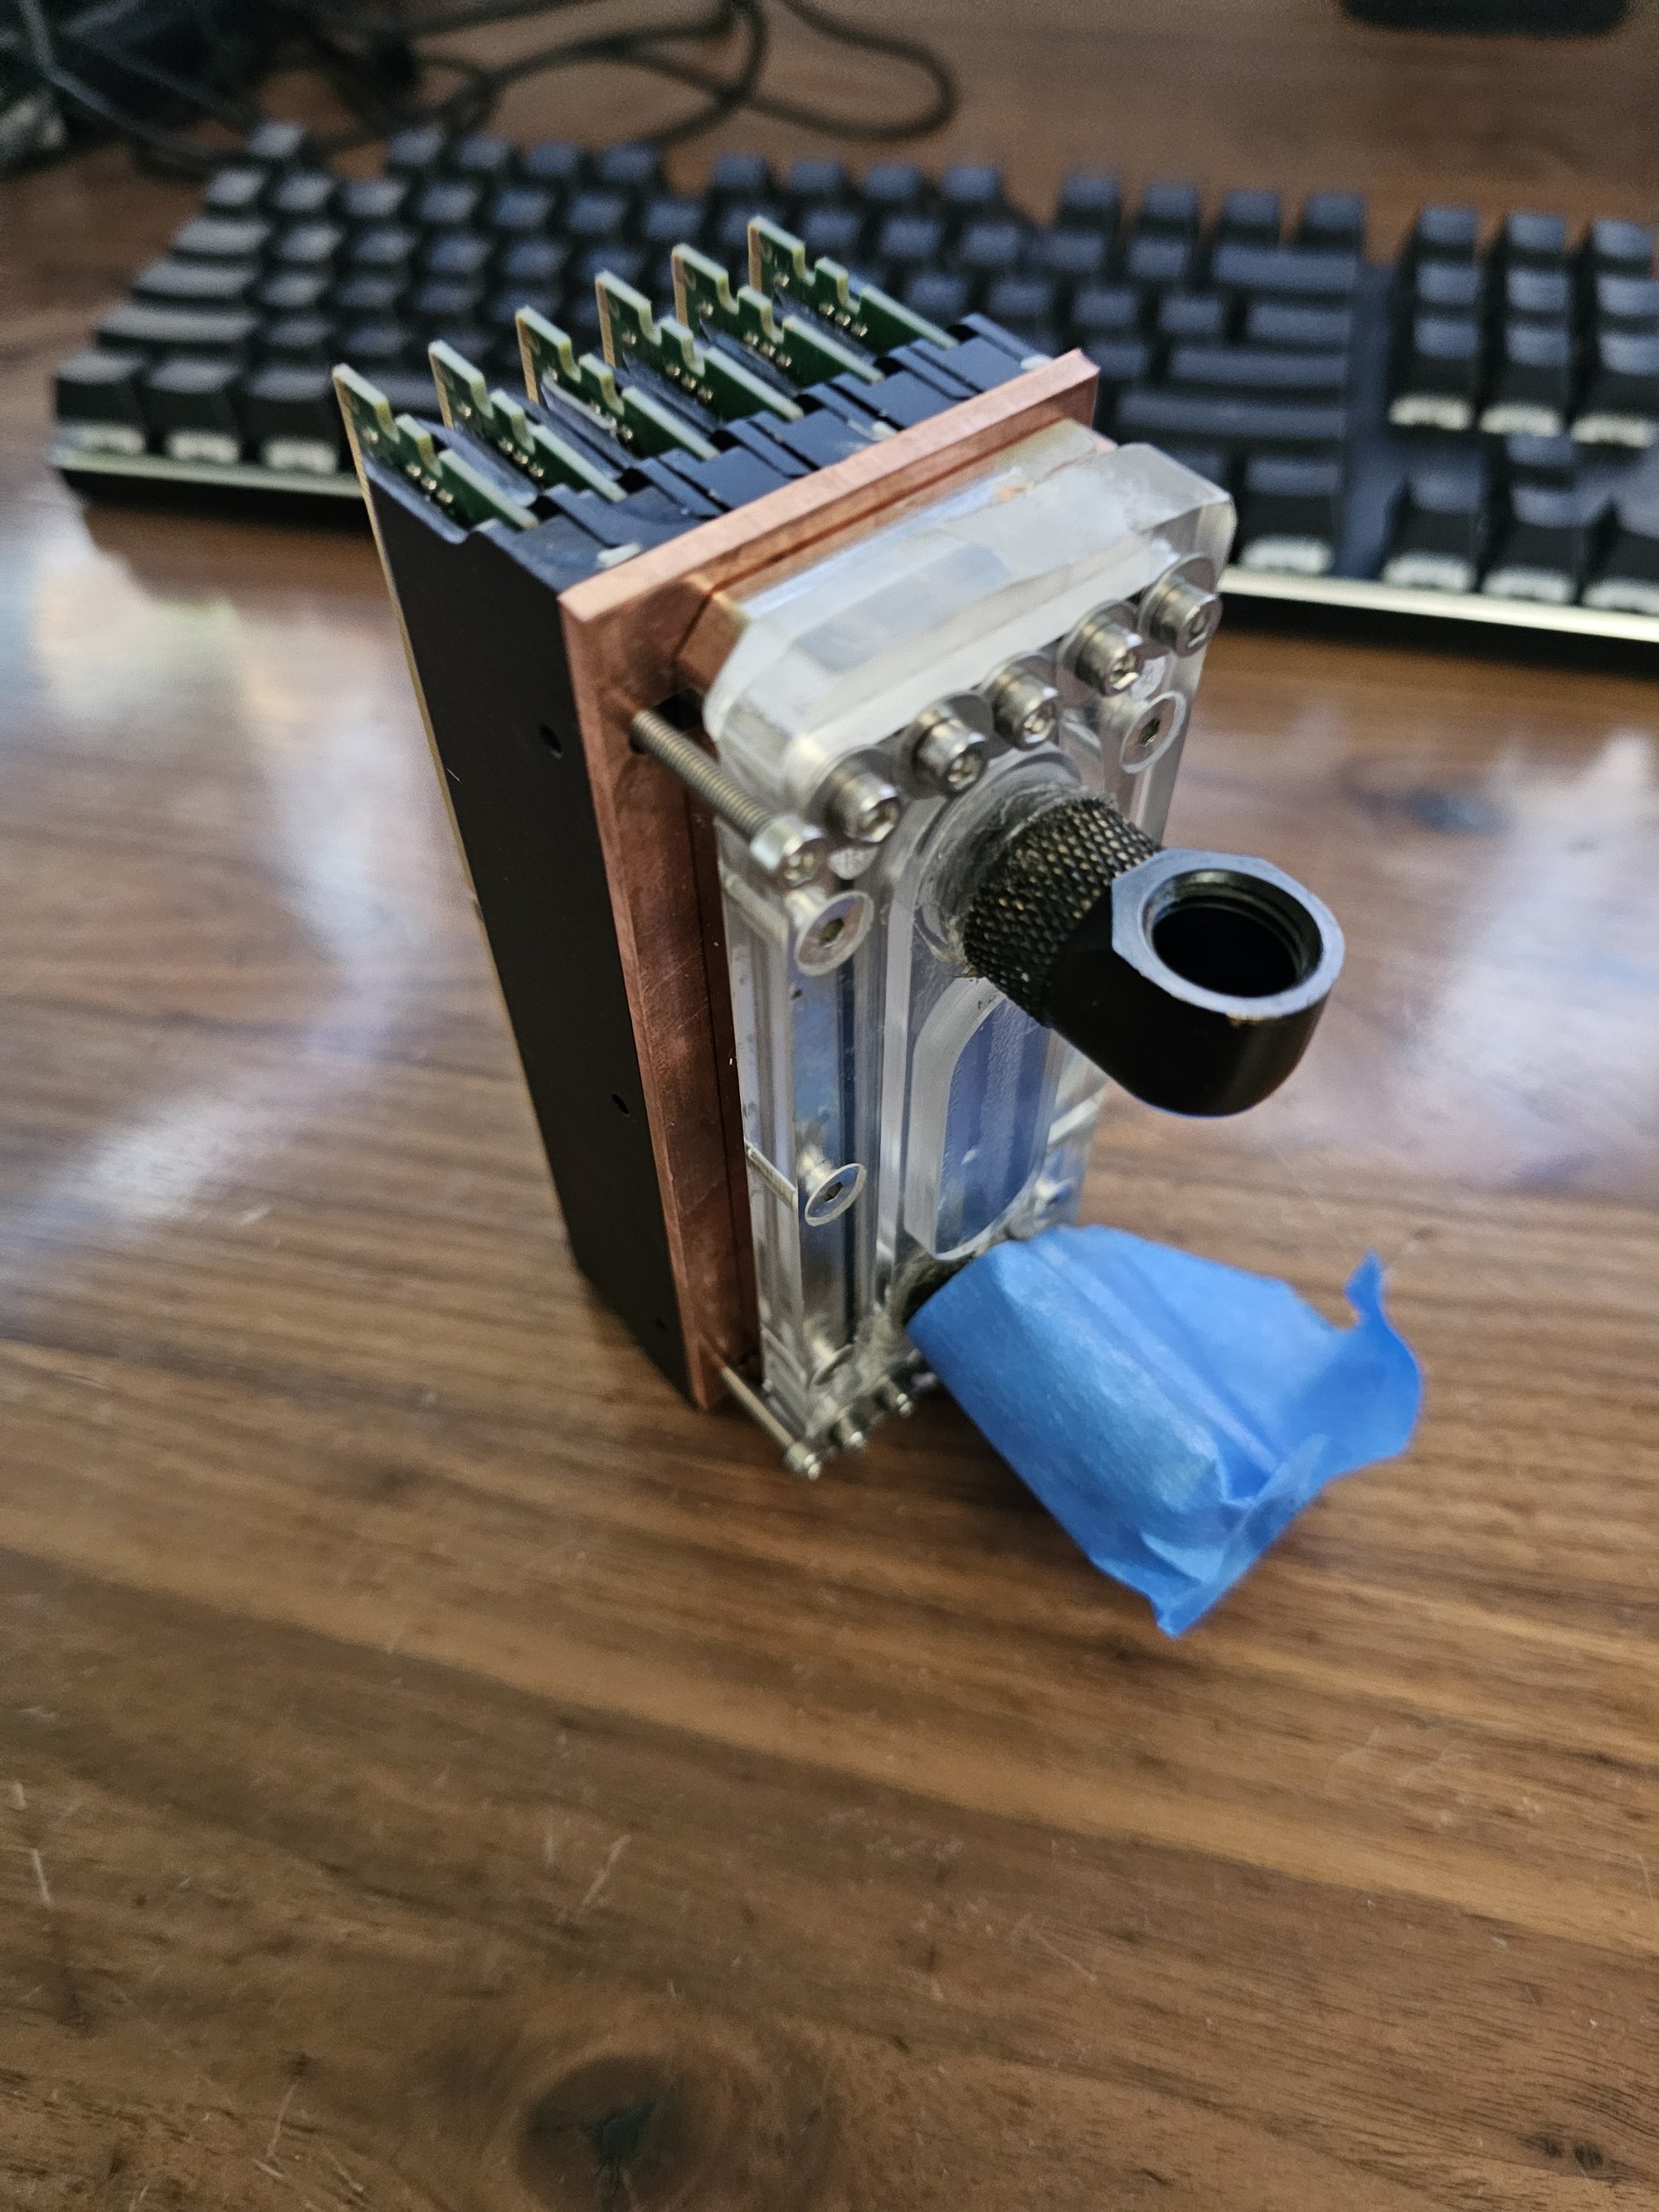
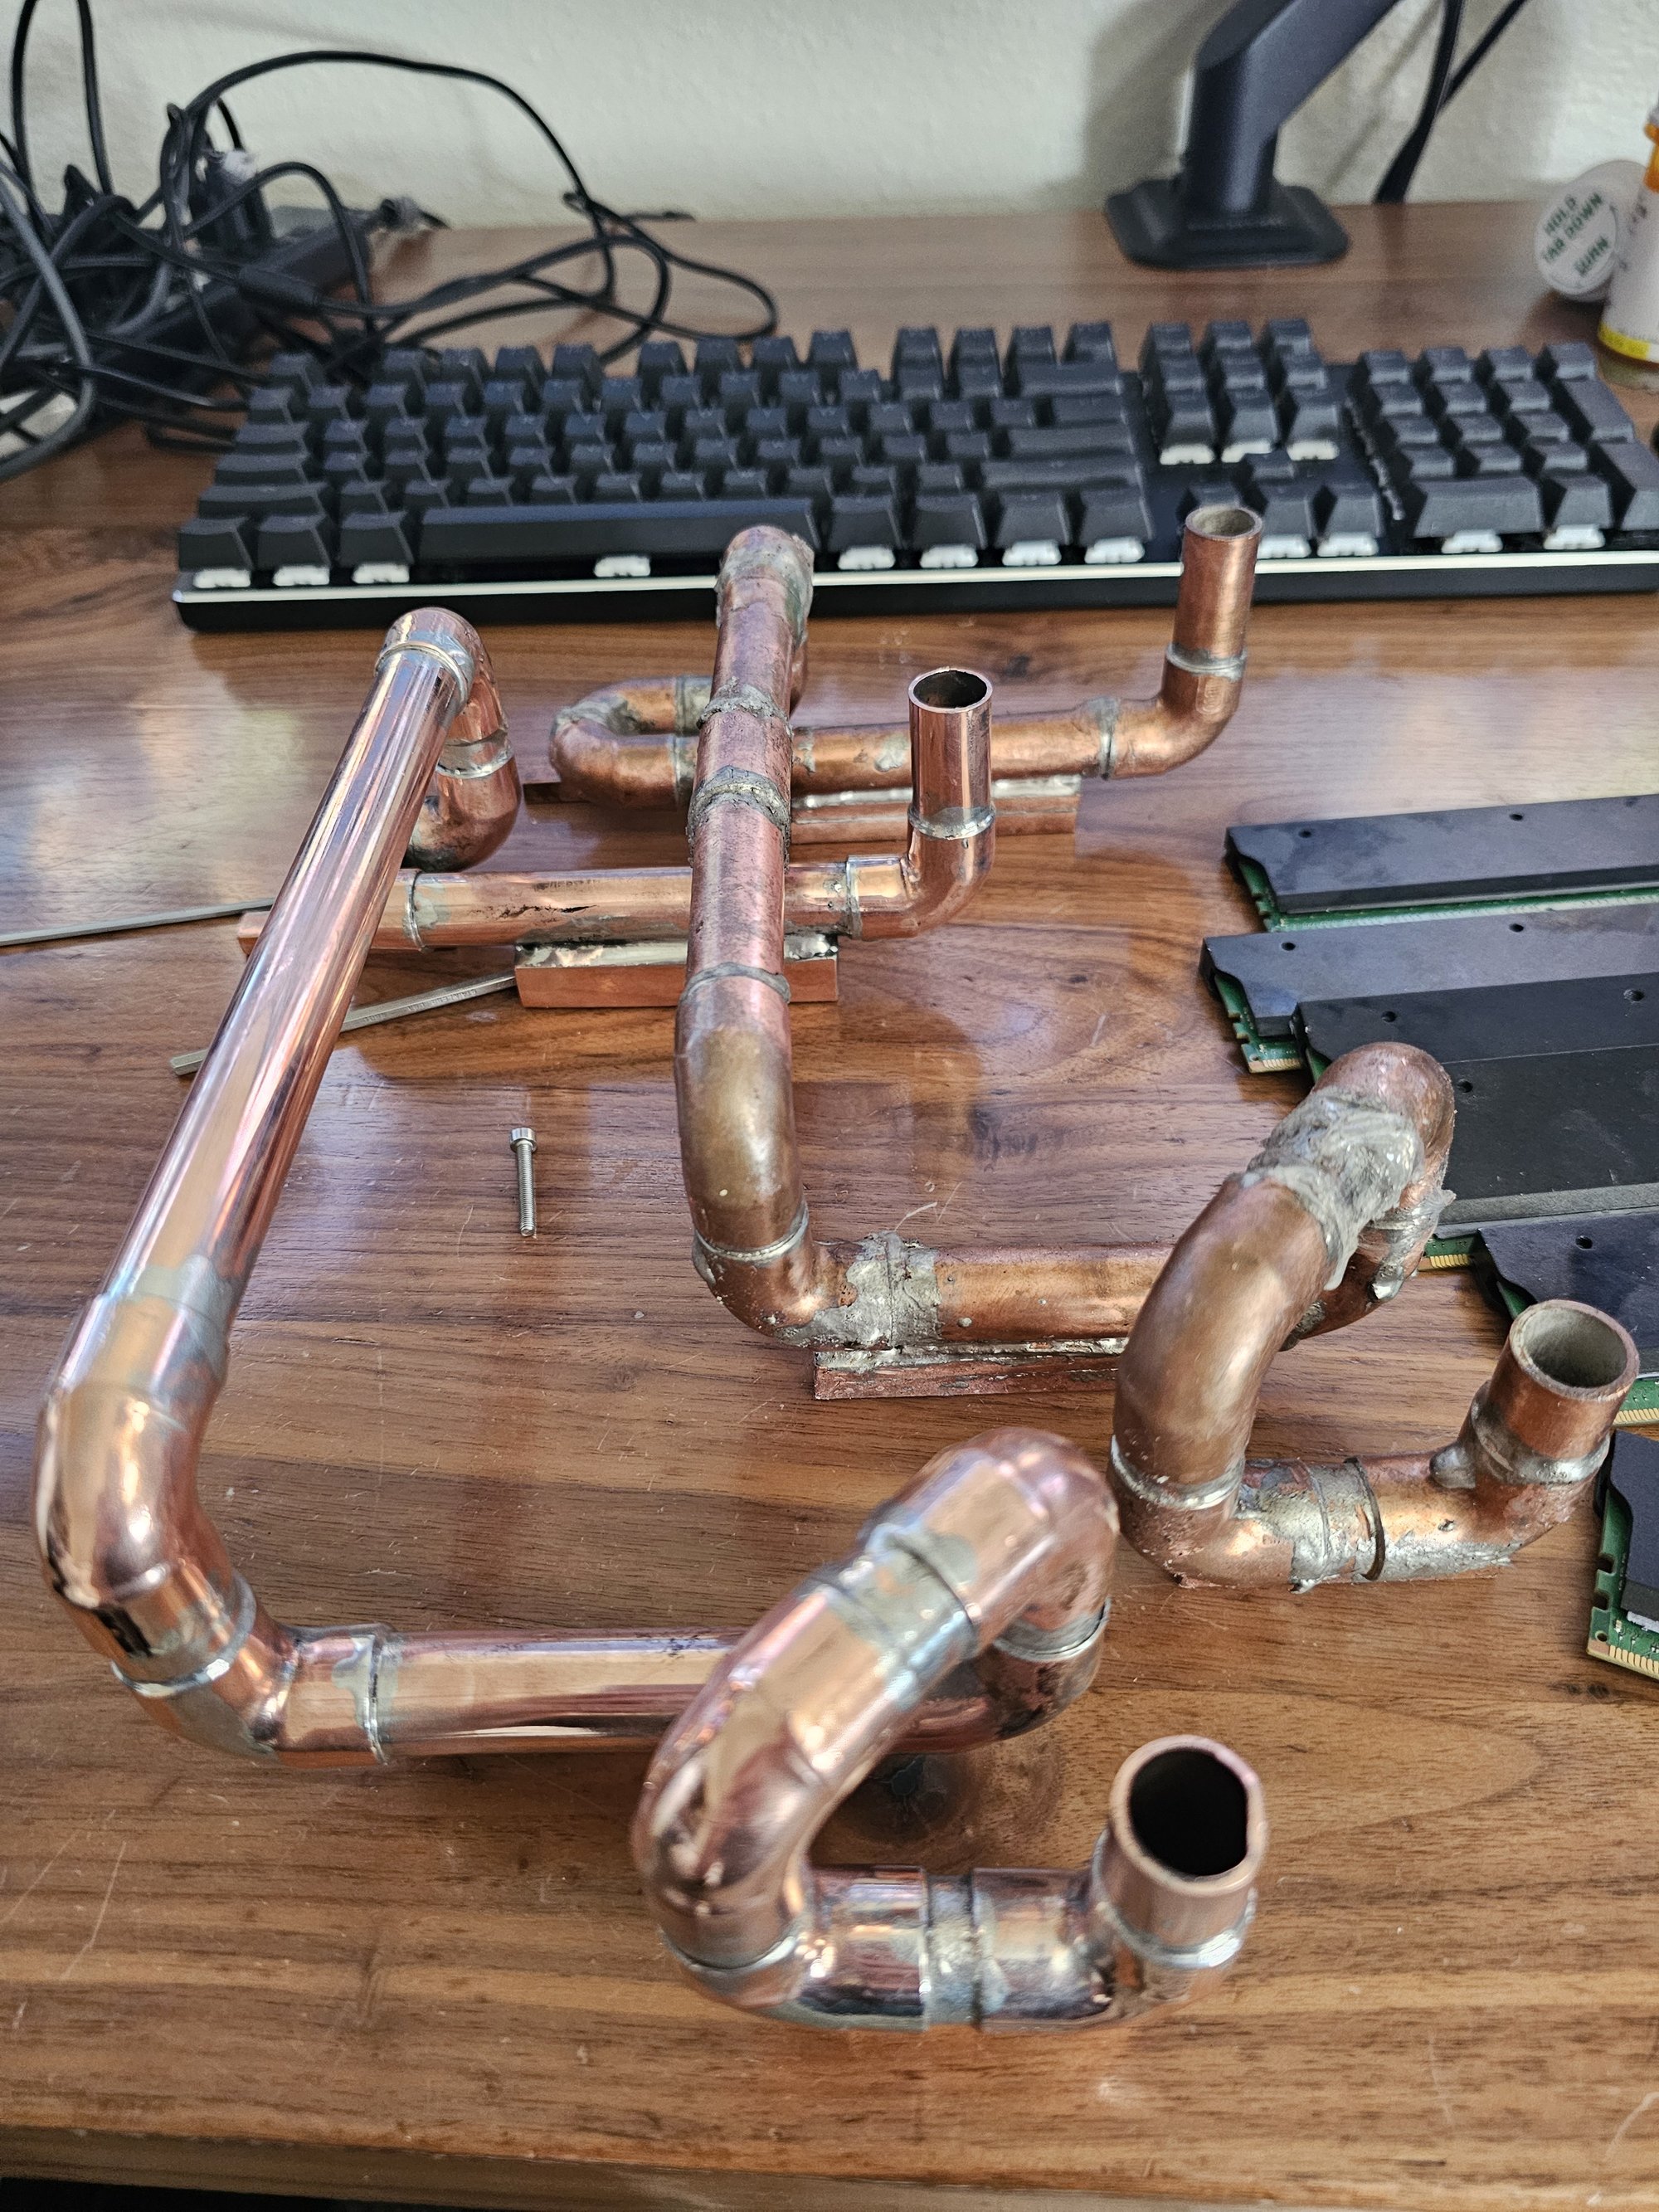
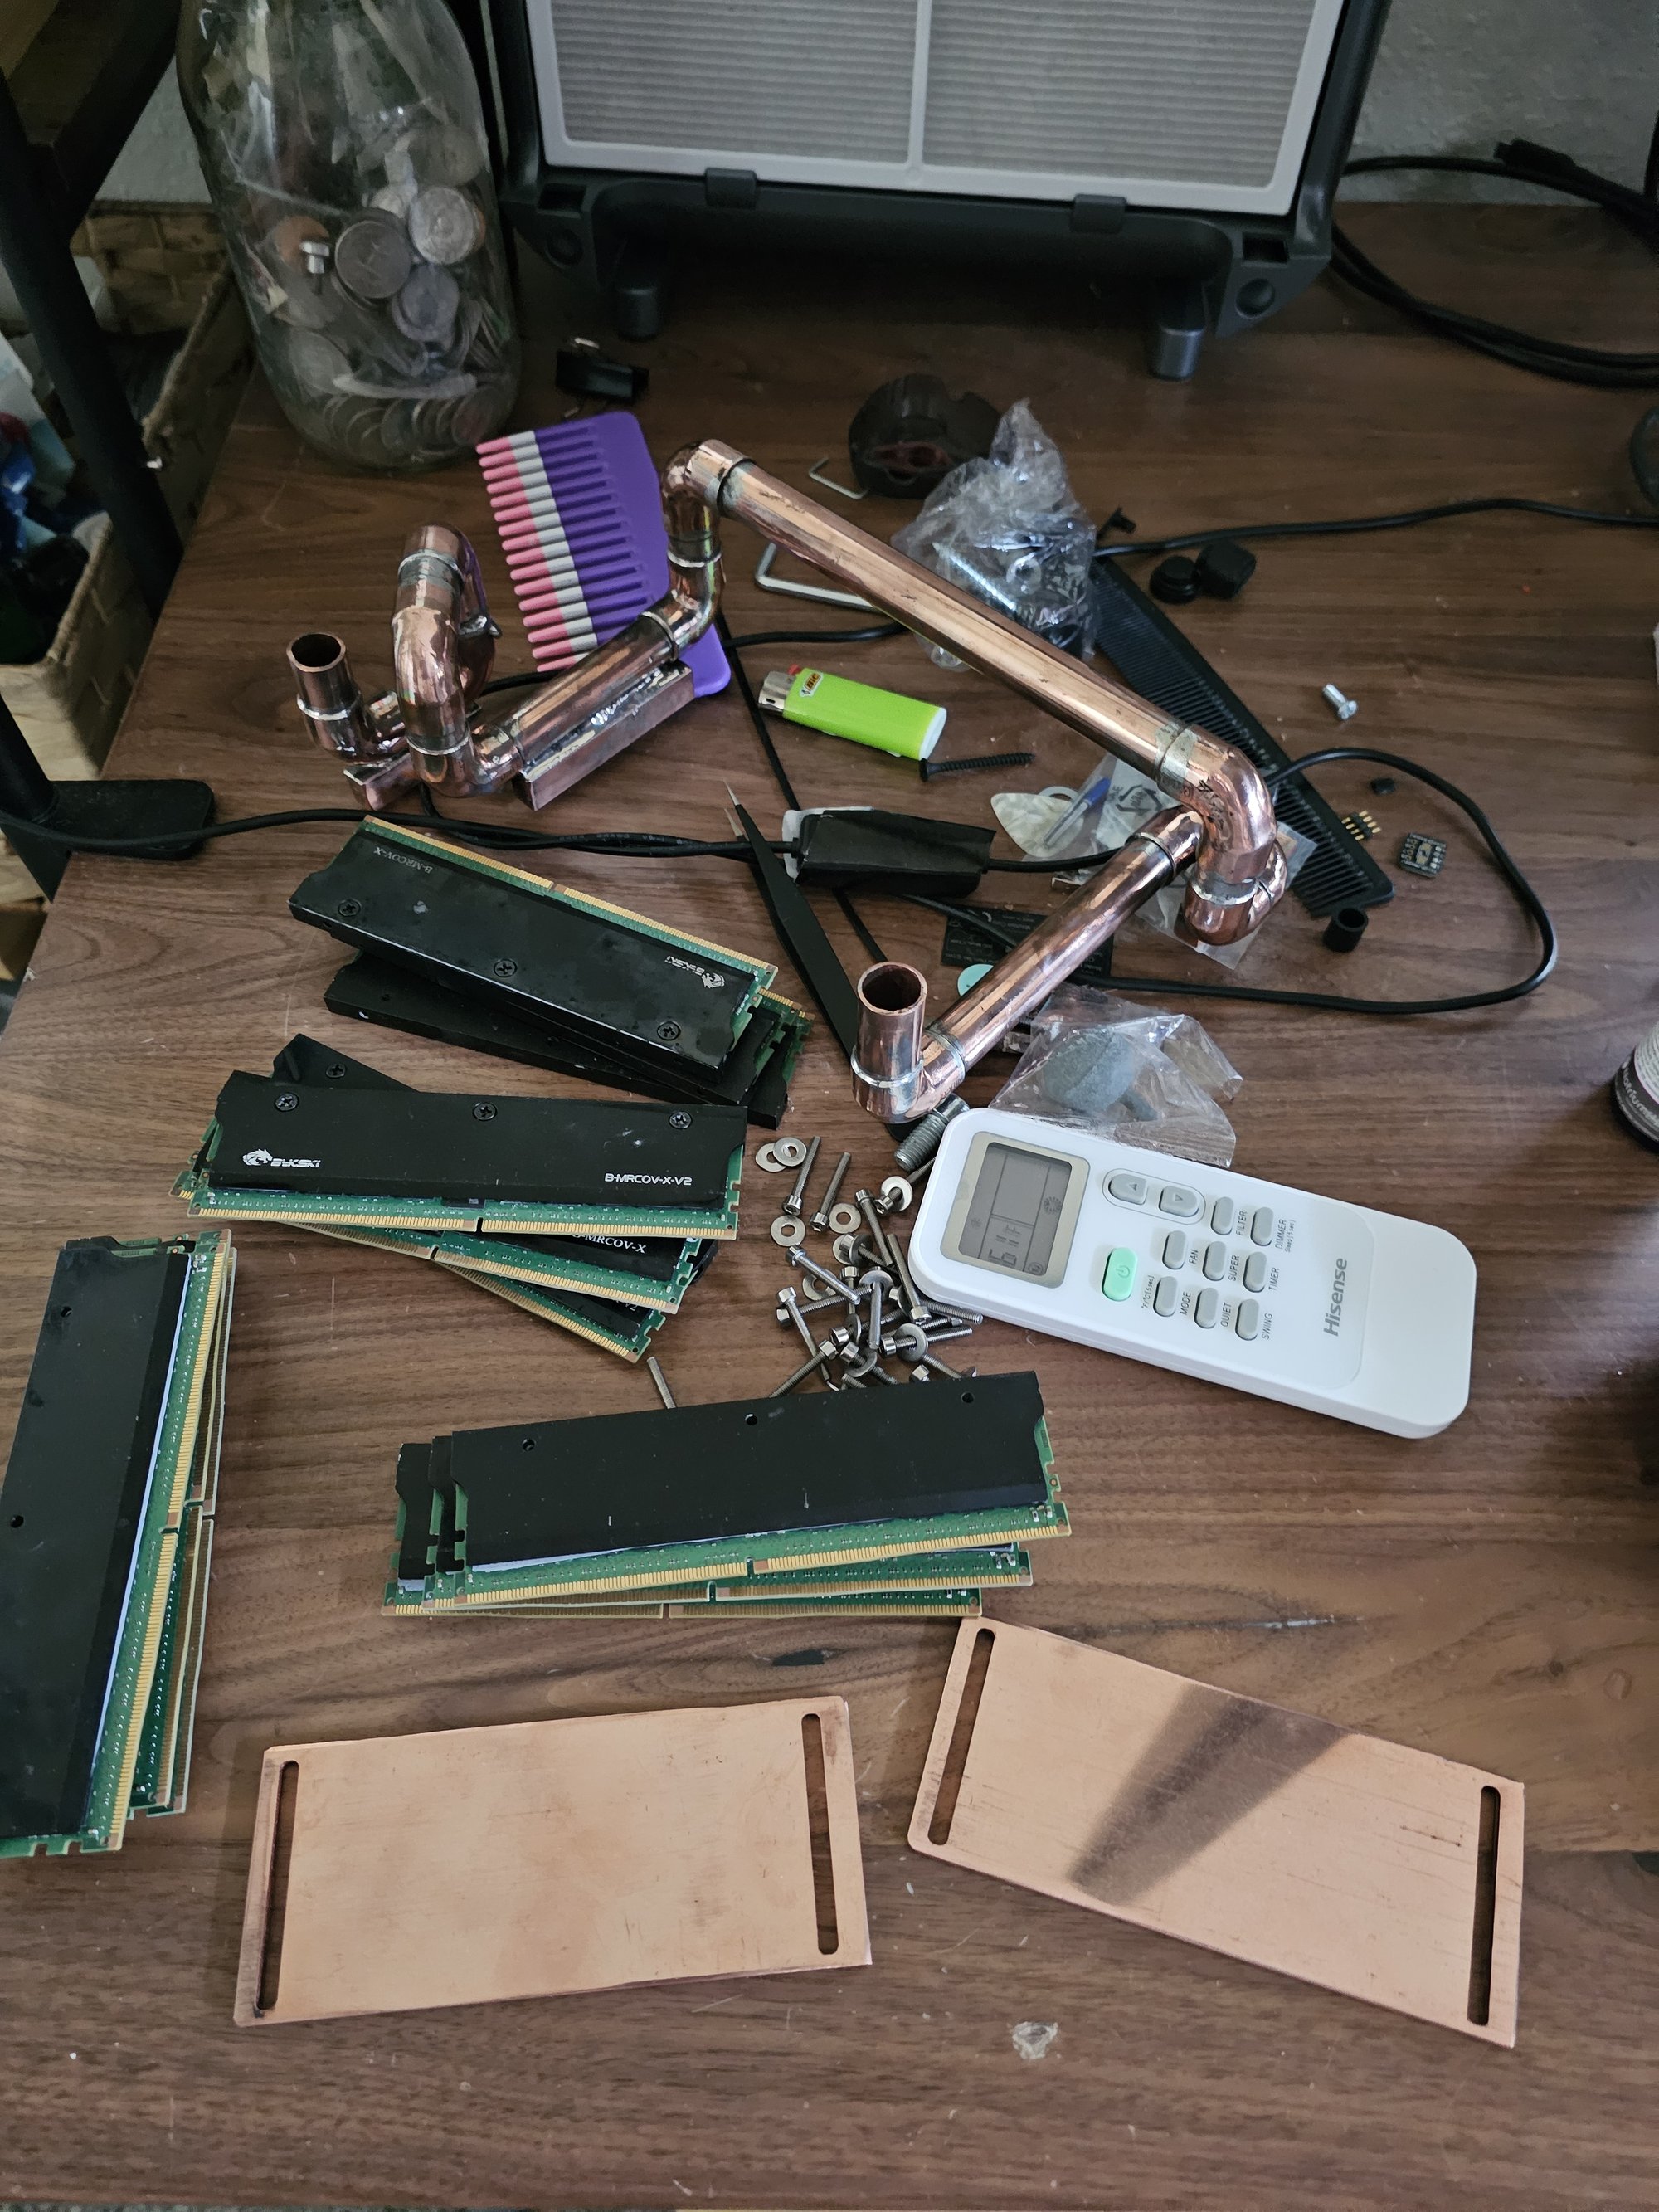
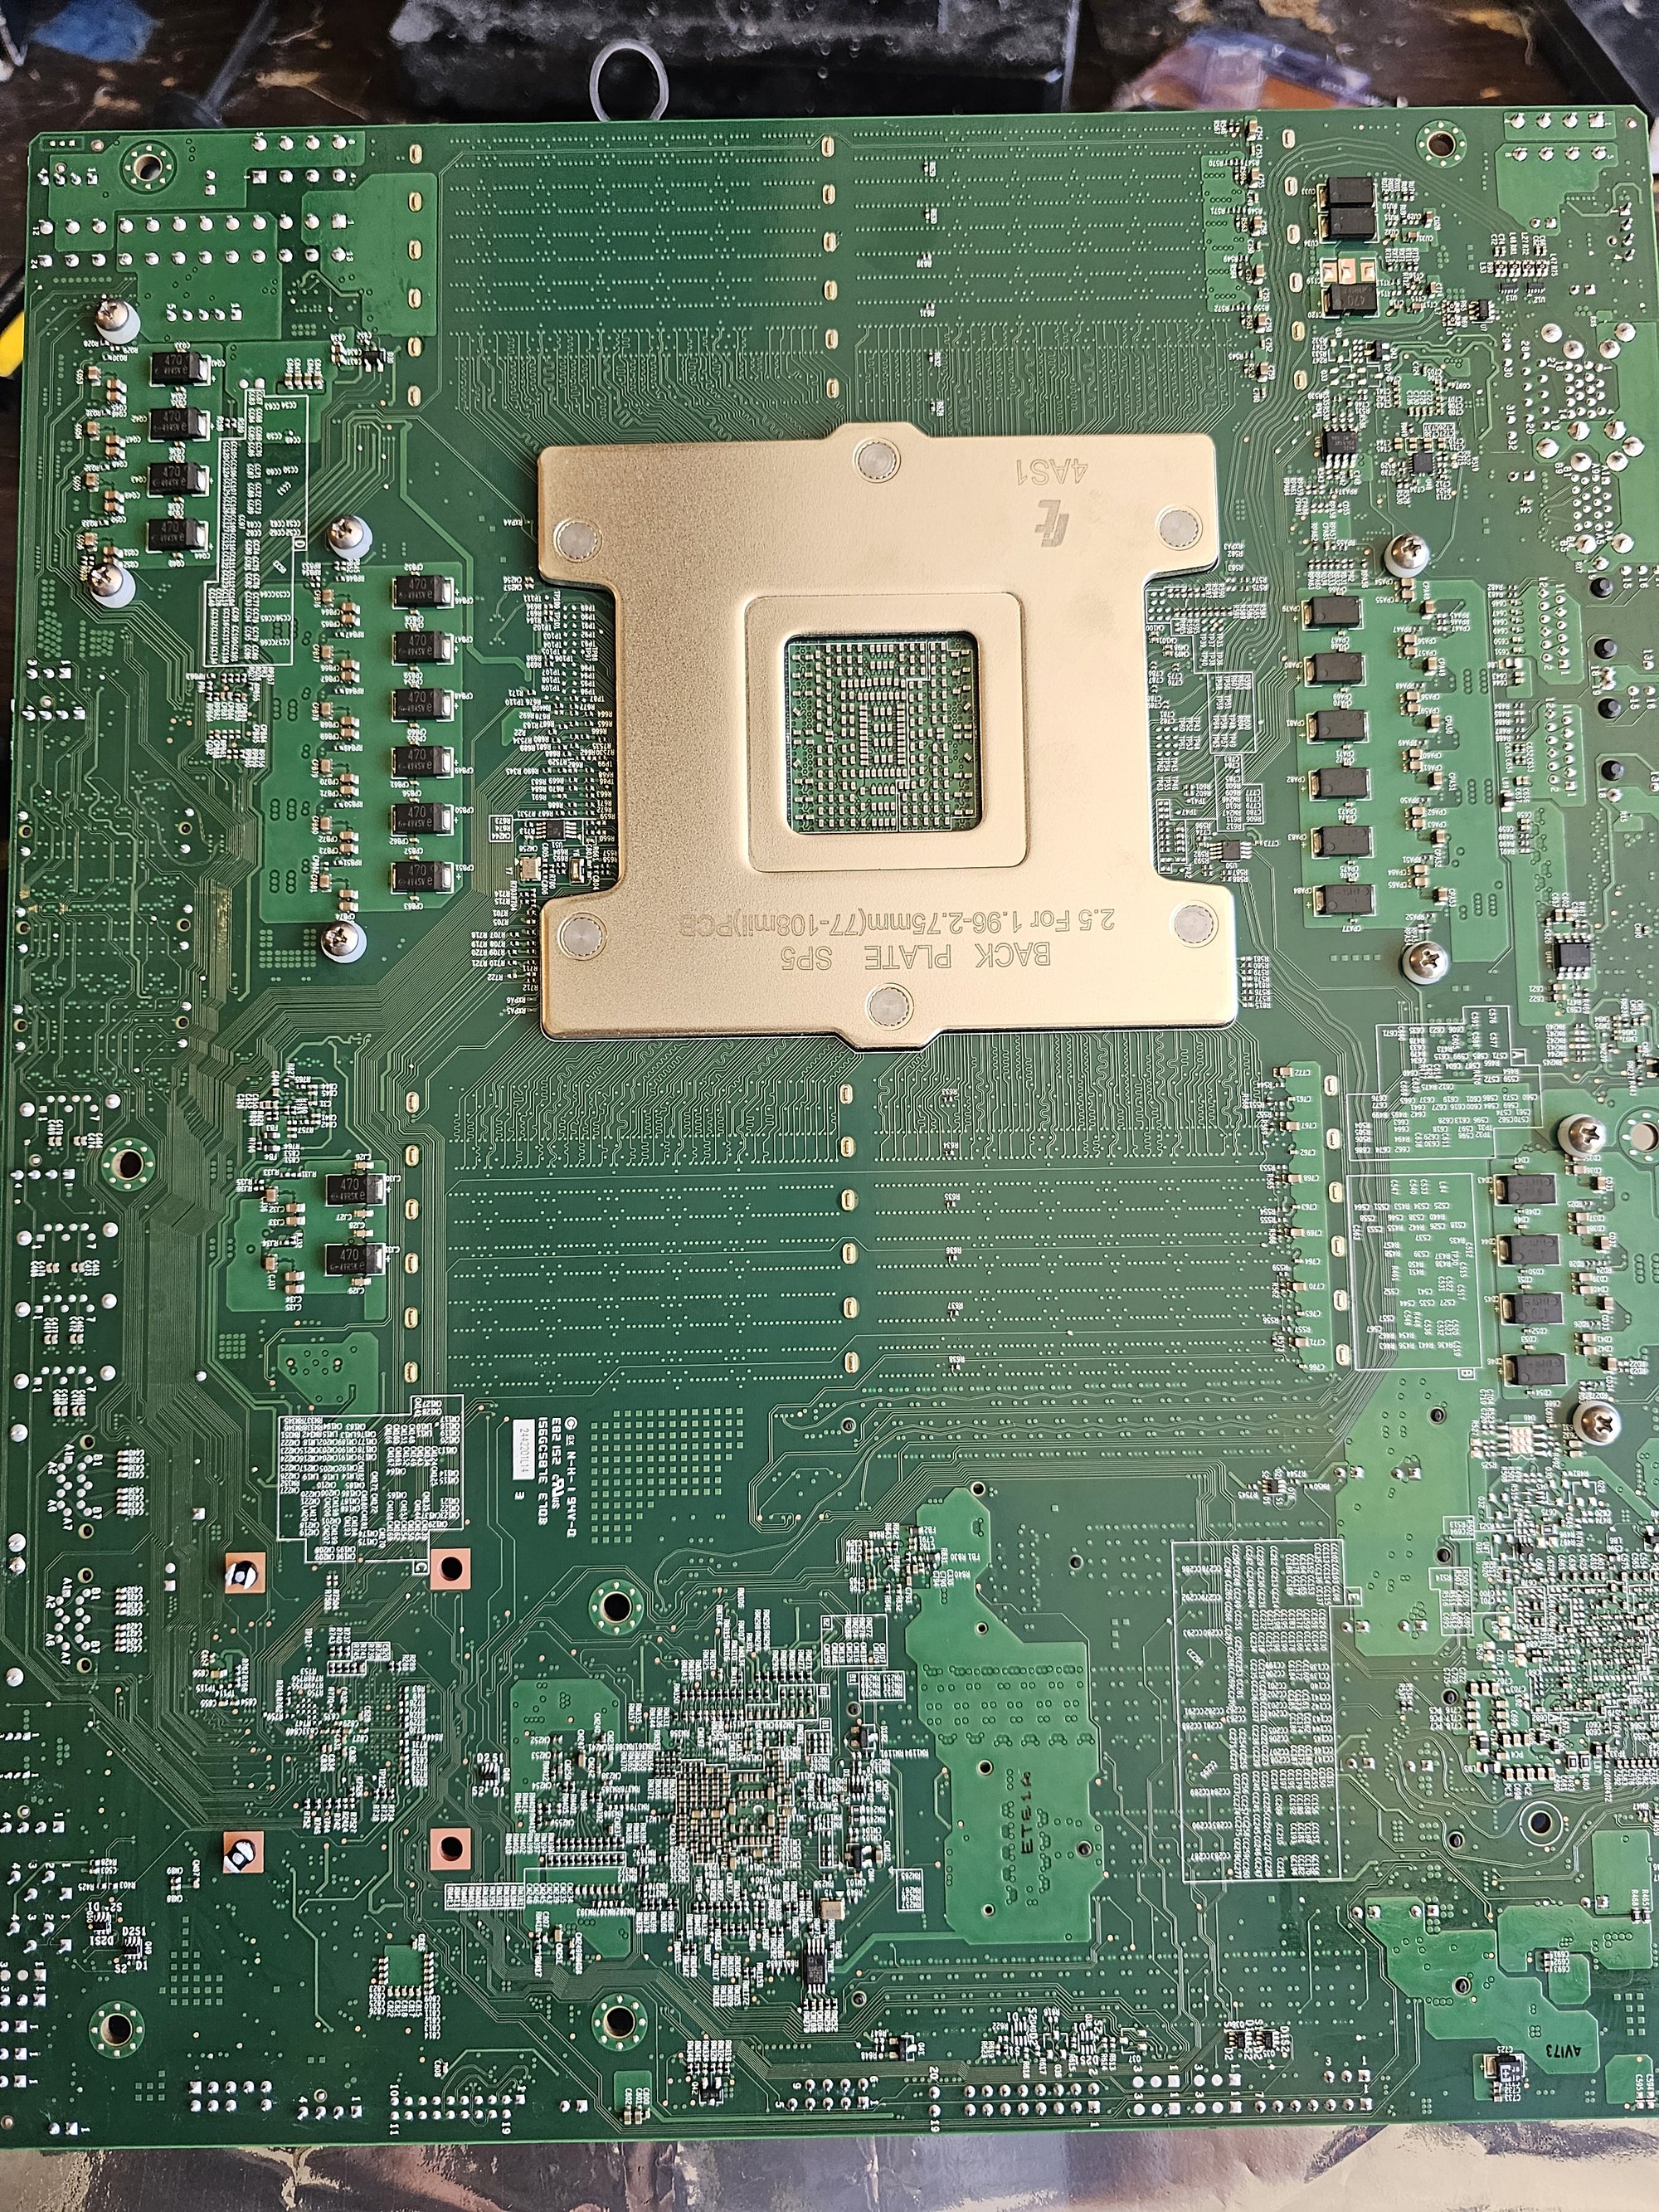
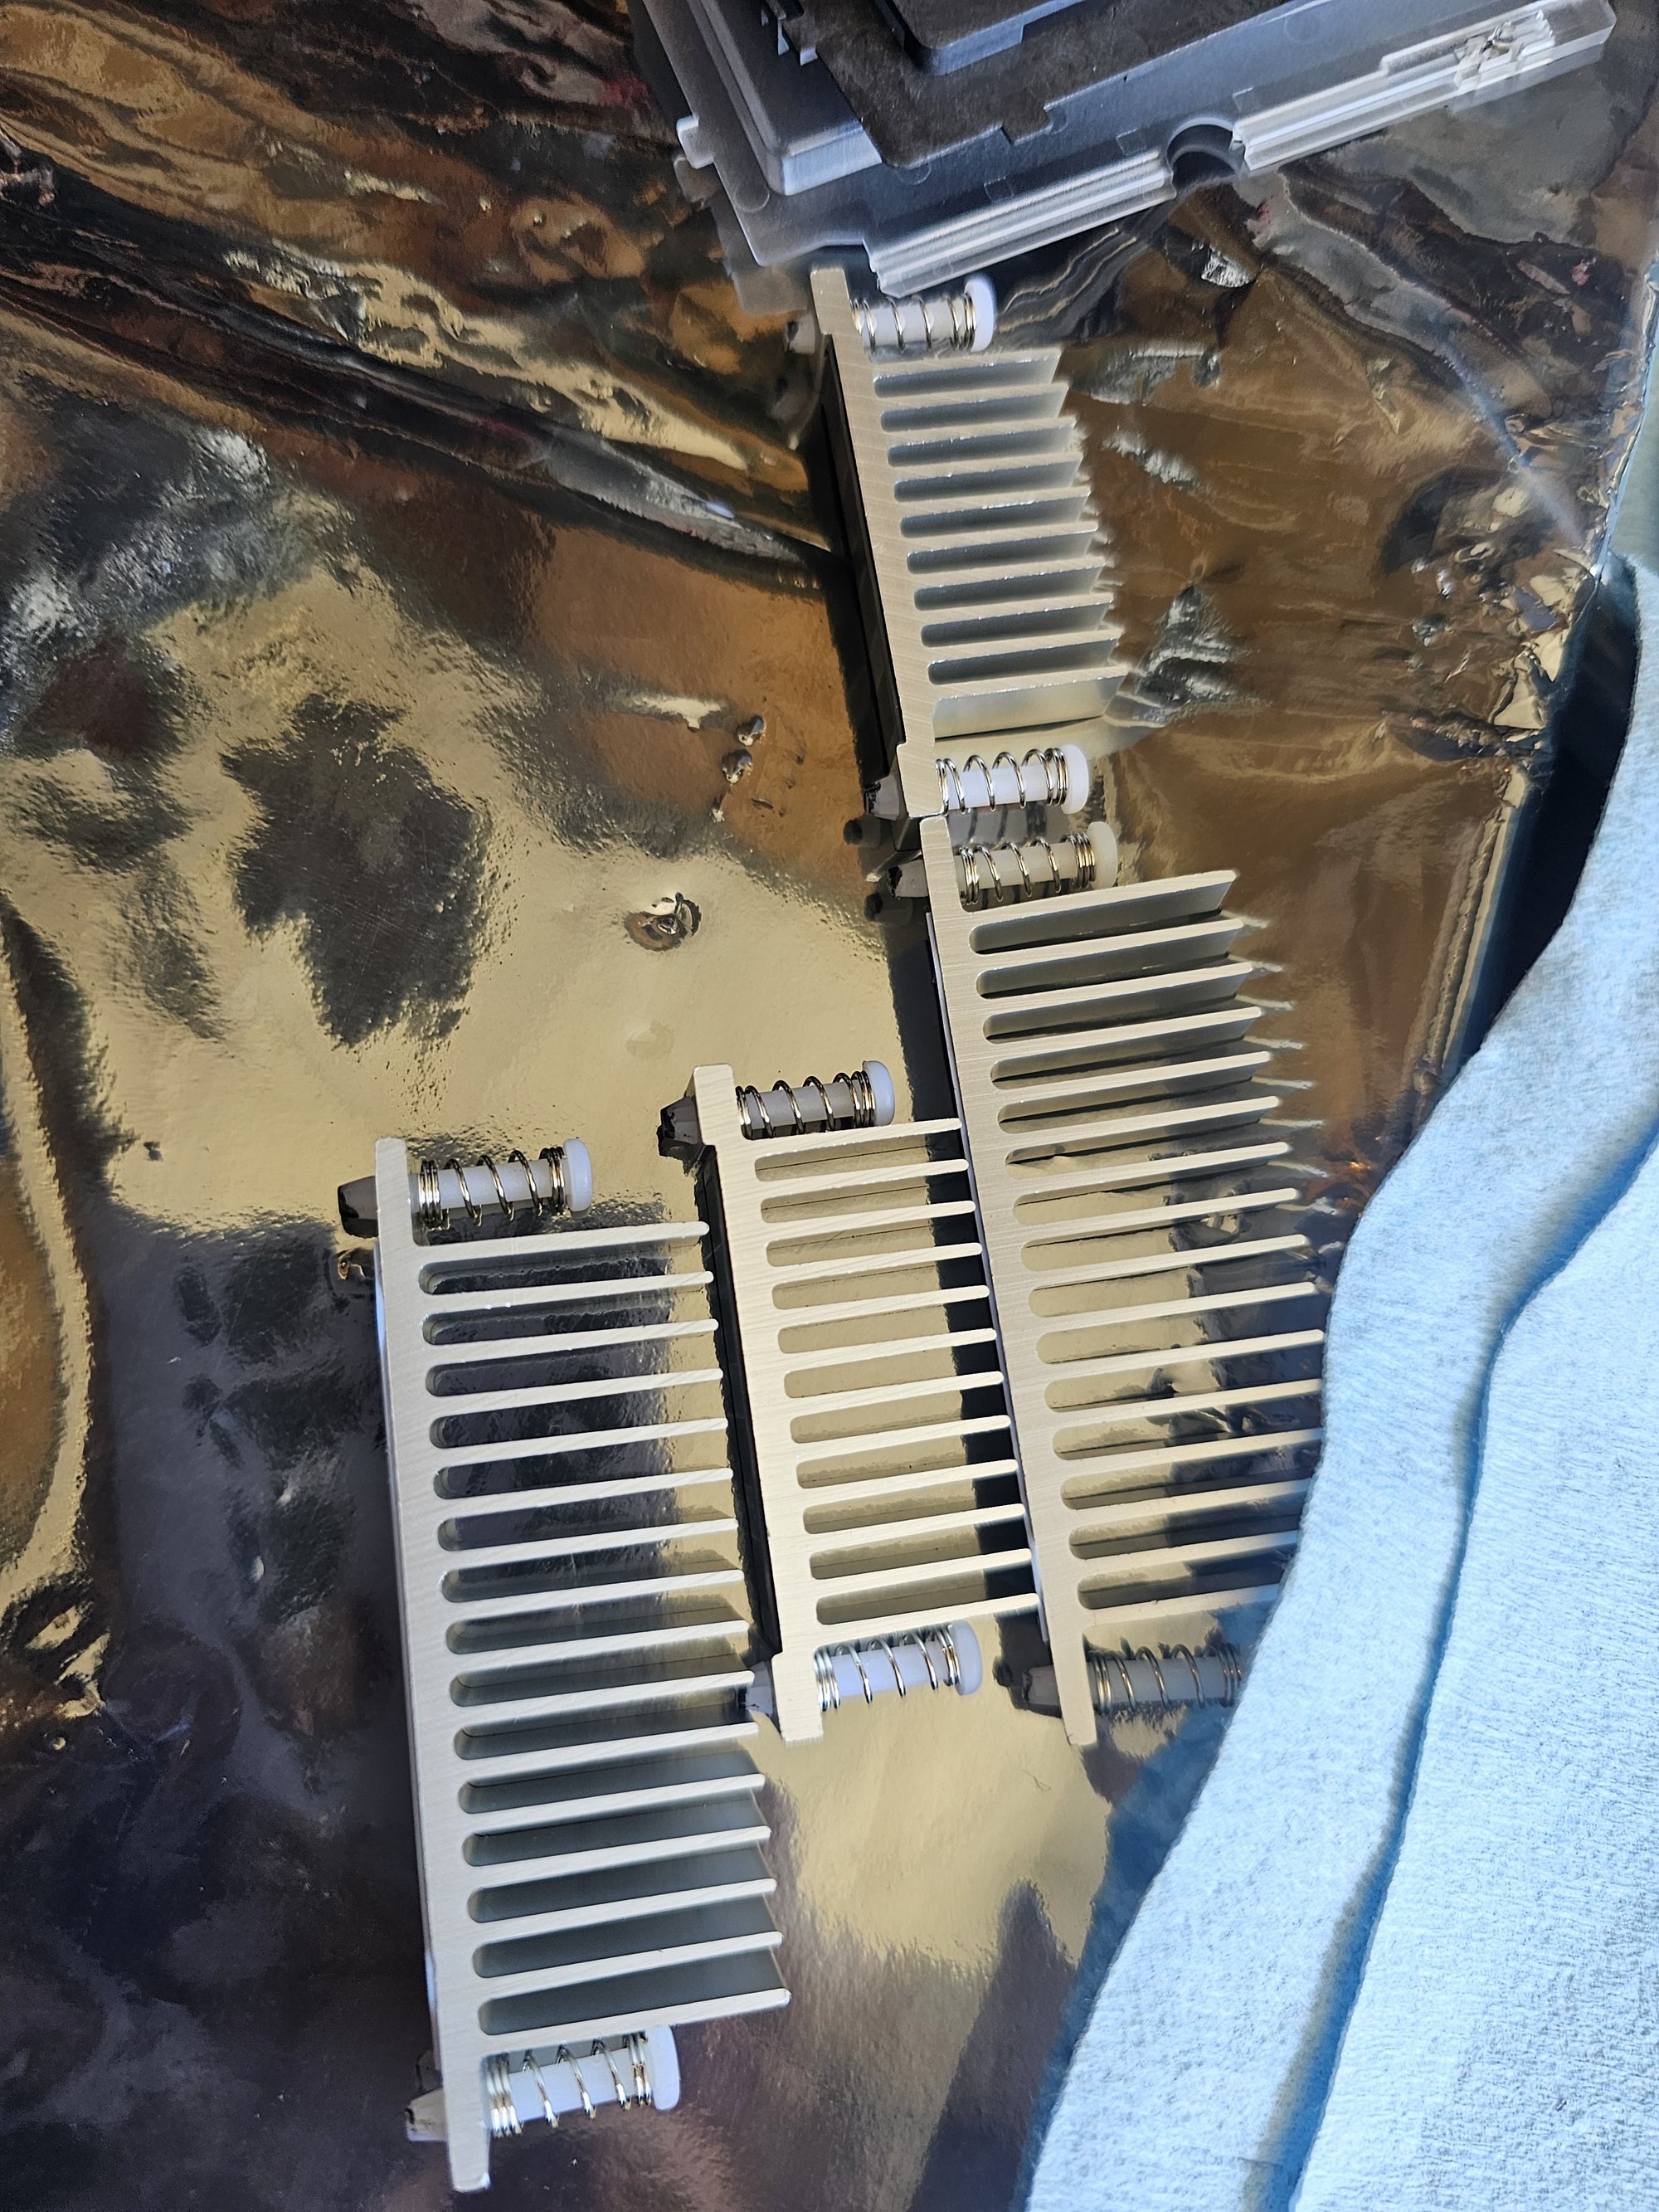
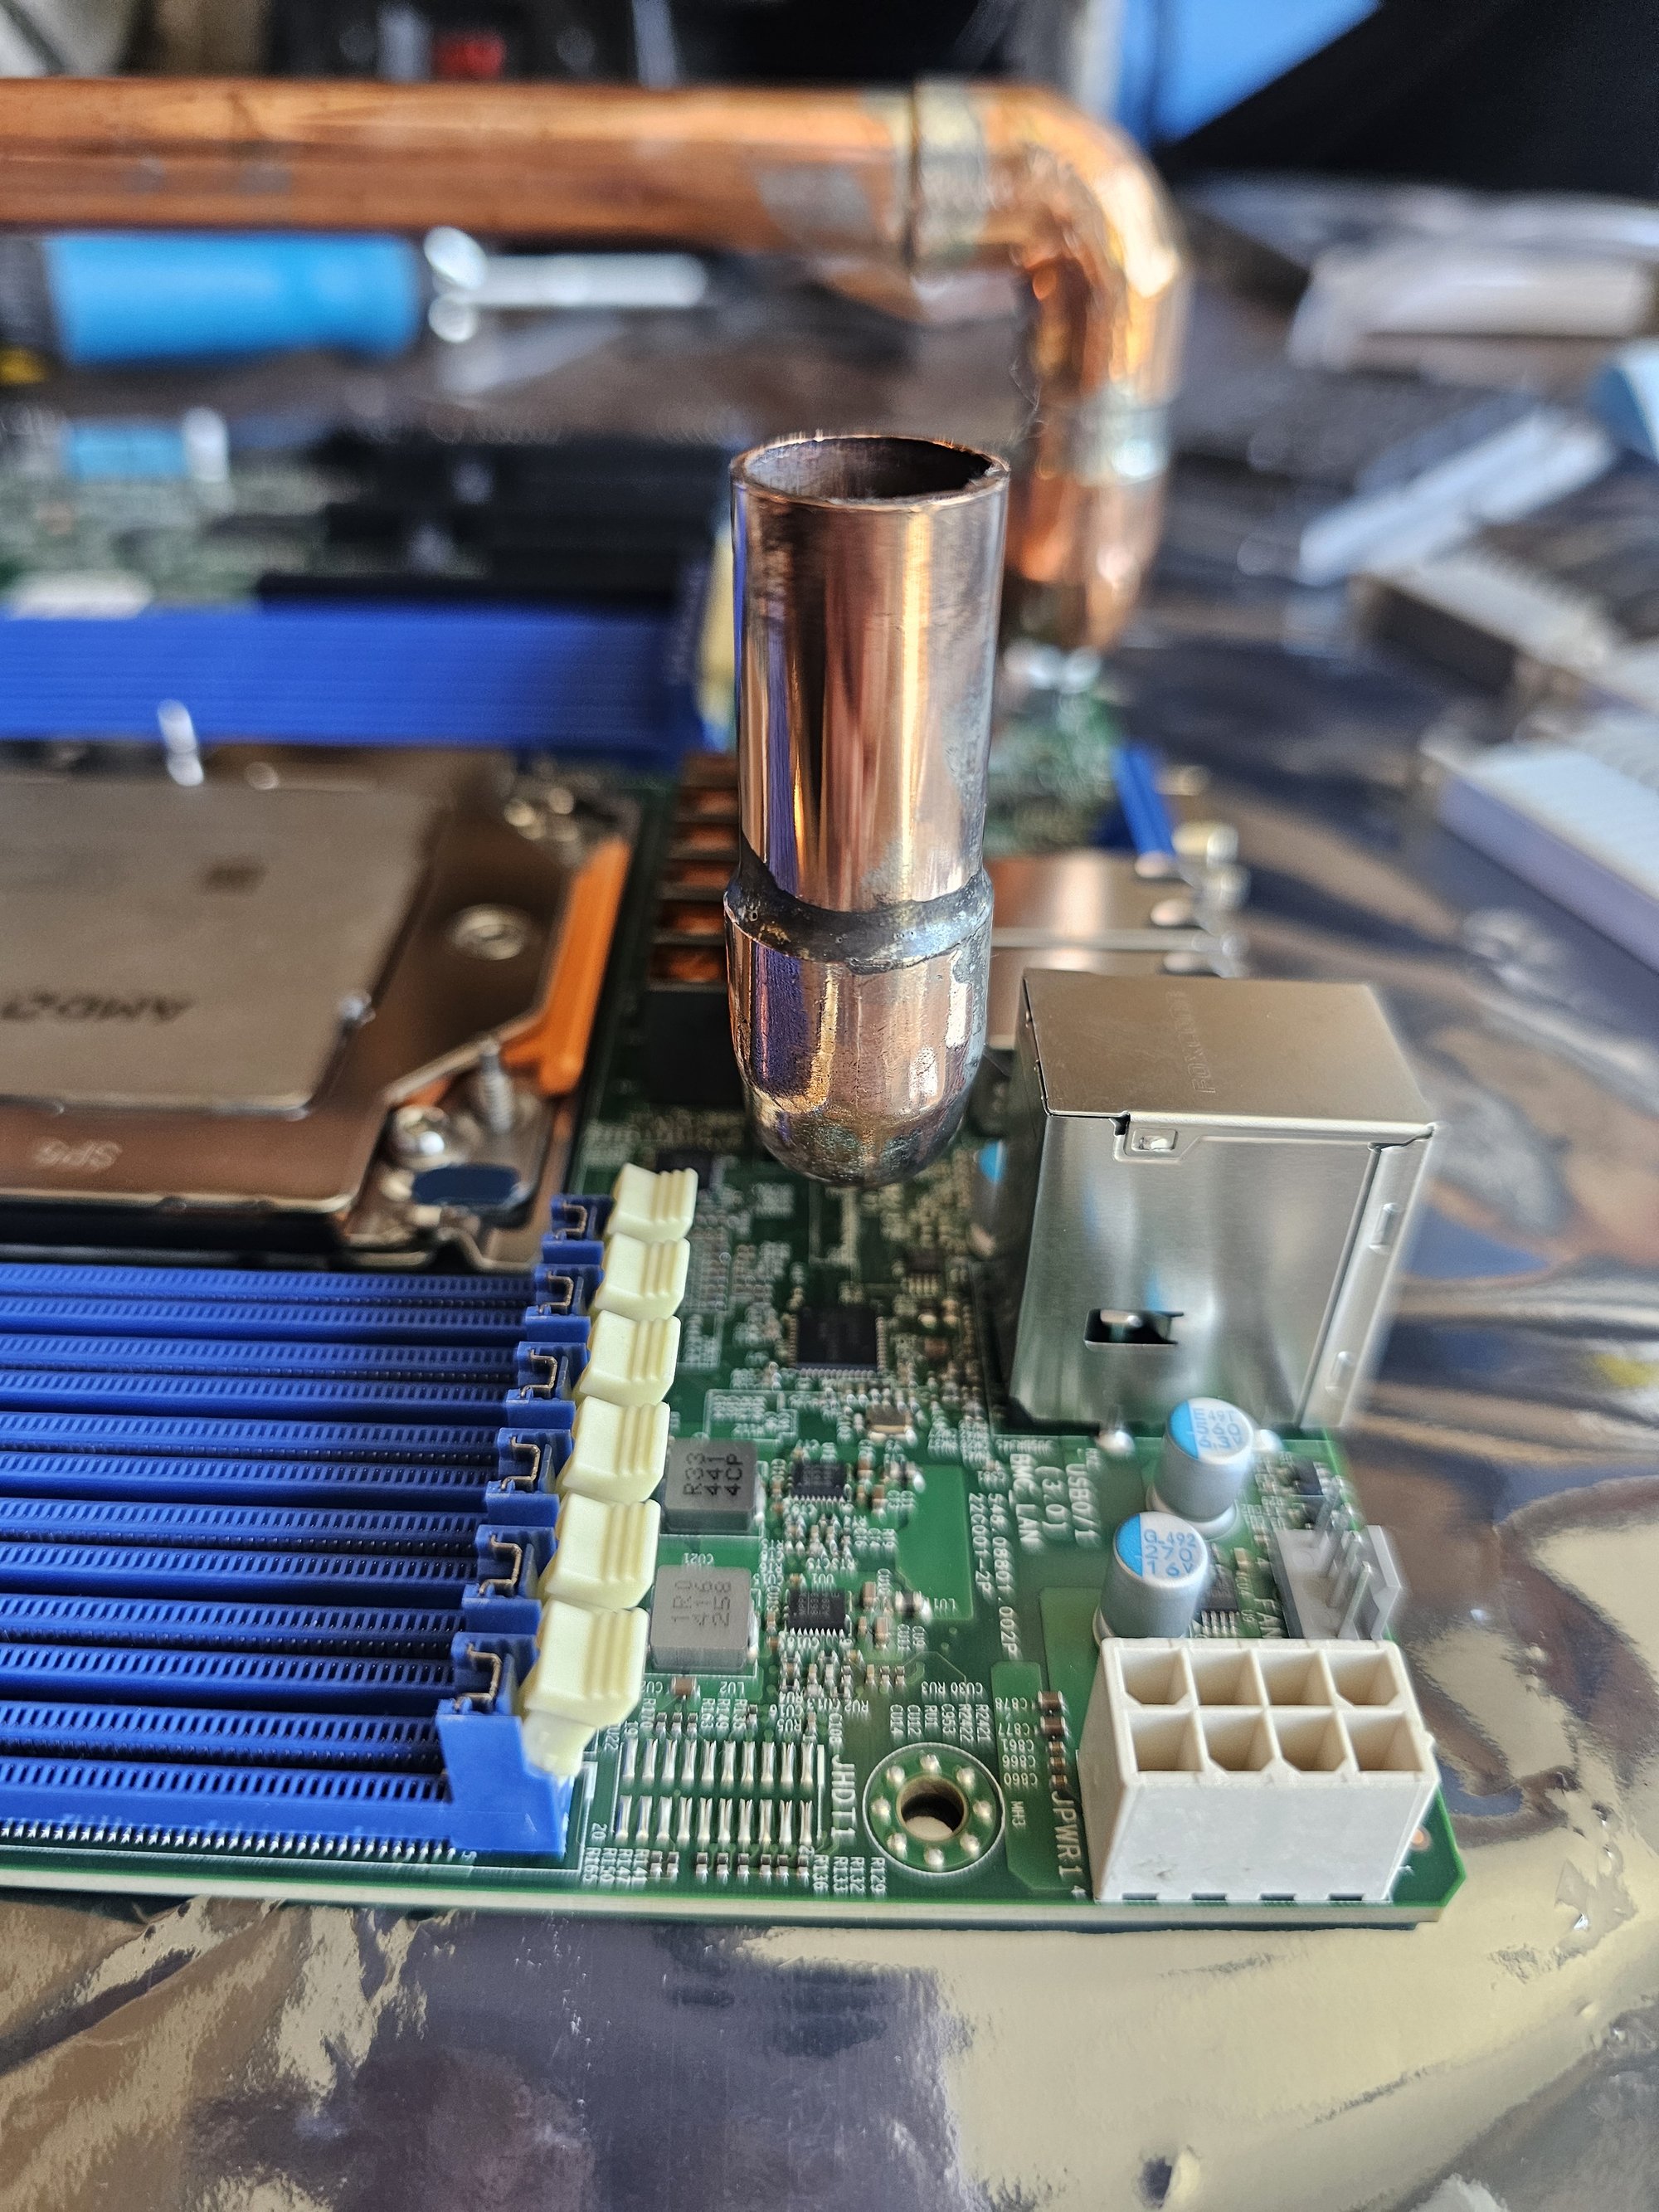
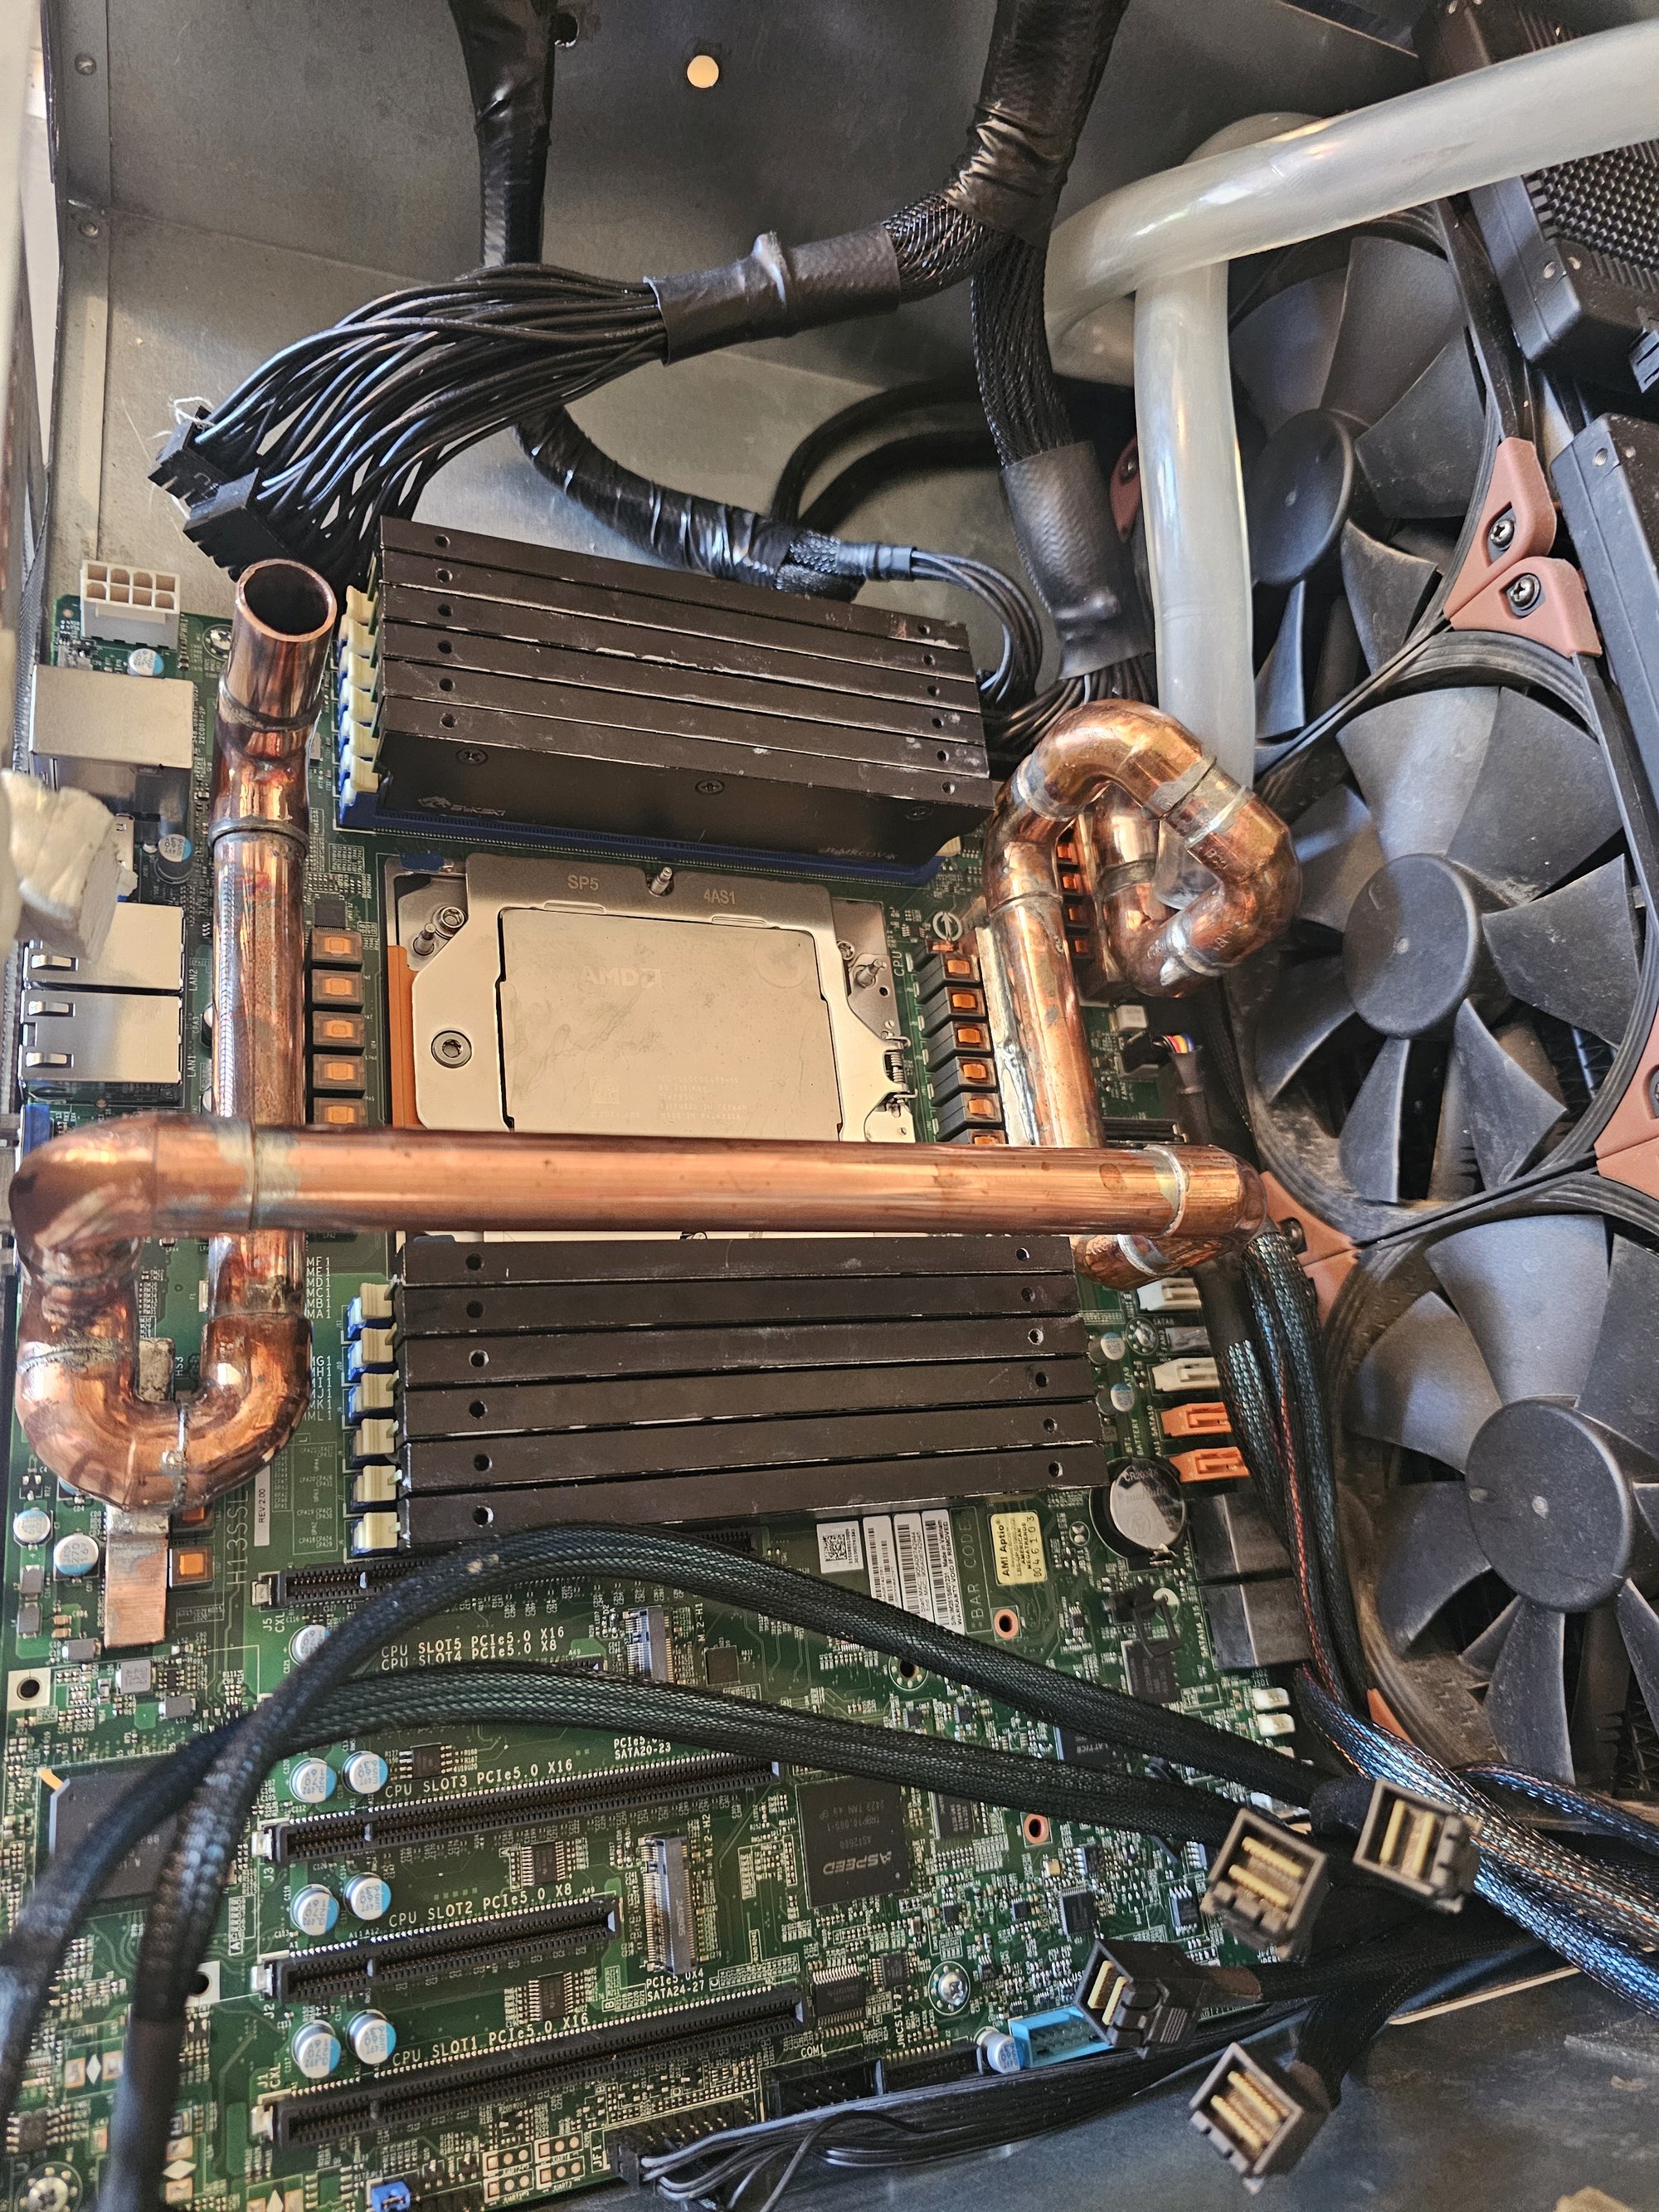
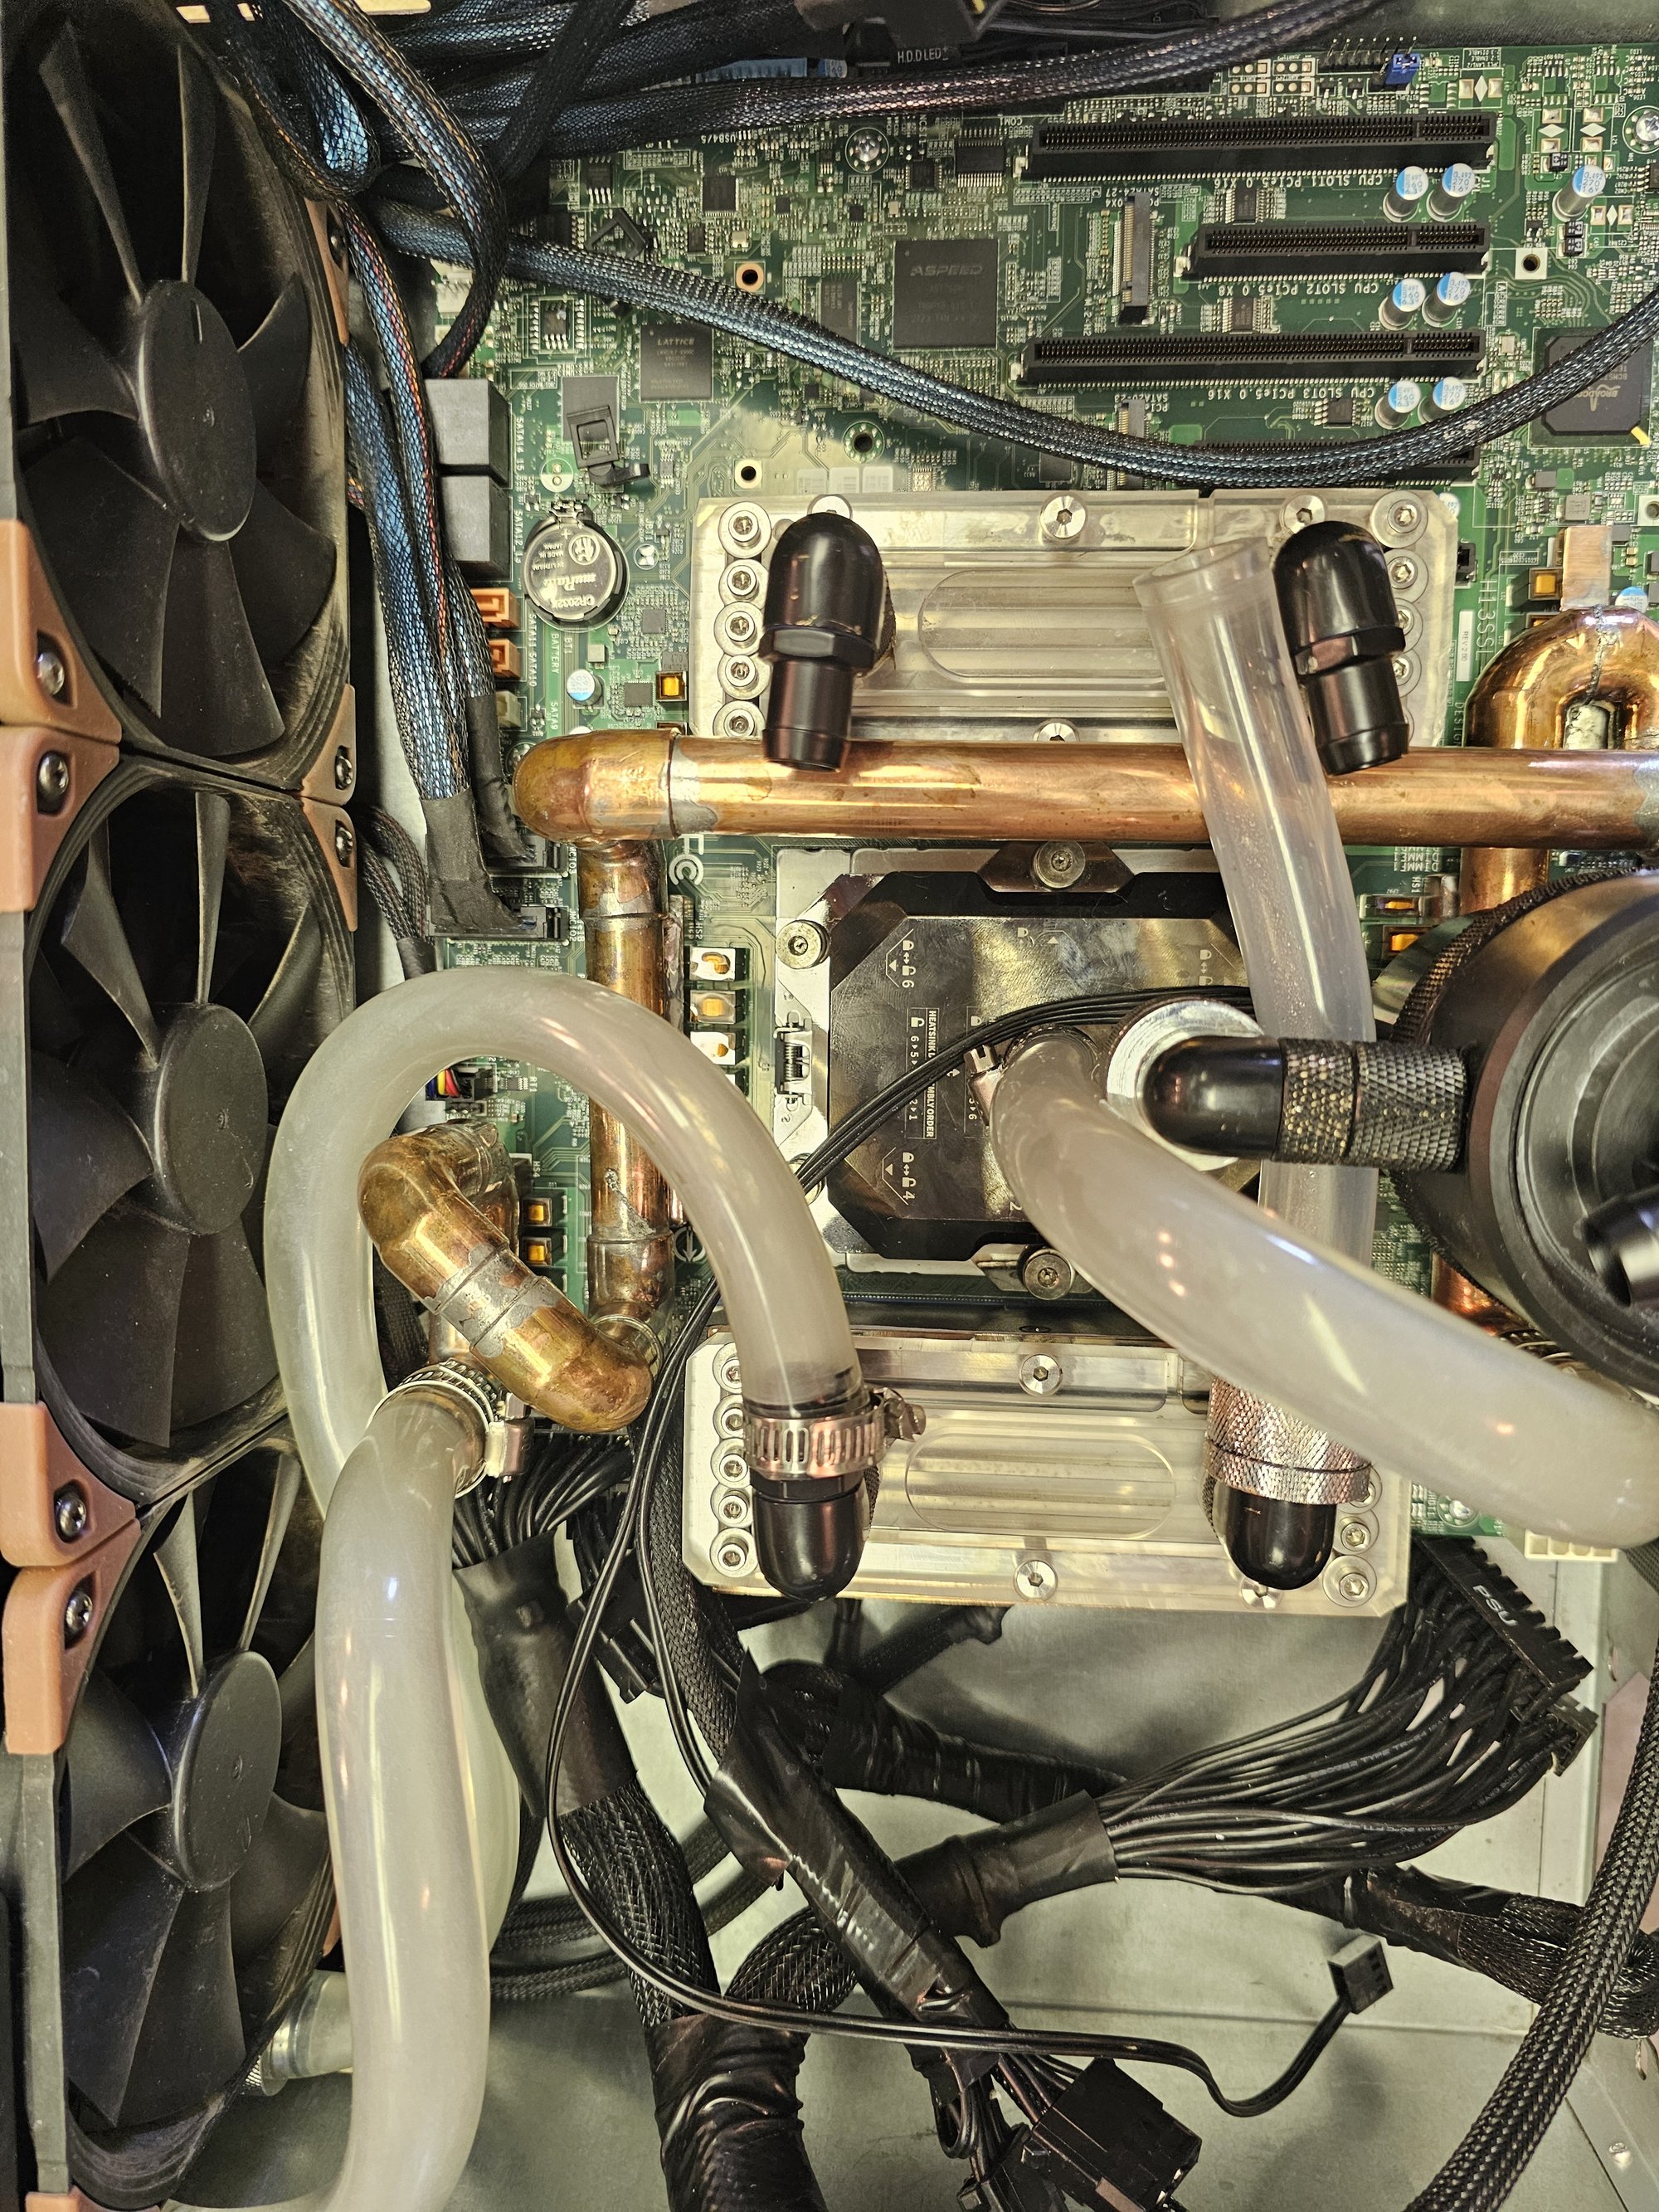
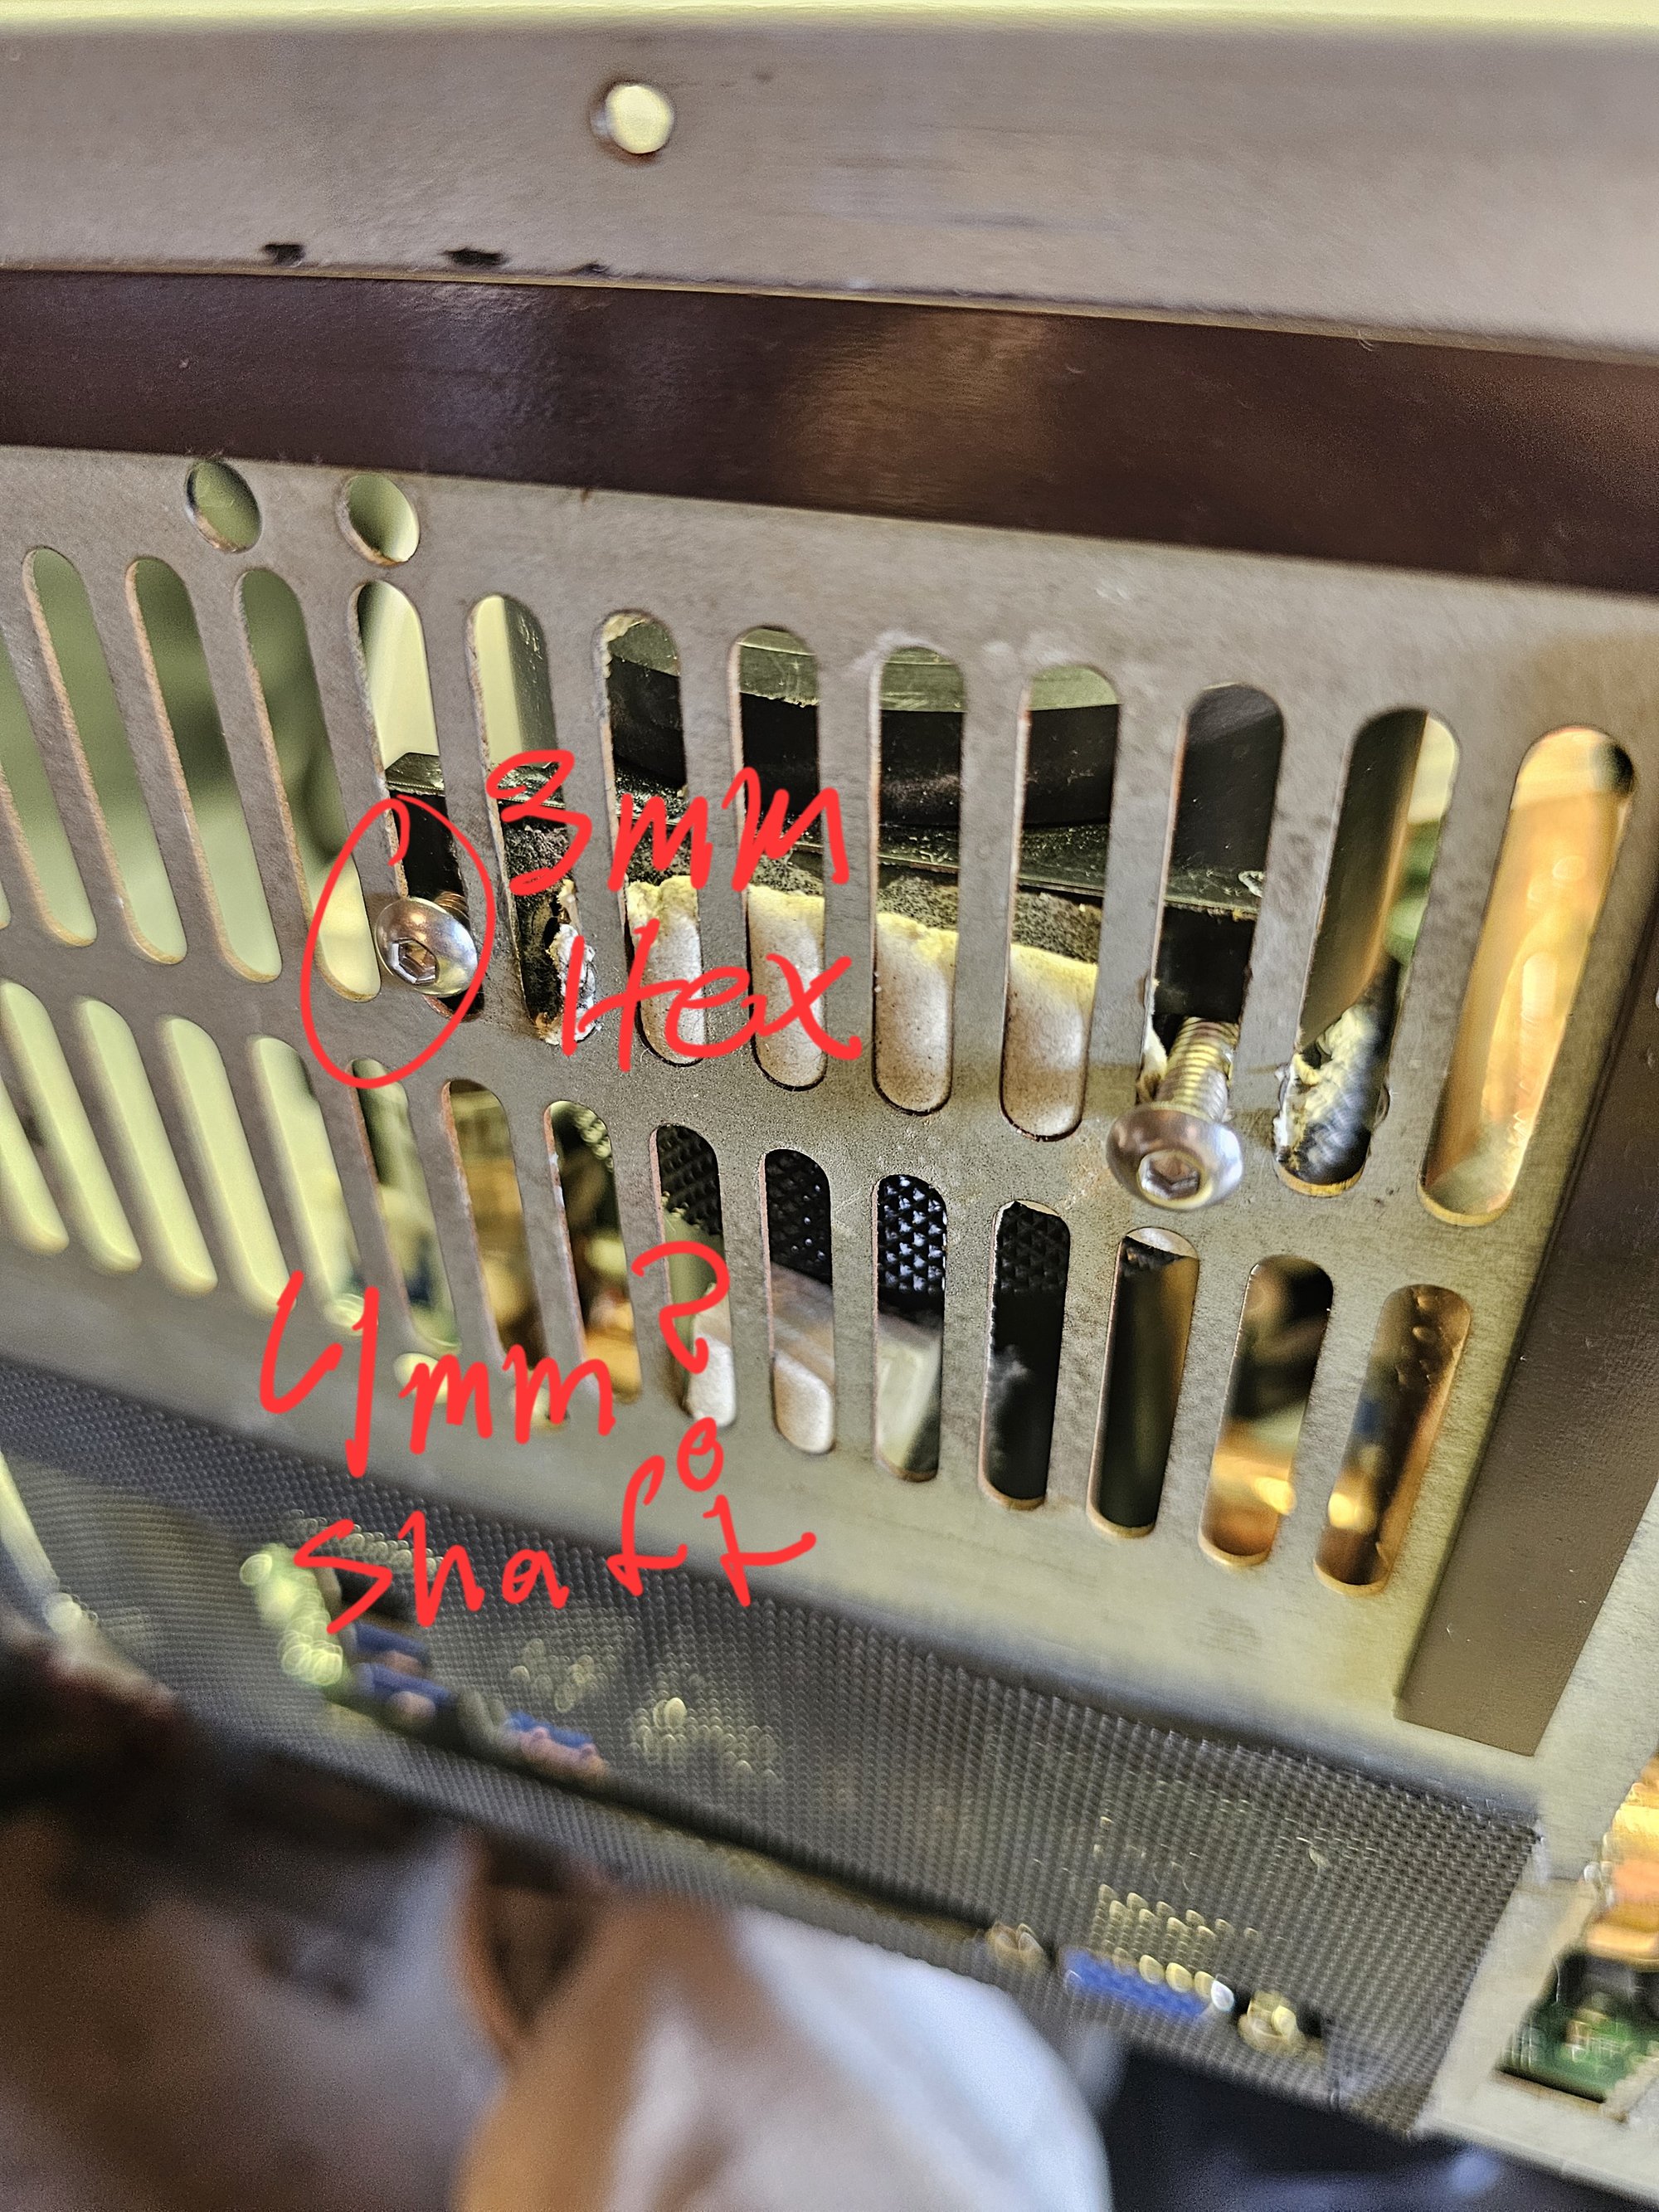
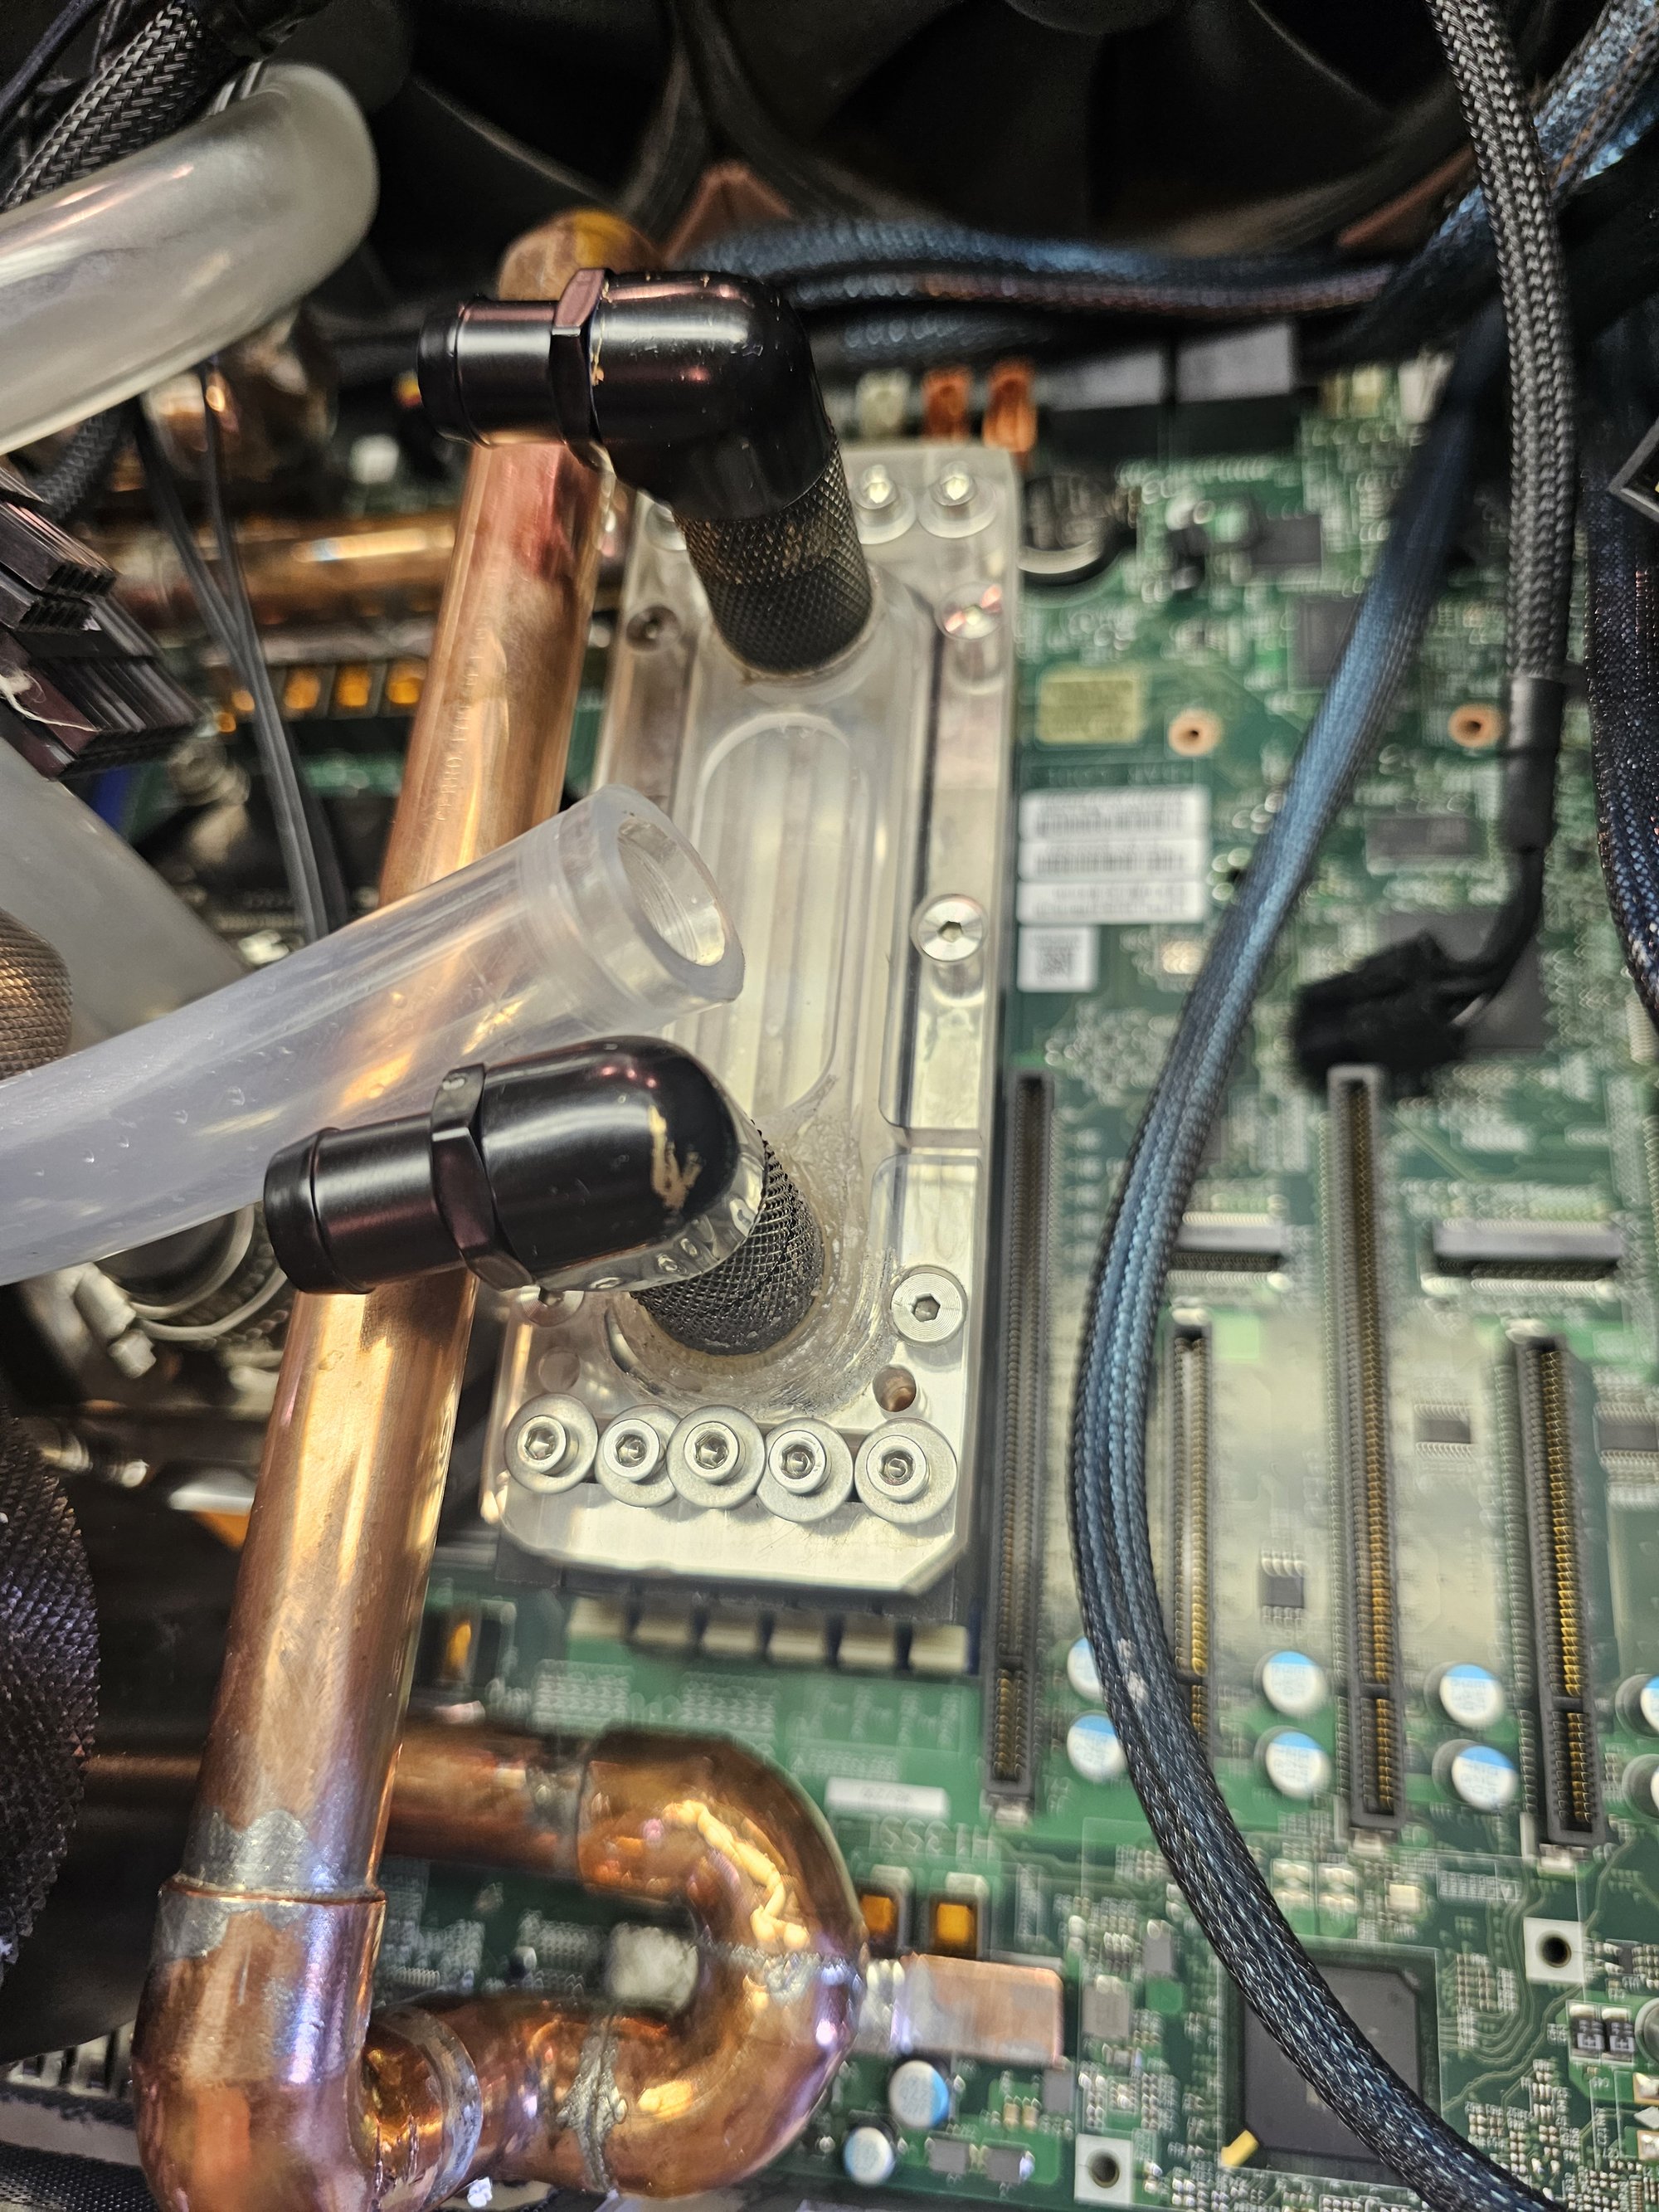
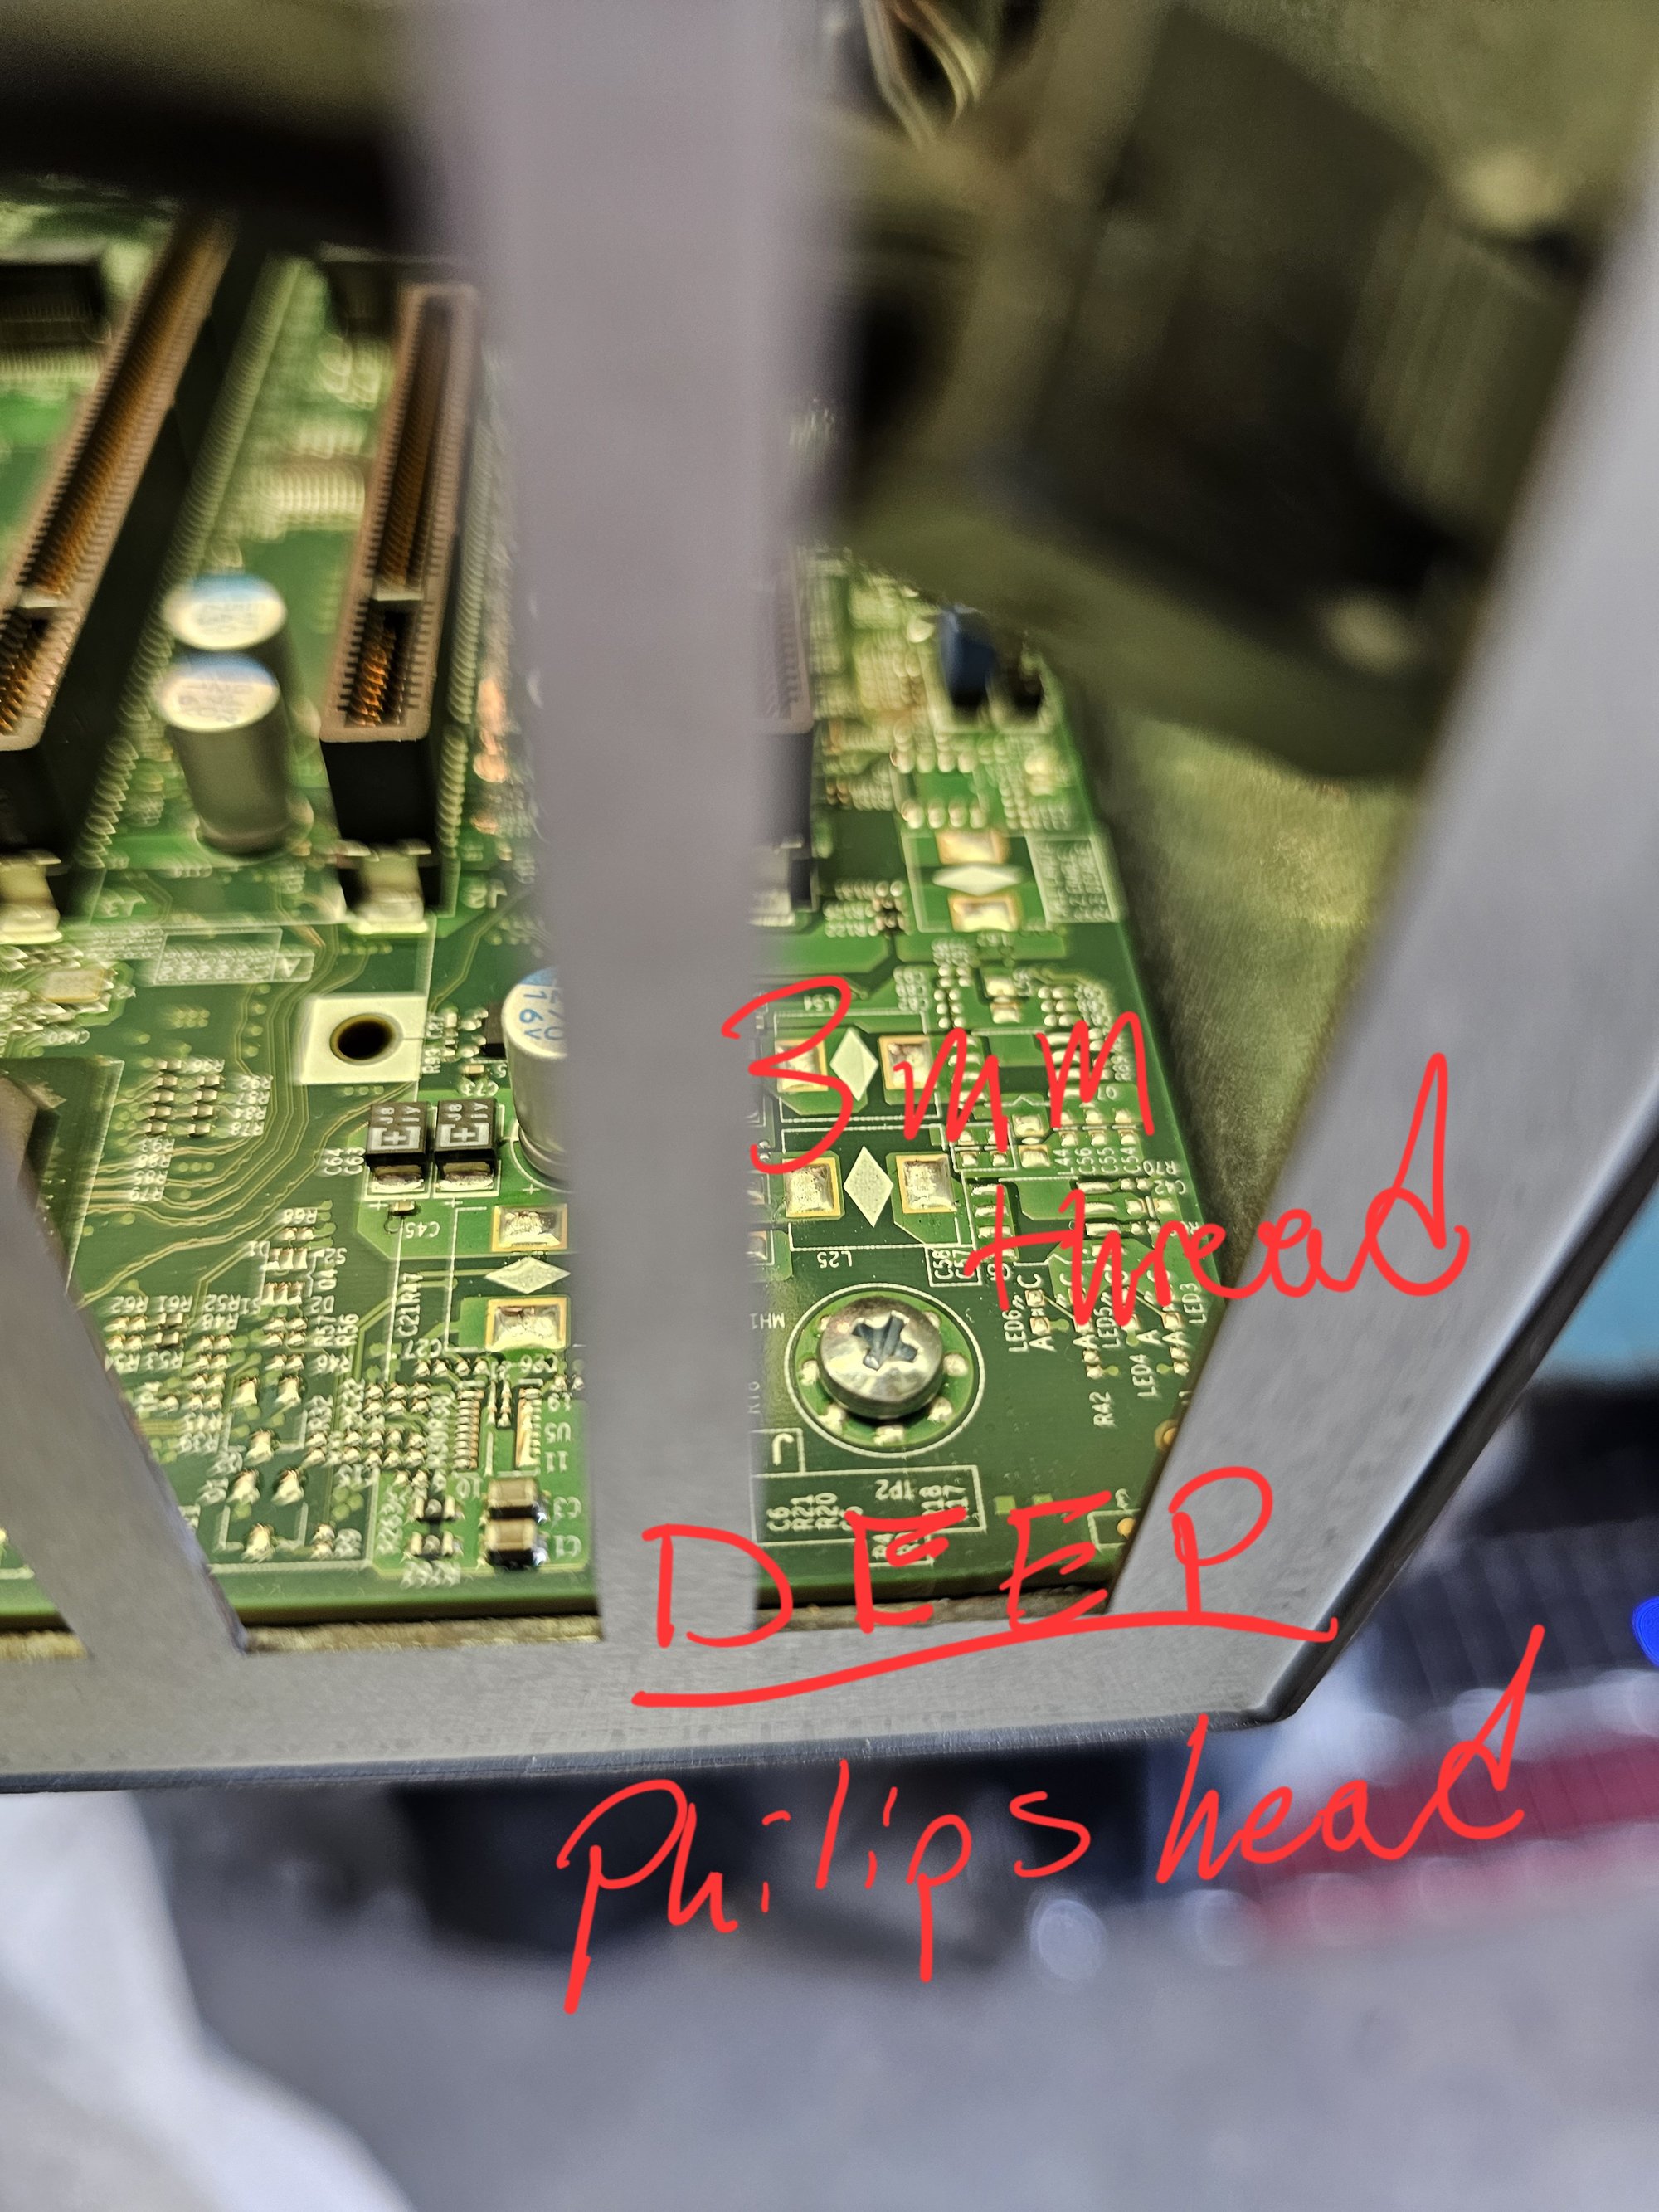
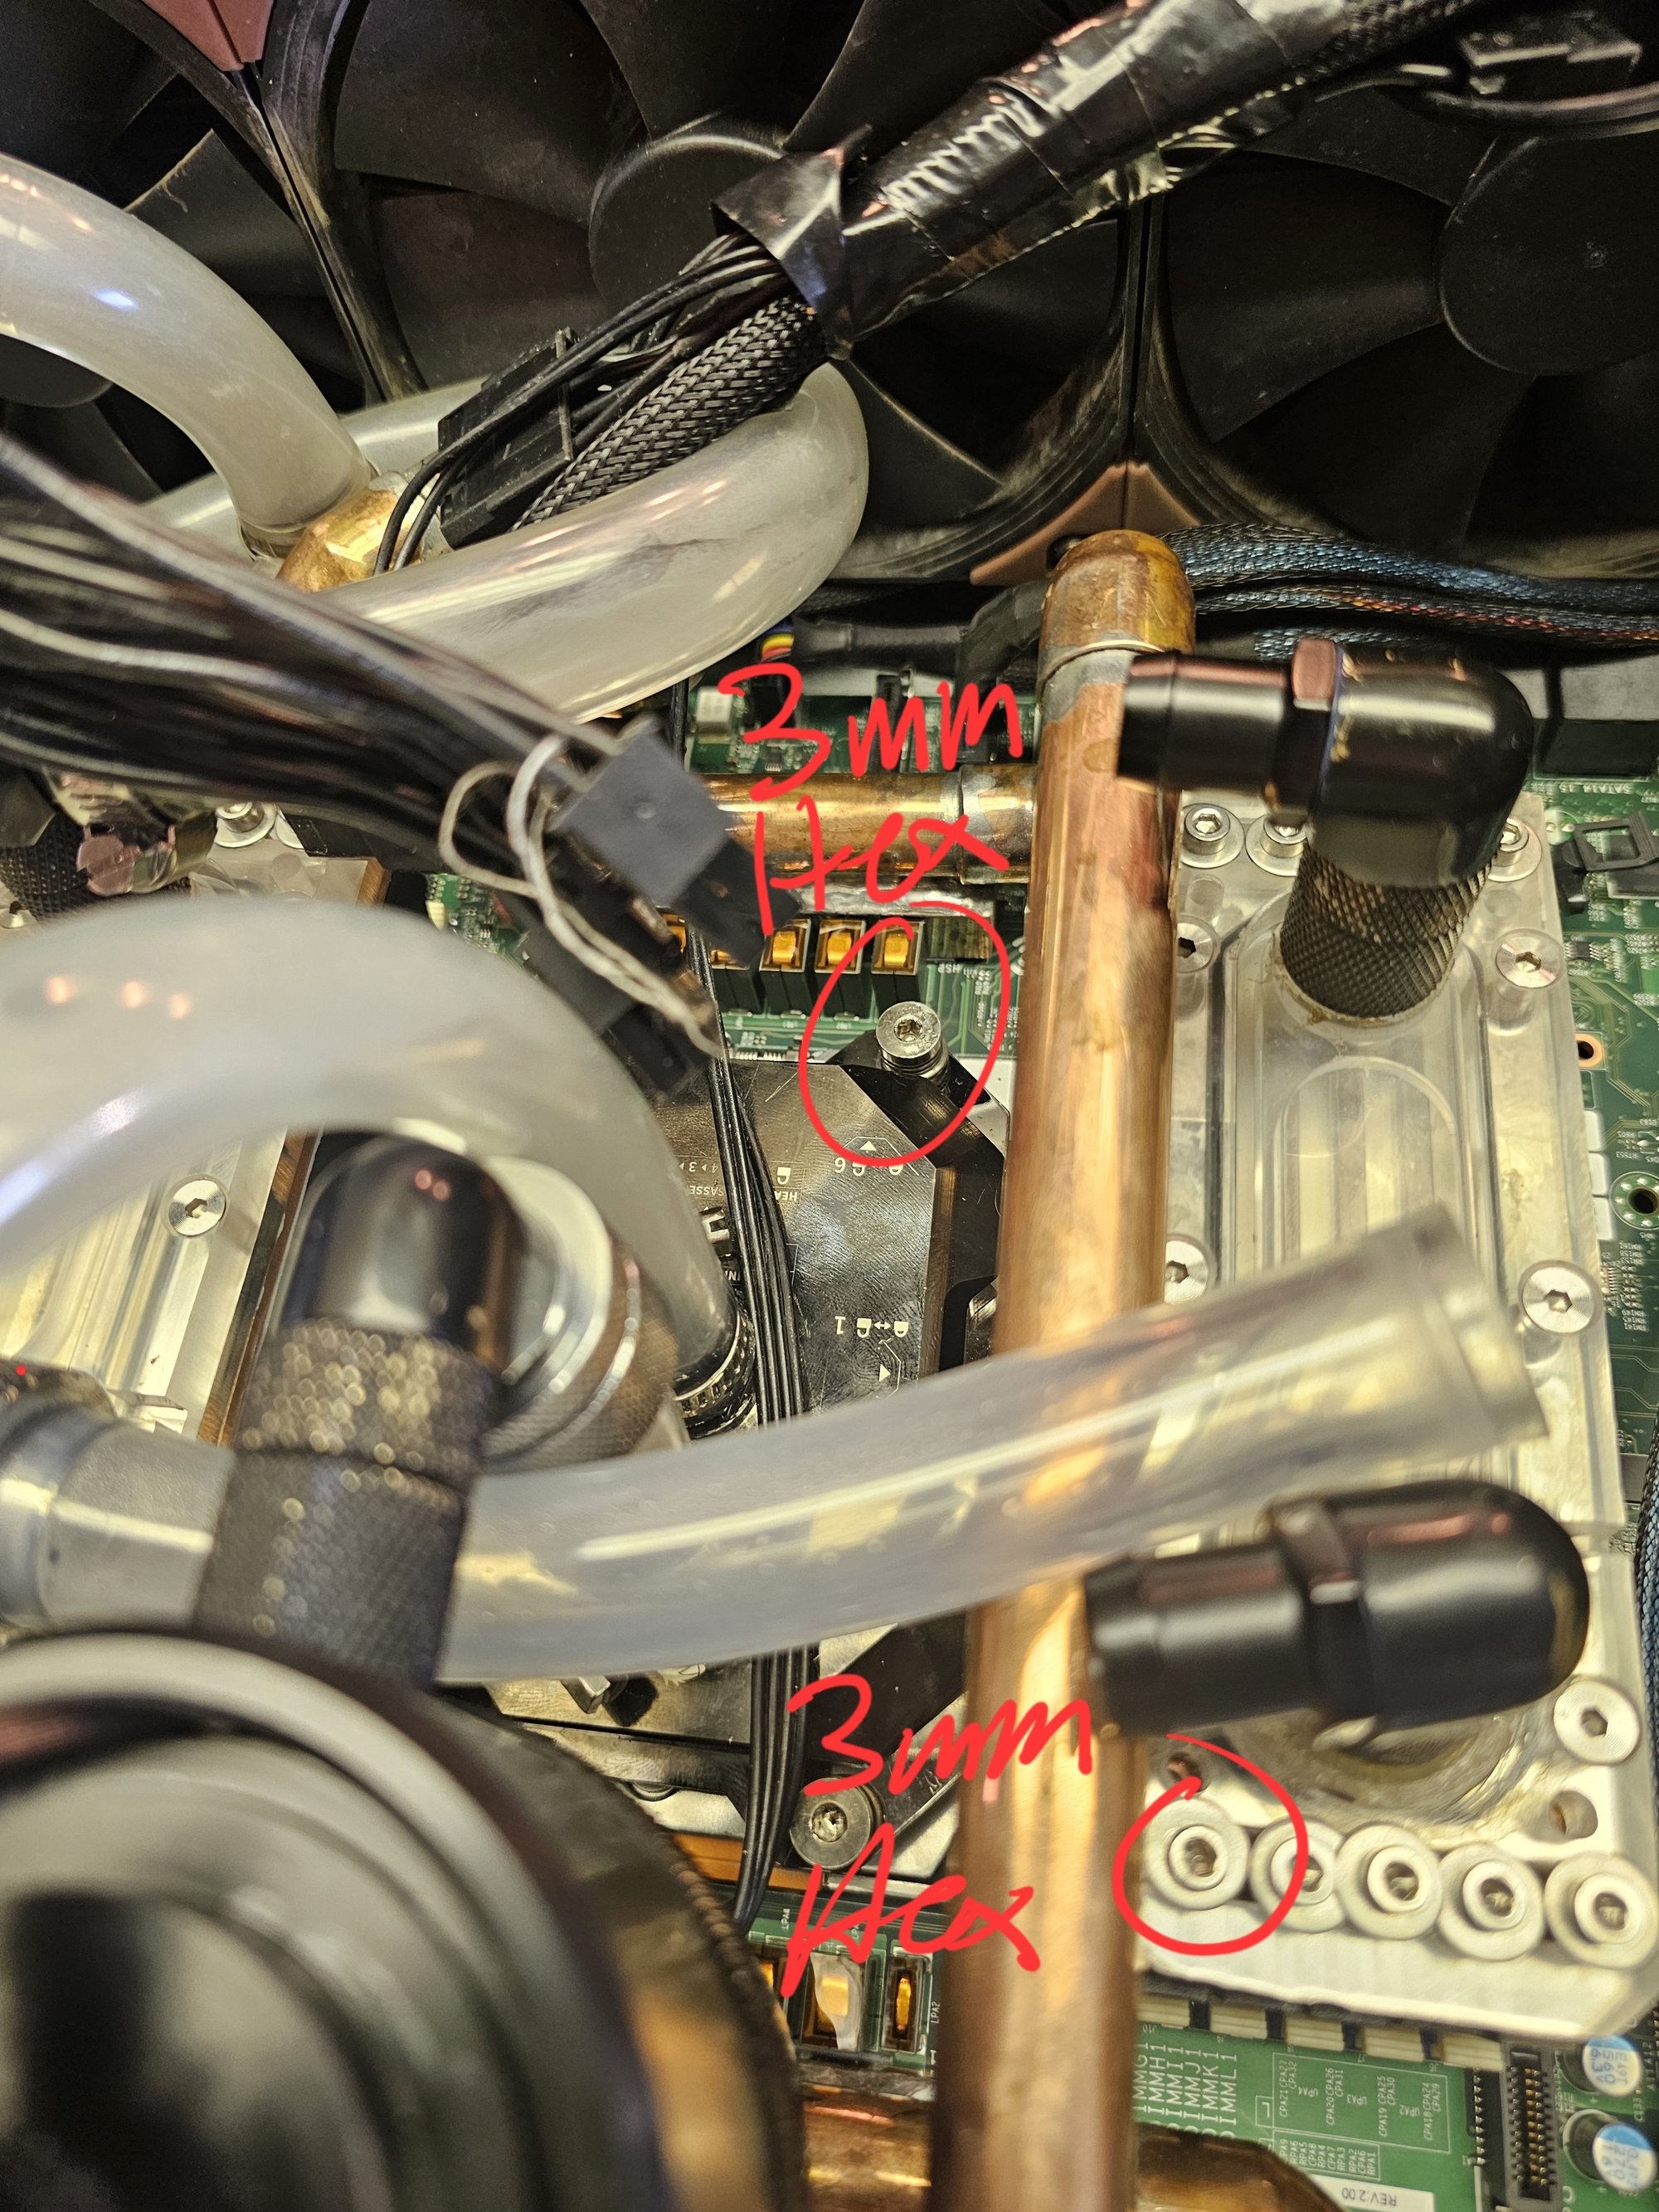
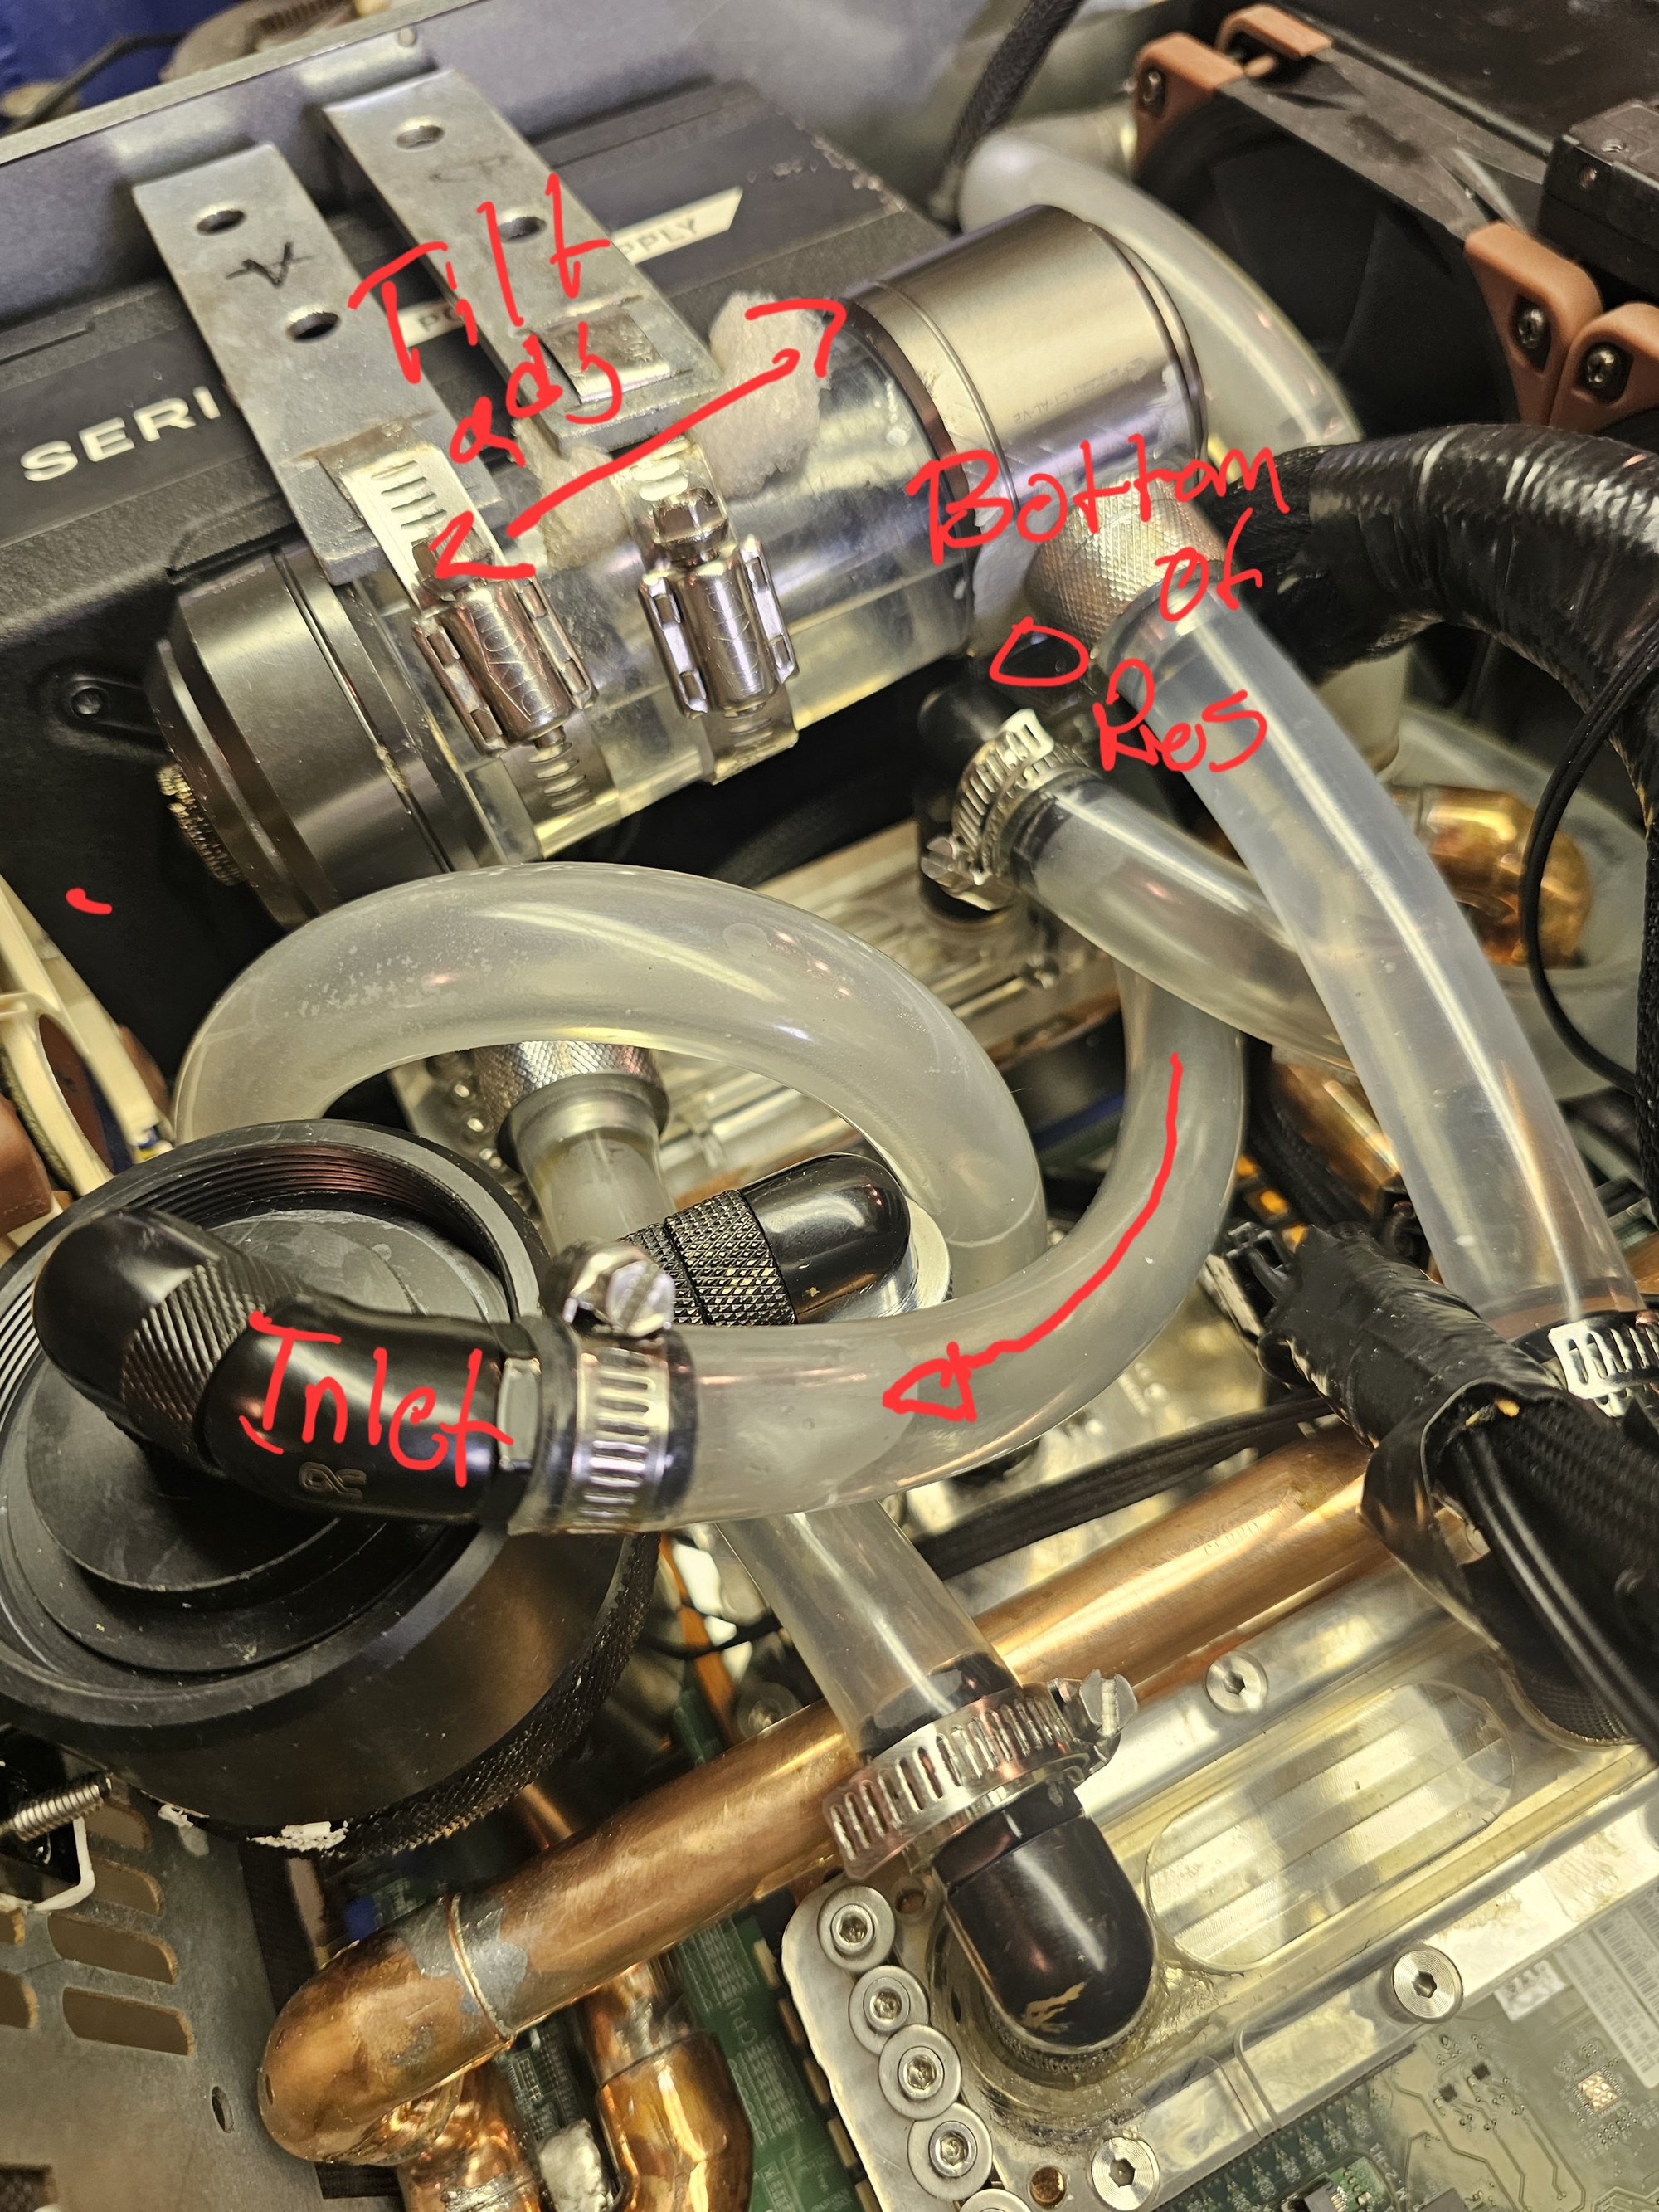
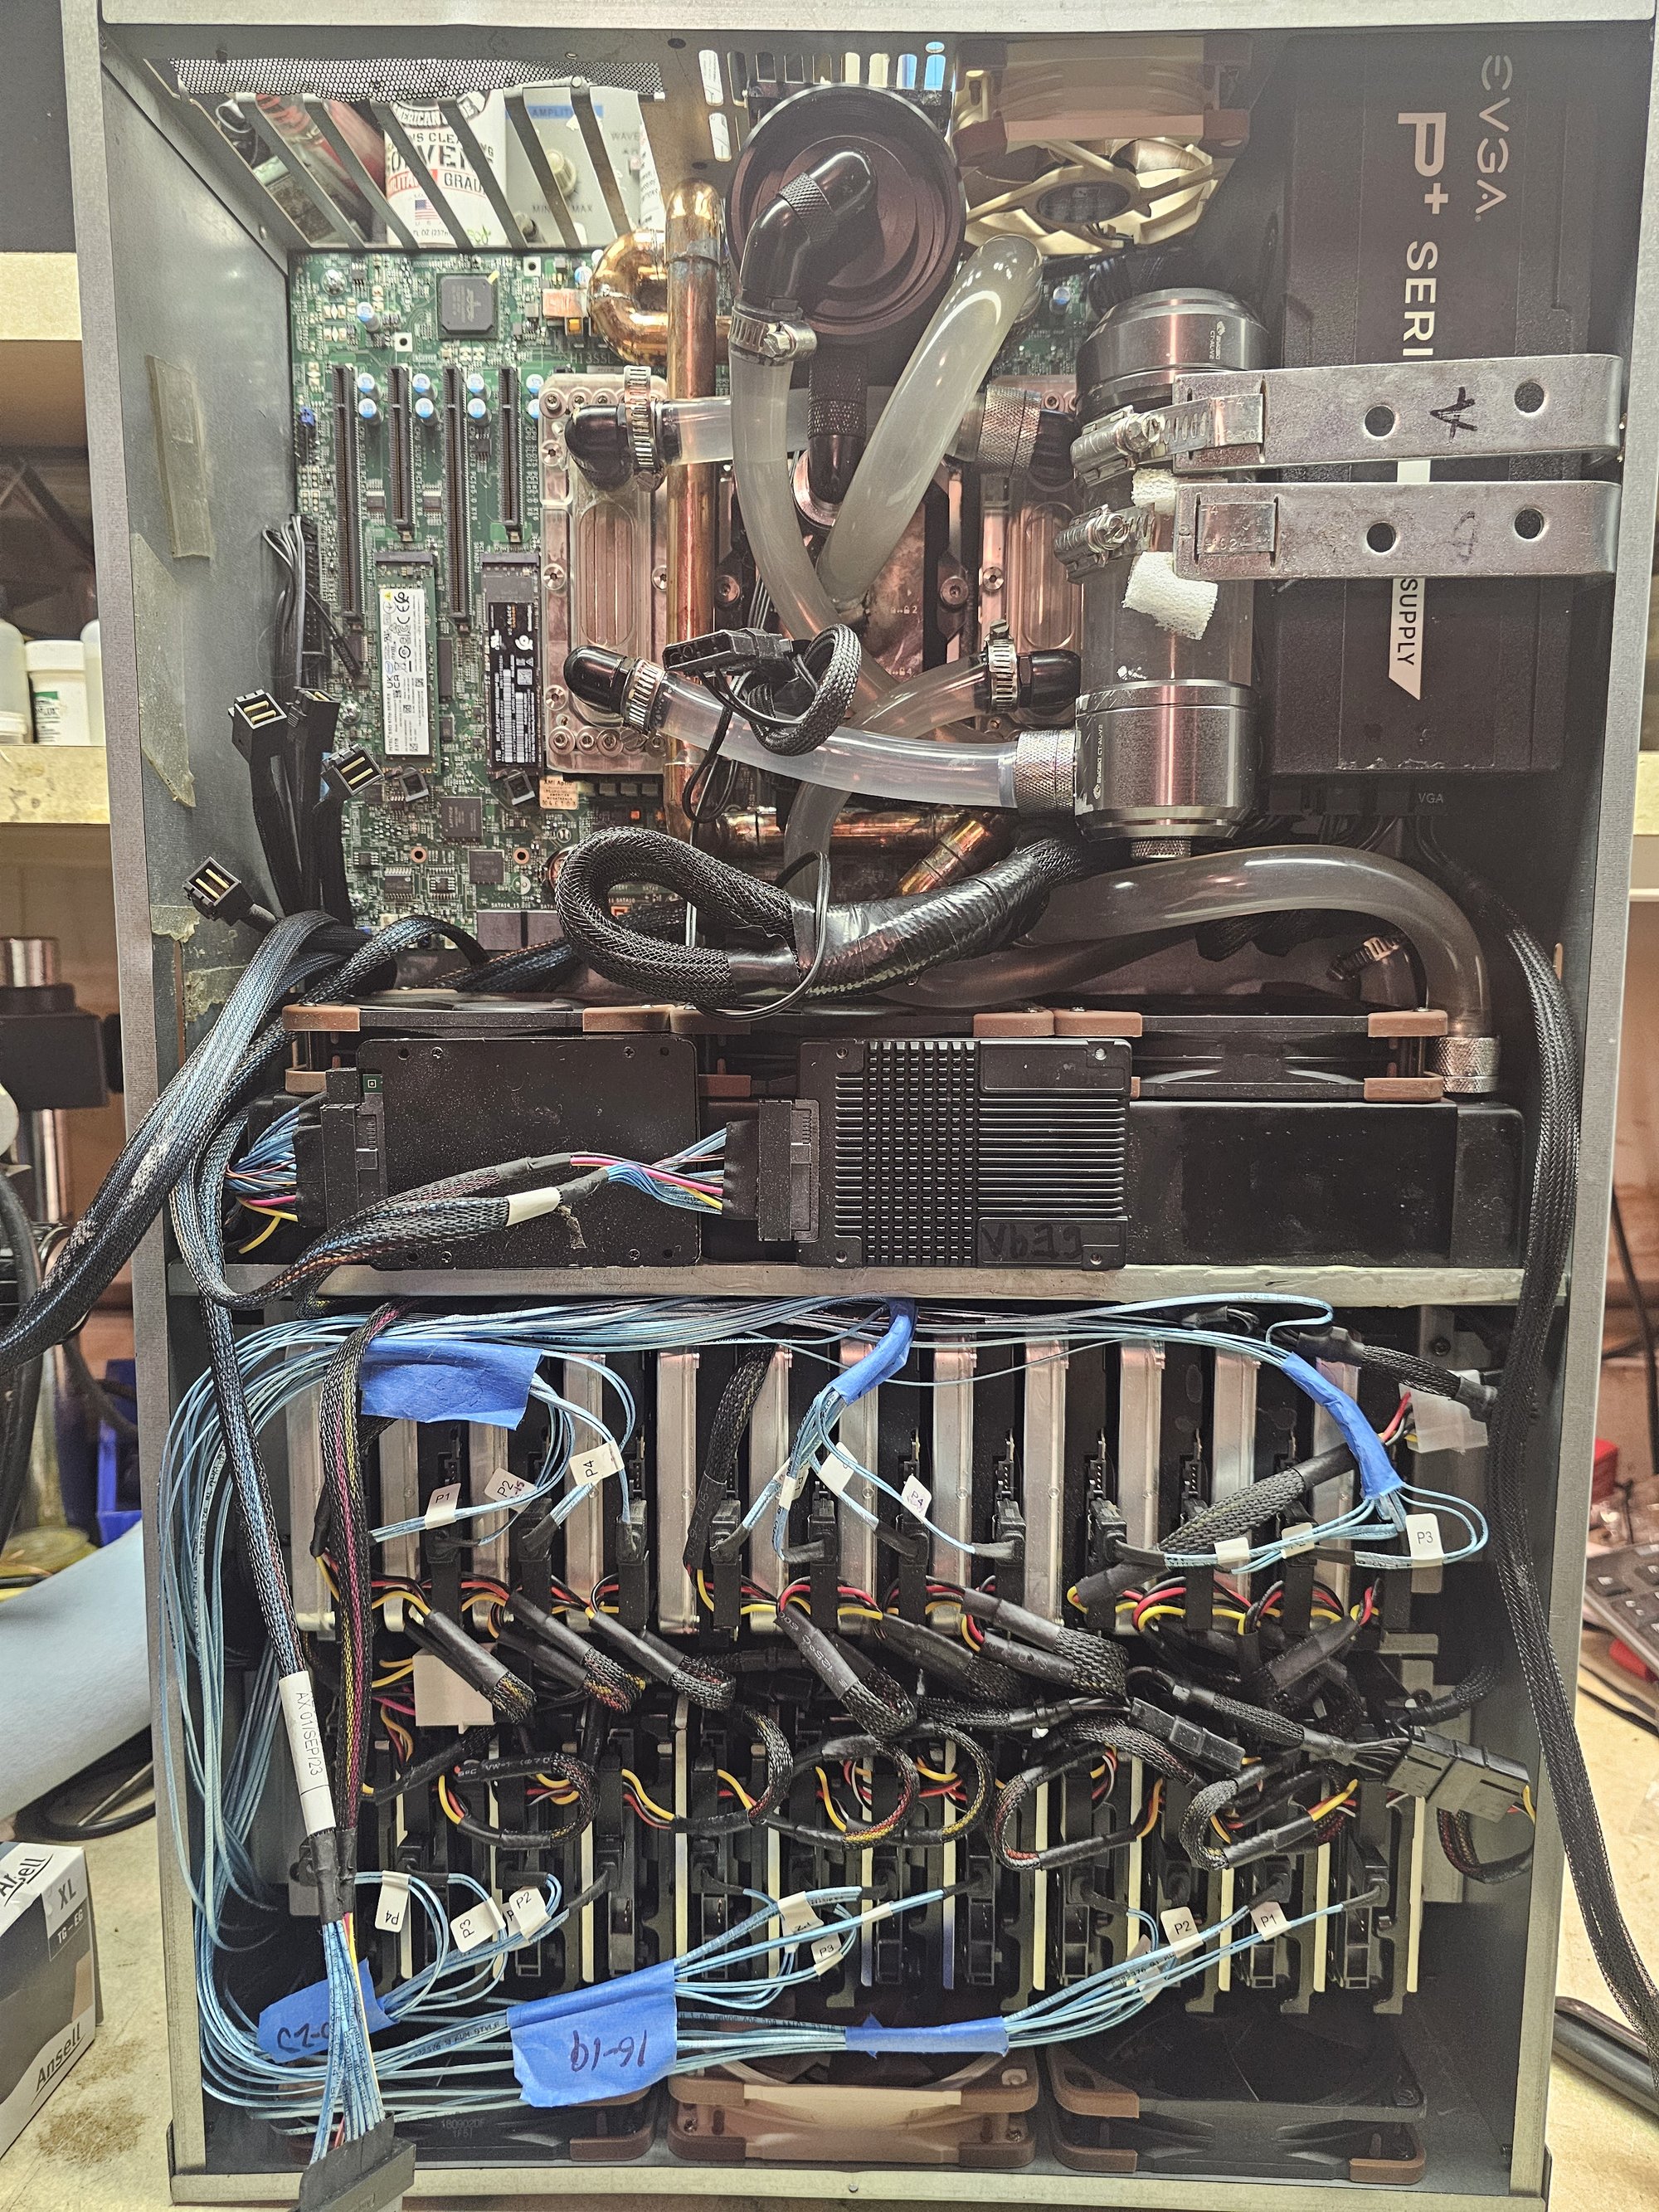
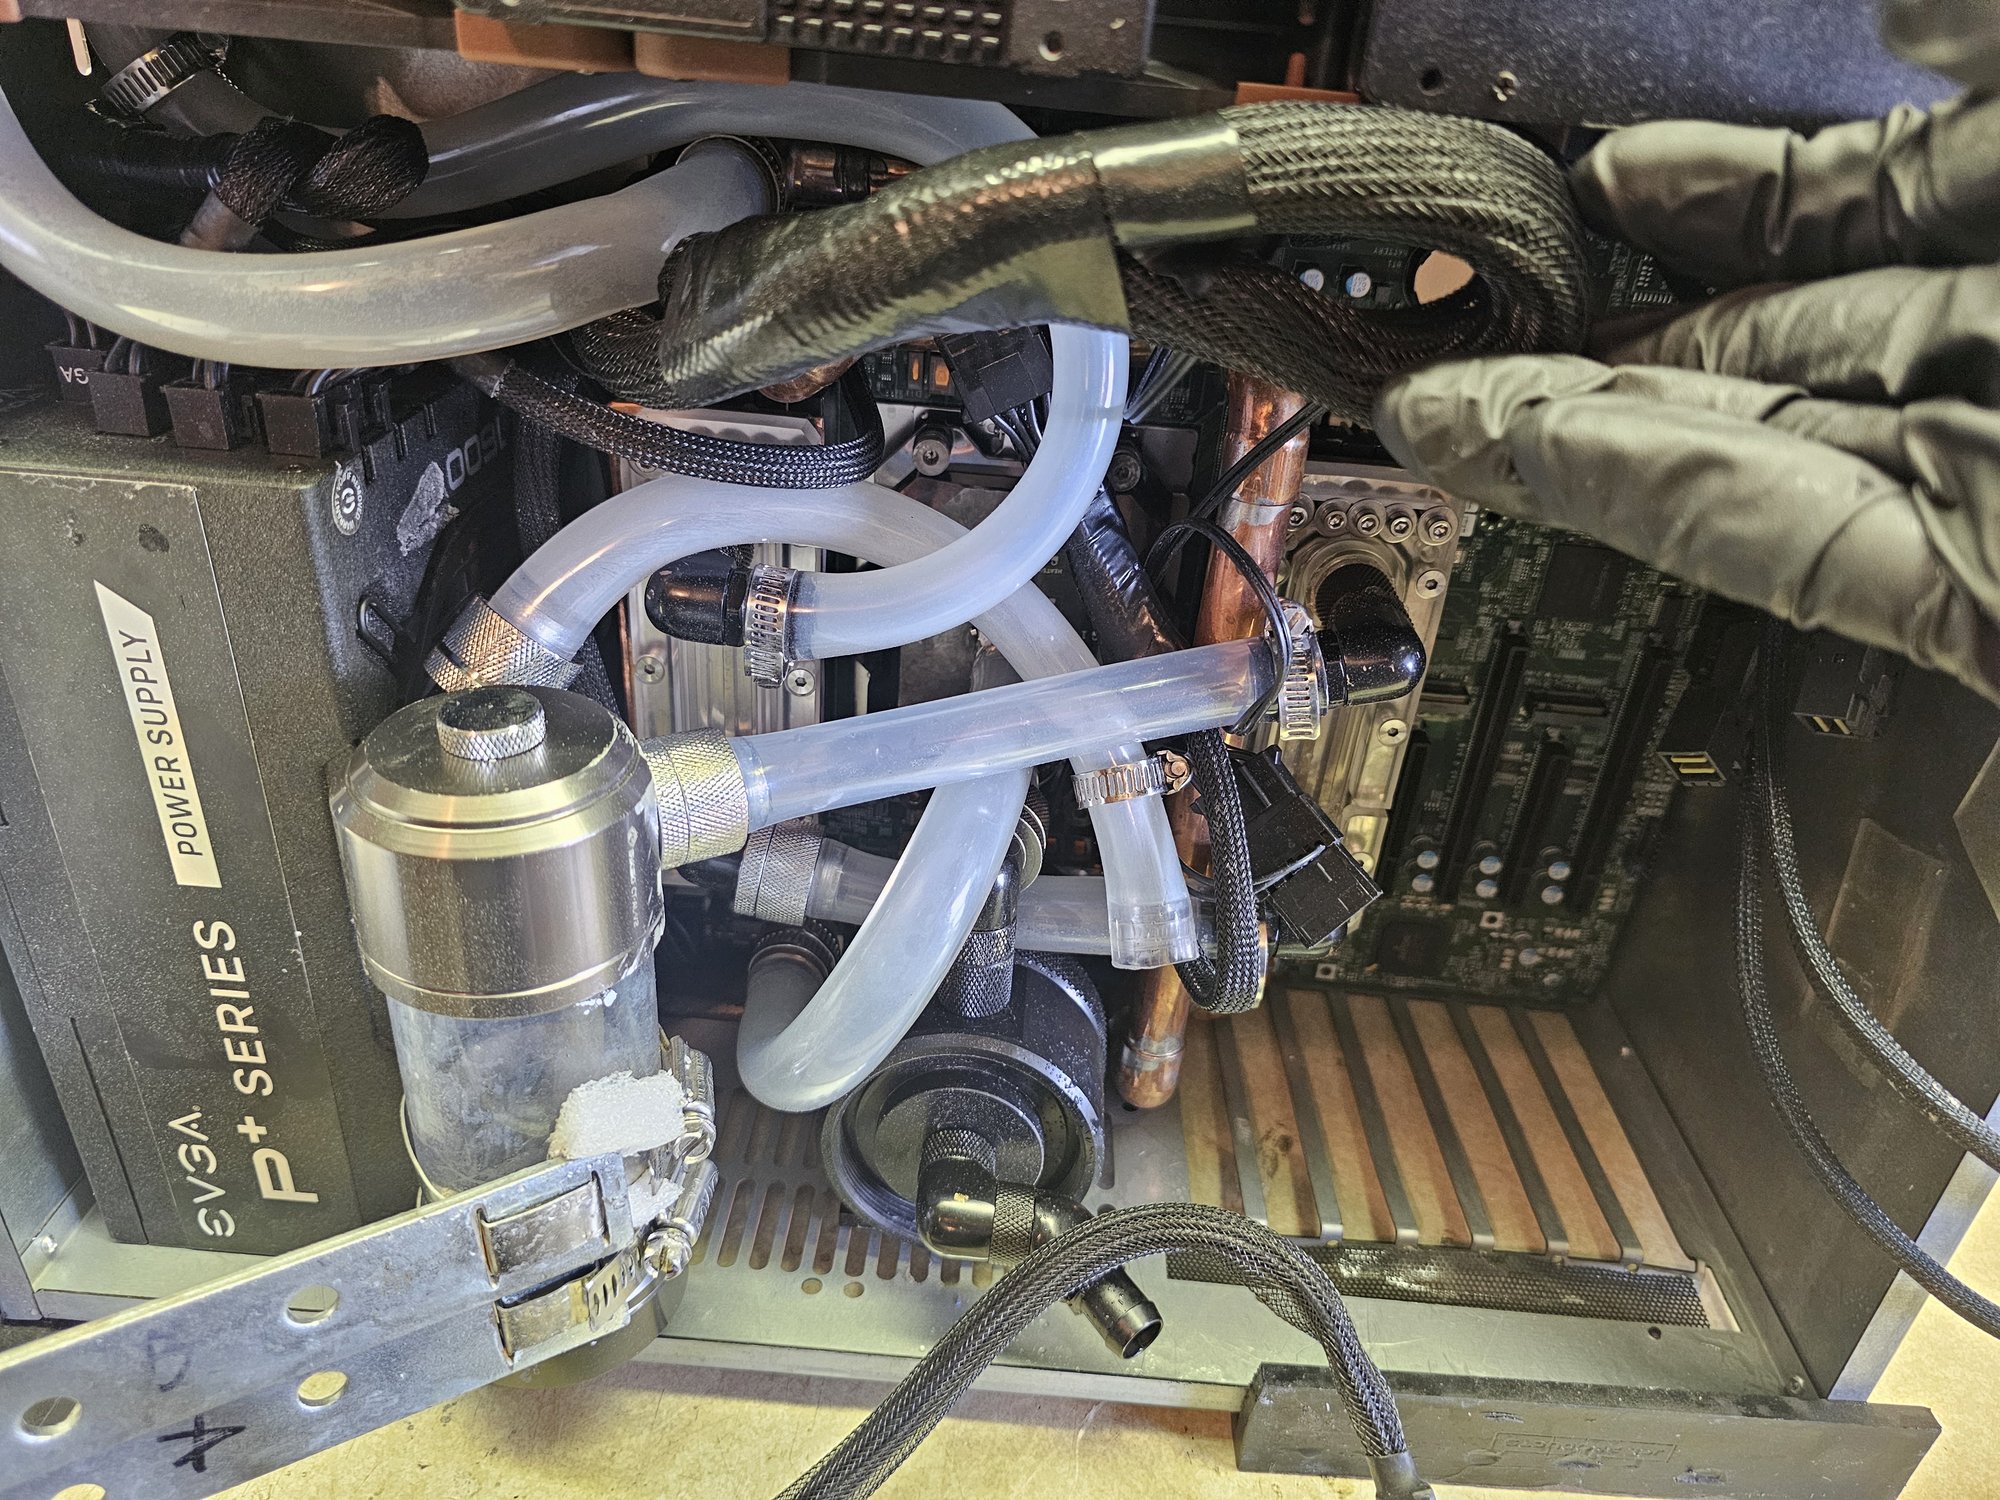
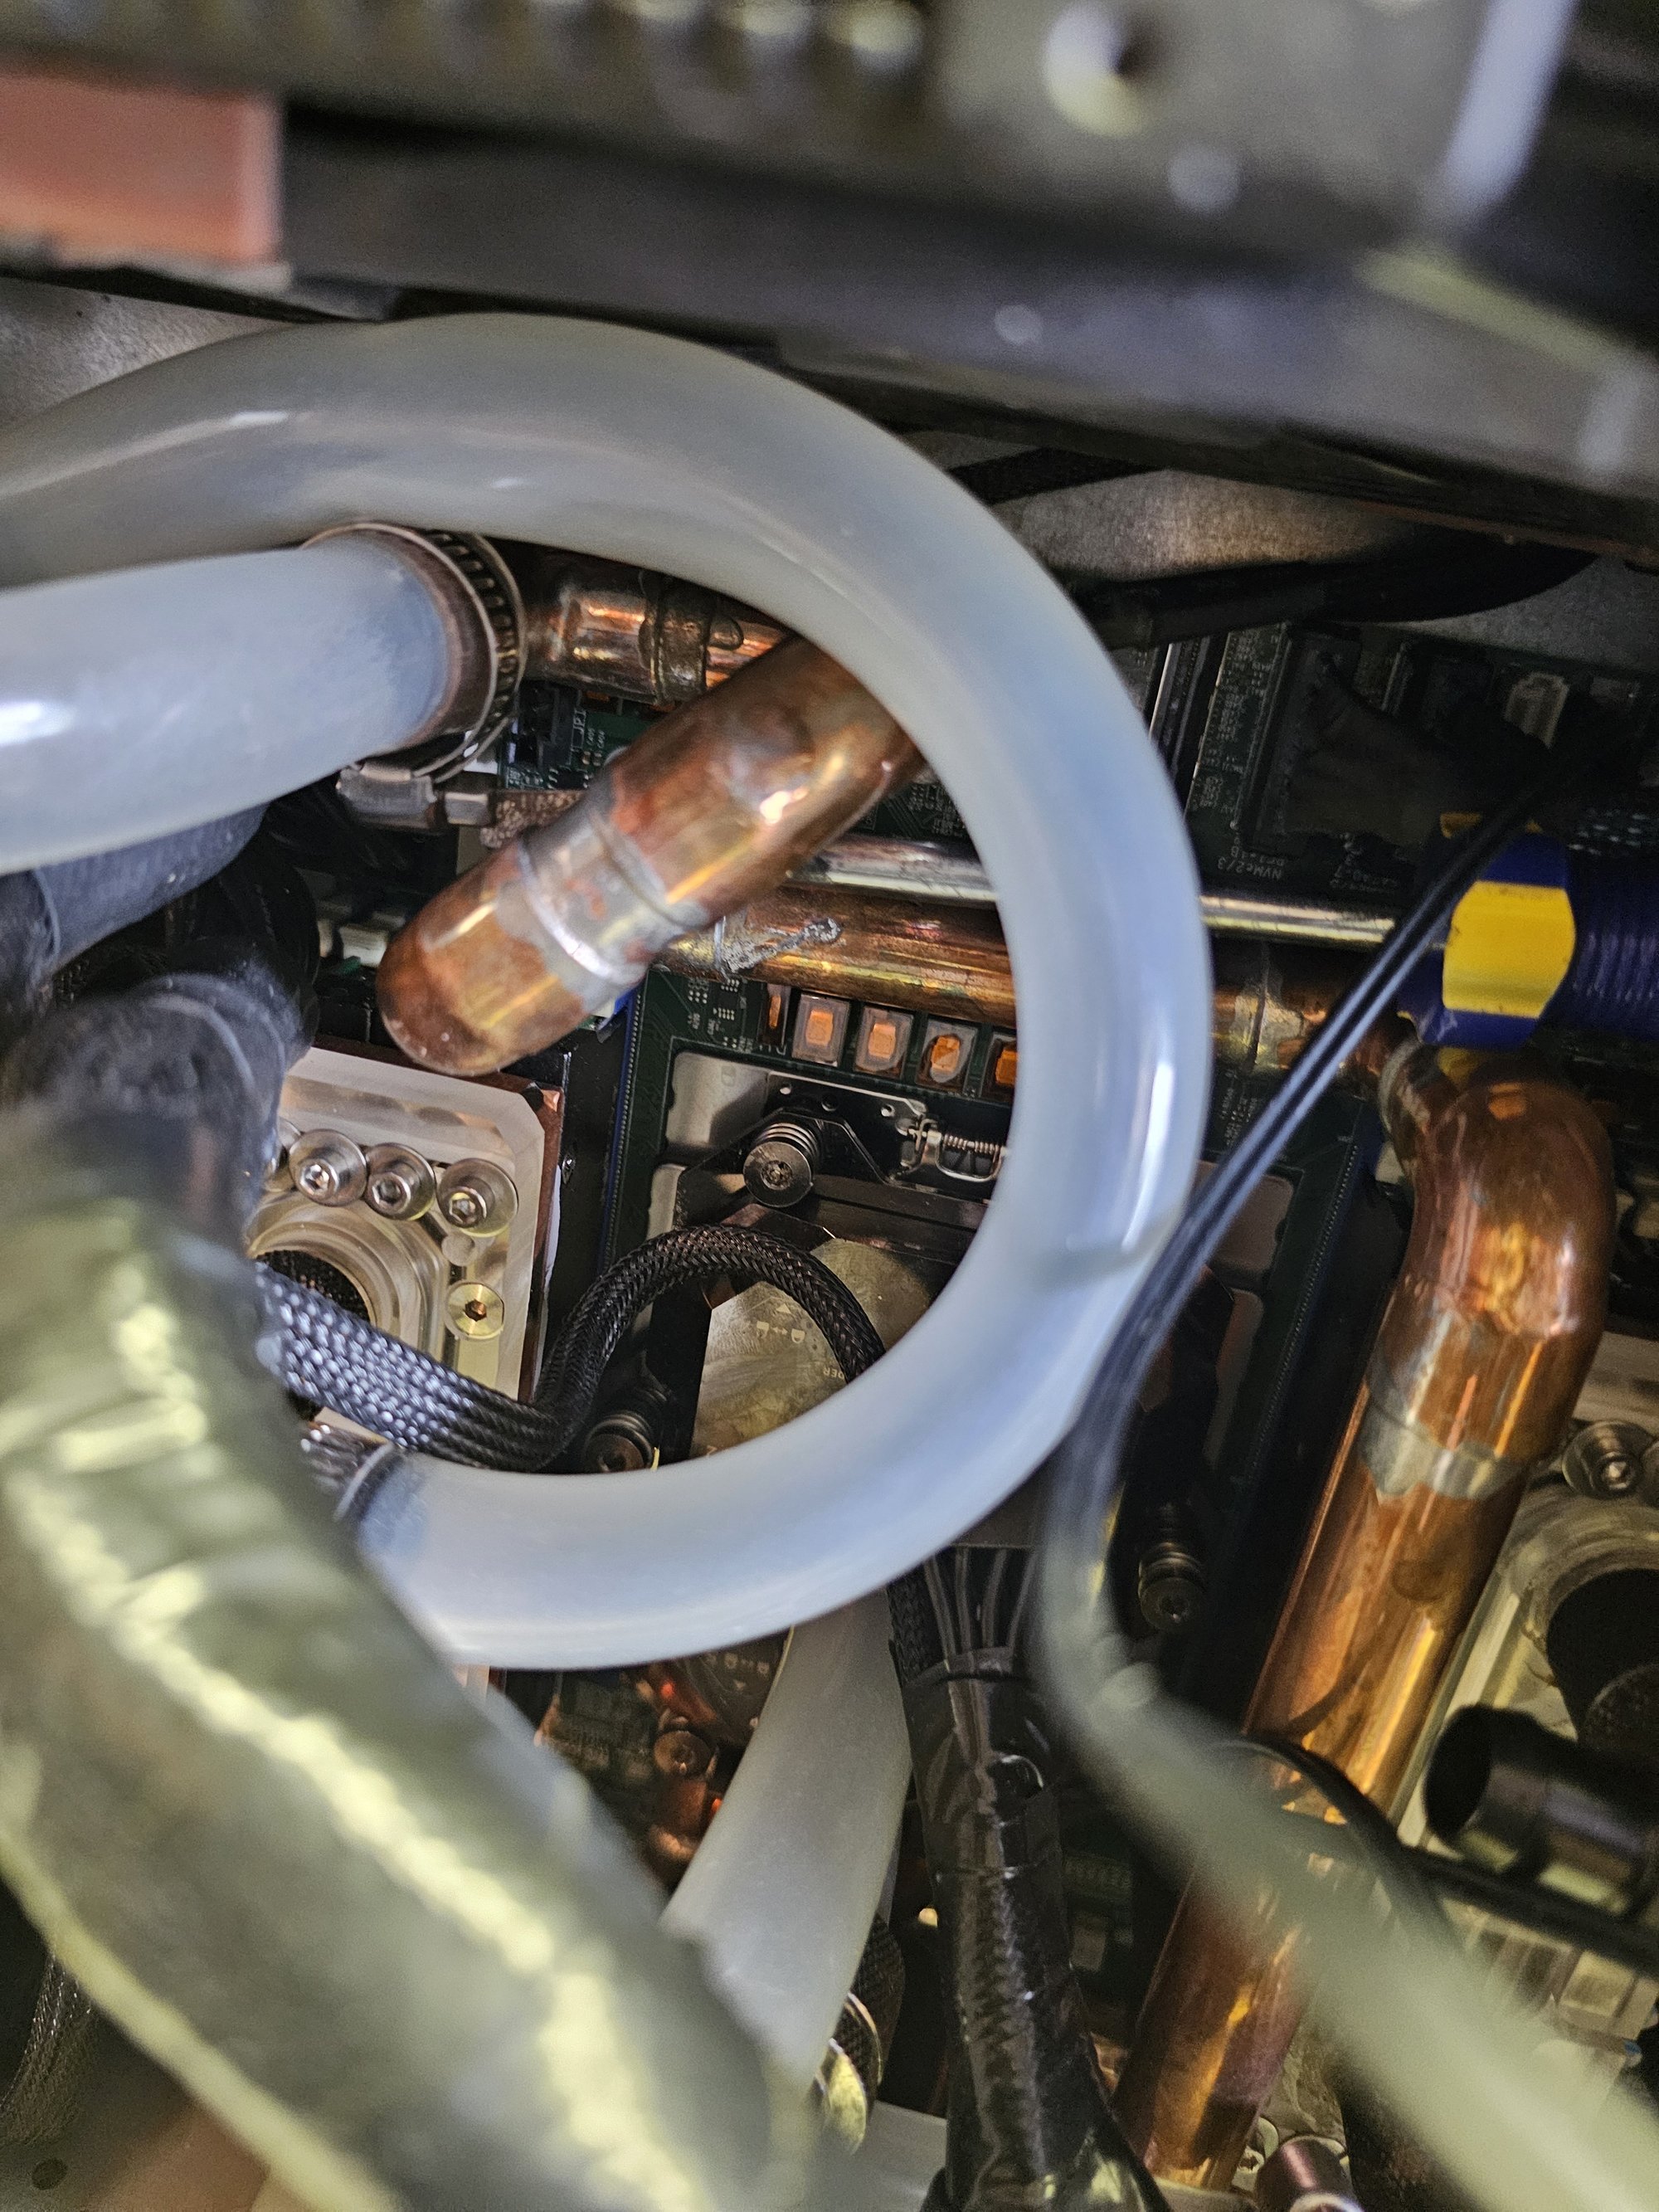
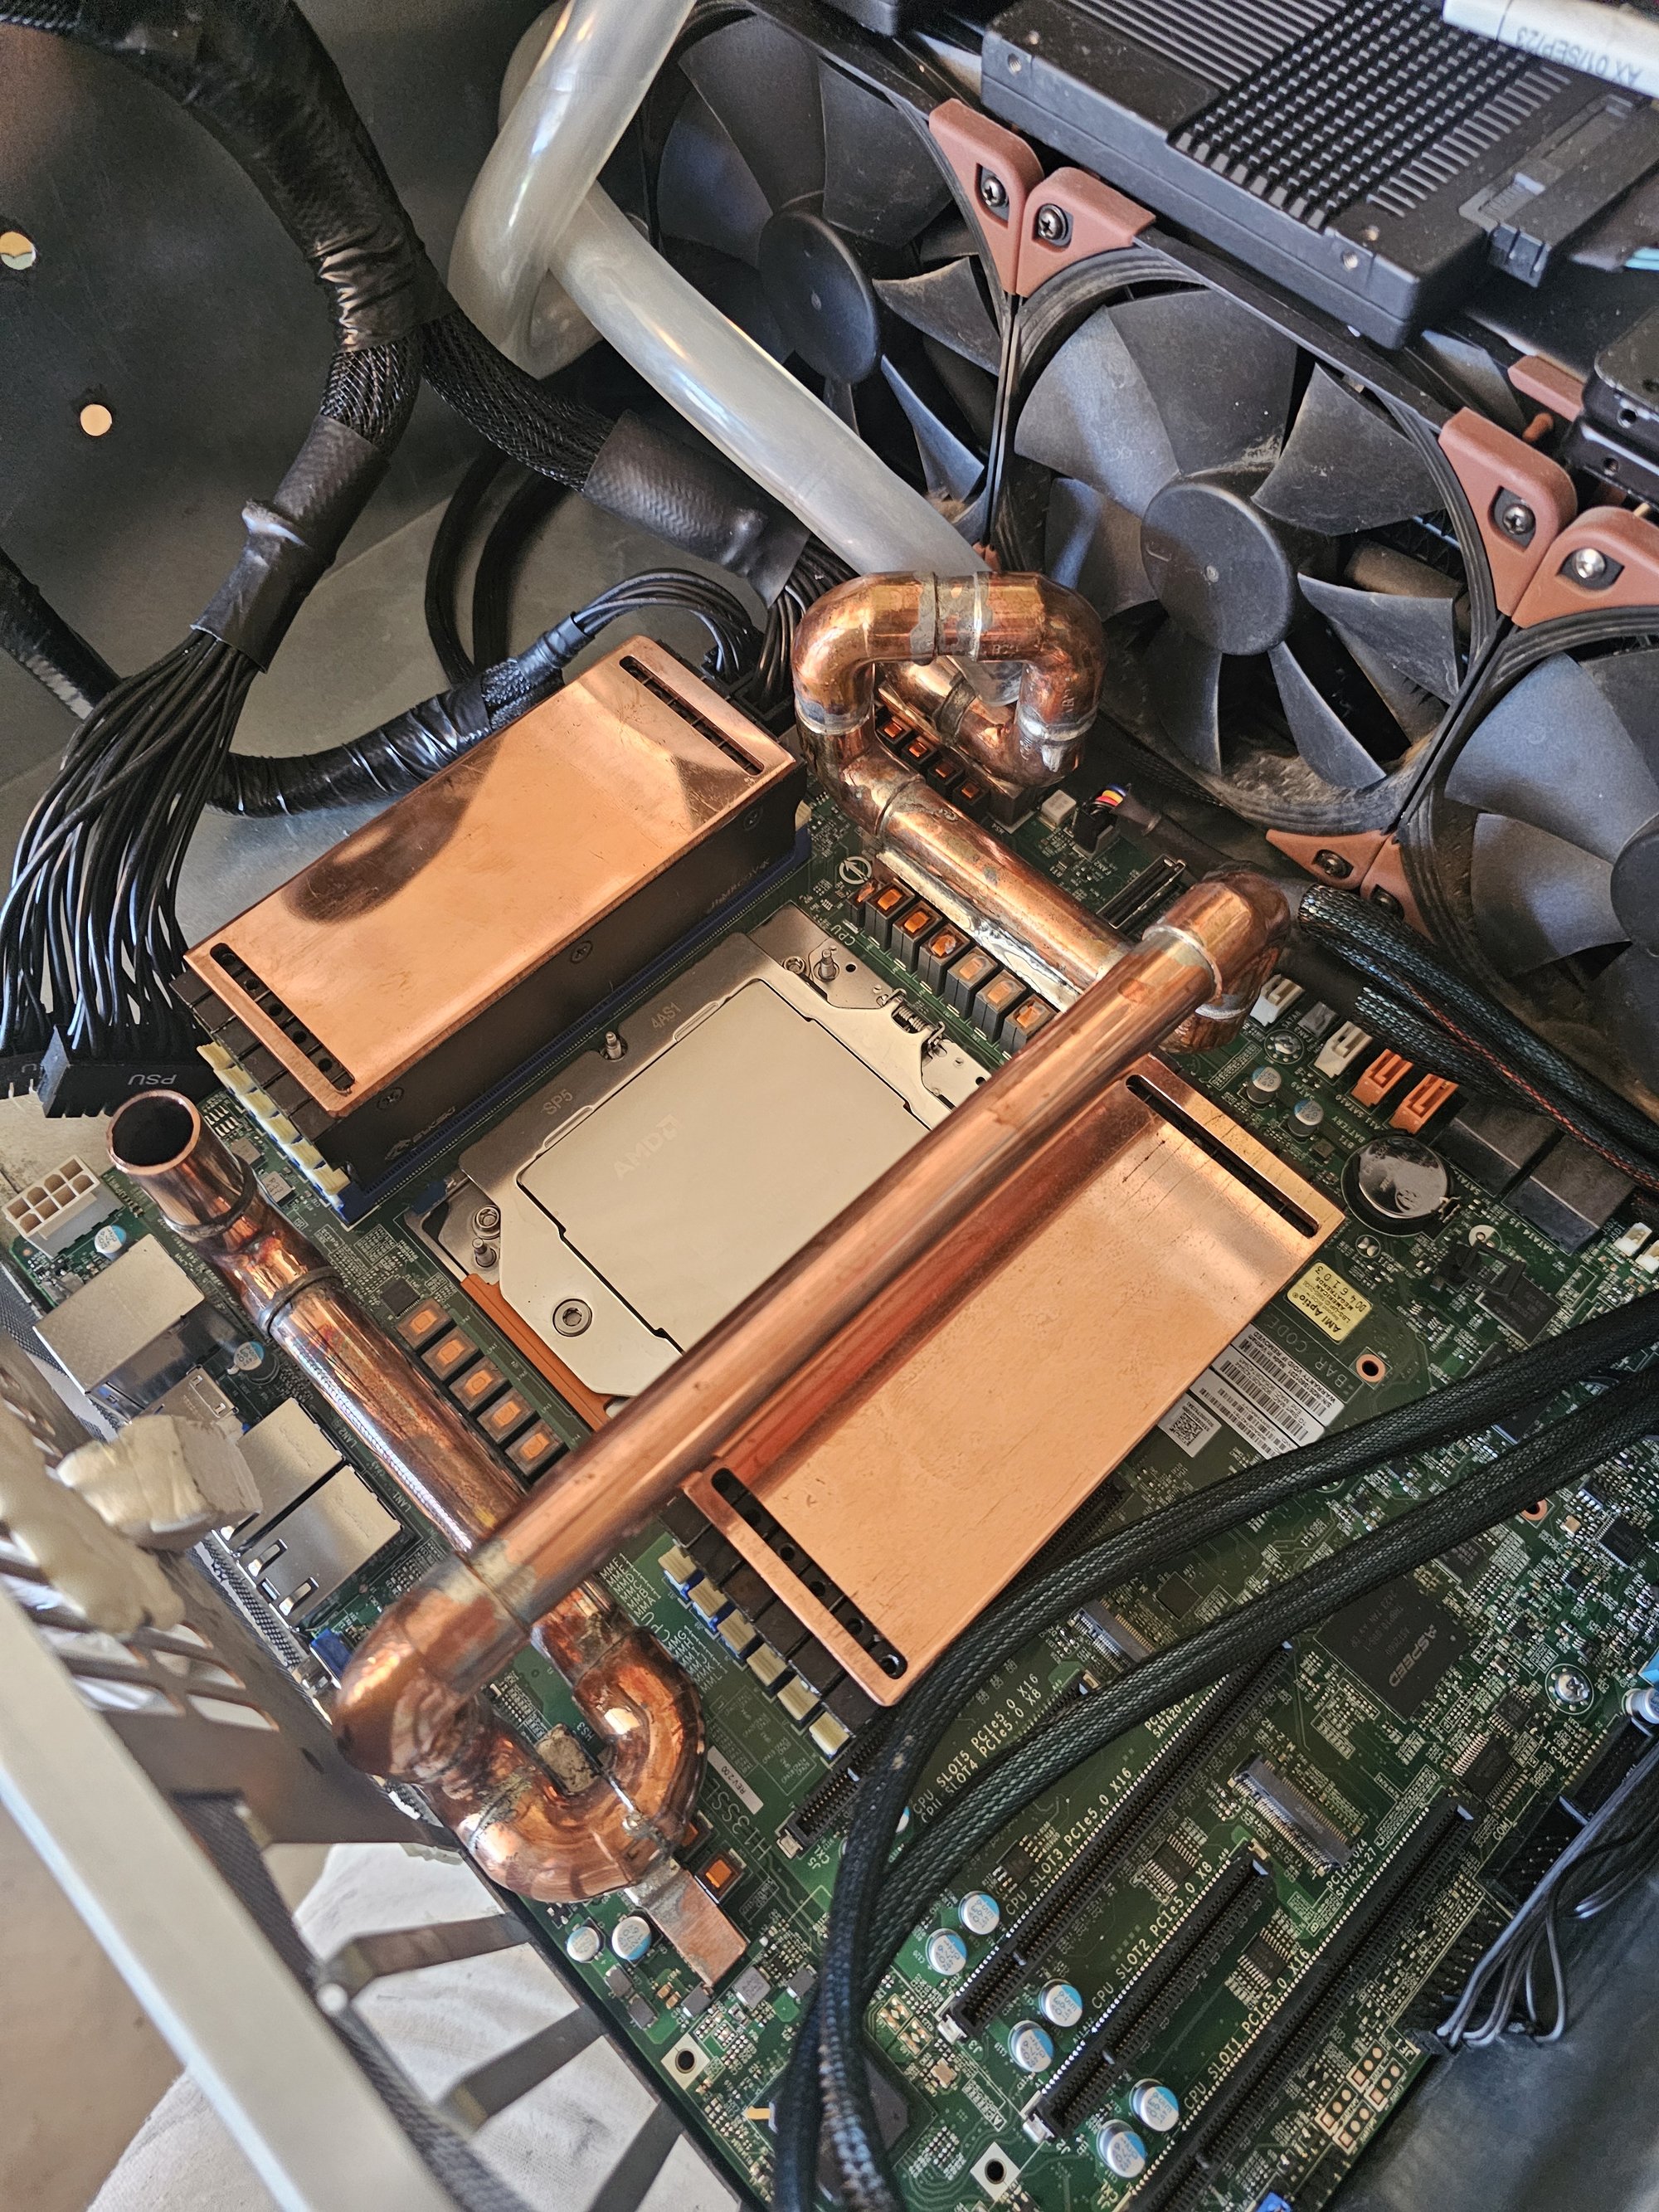
Items that are part of the cooling loop:
- SP6 socket CPU
- 12x DDR5
- 2x m.2 NVMe (thermal padded to radiator)
- 2x Optane (thermal padded to radiator)
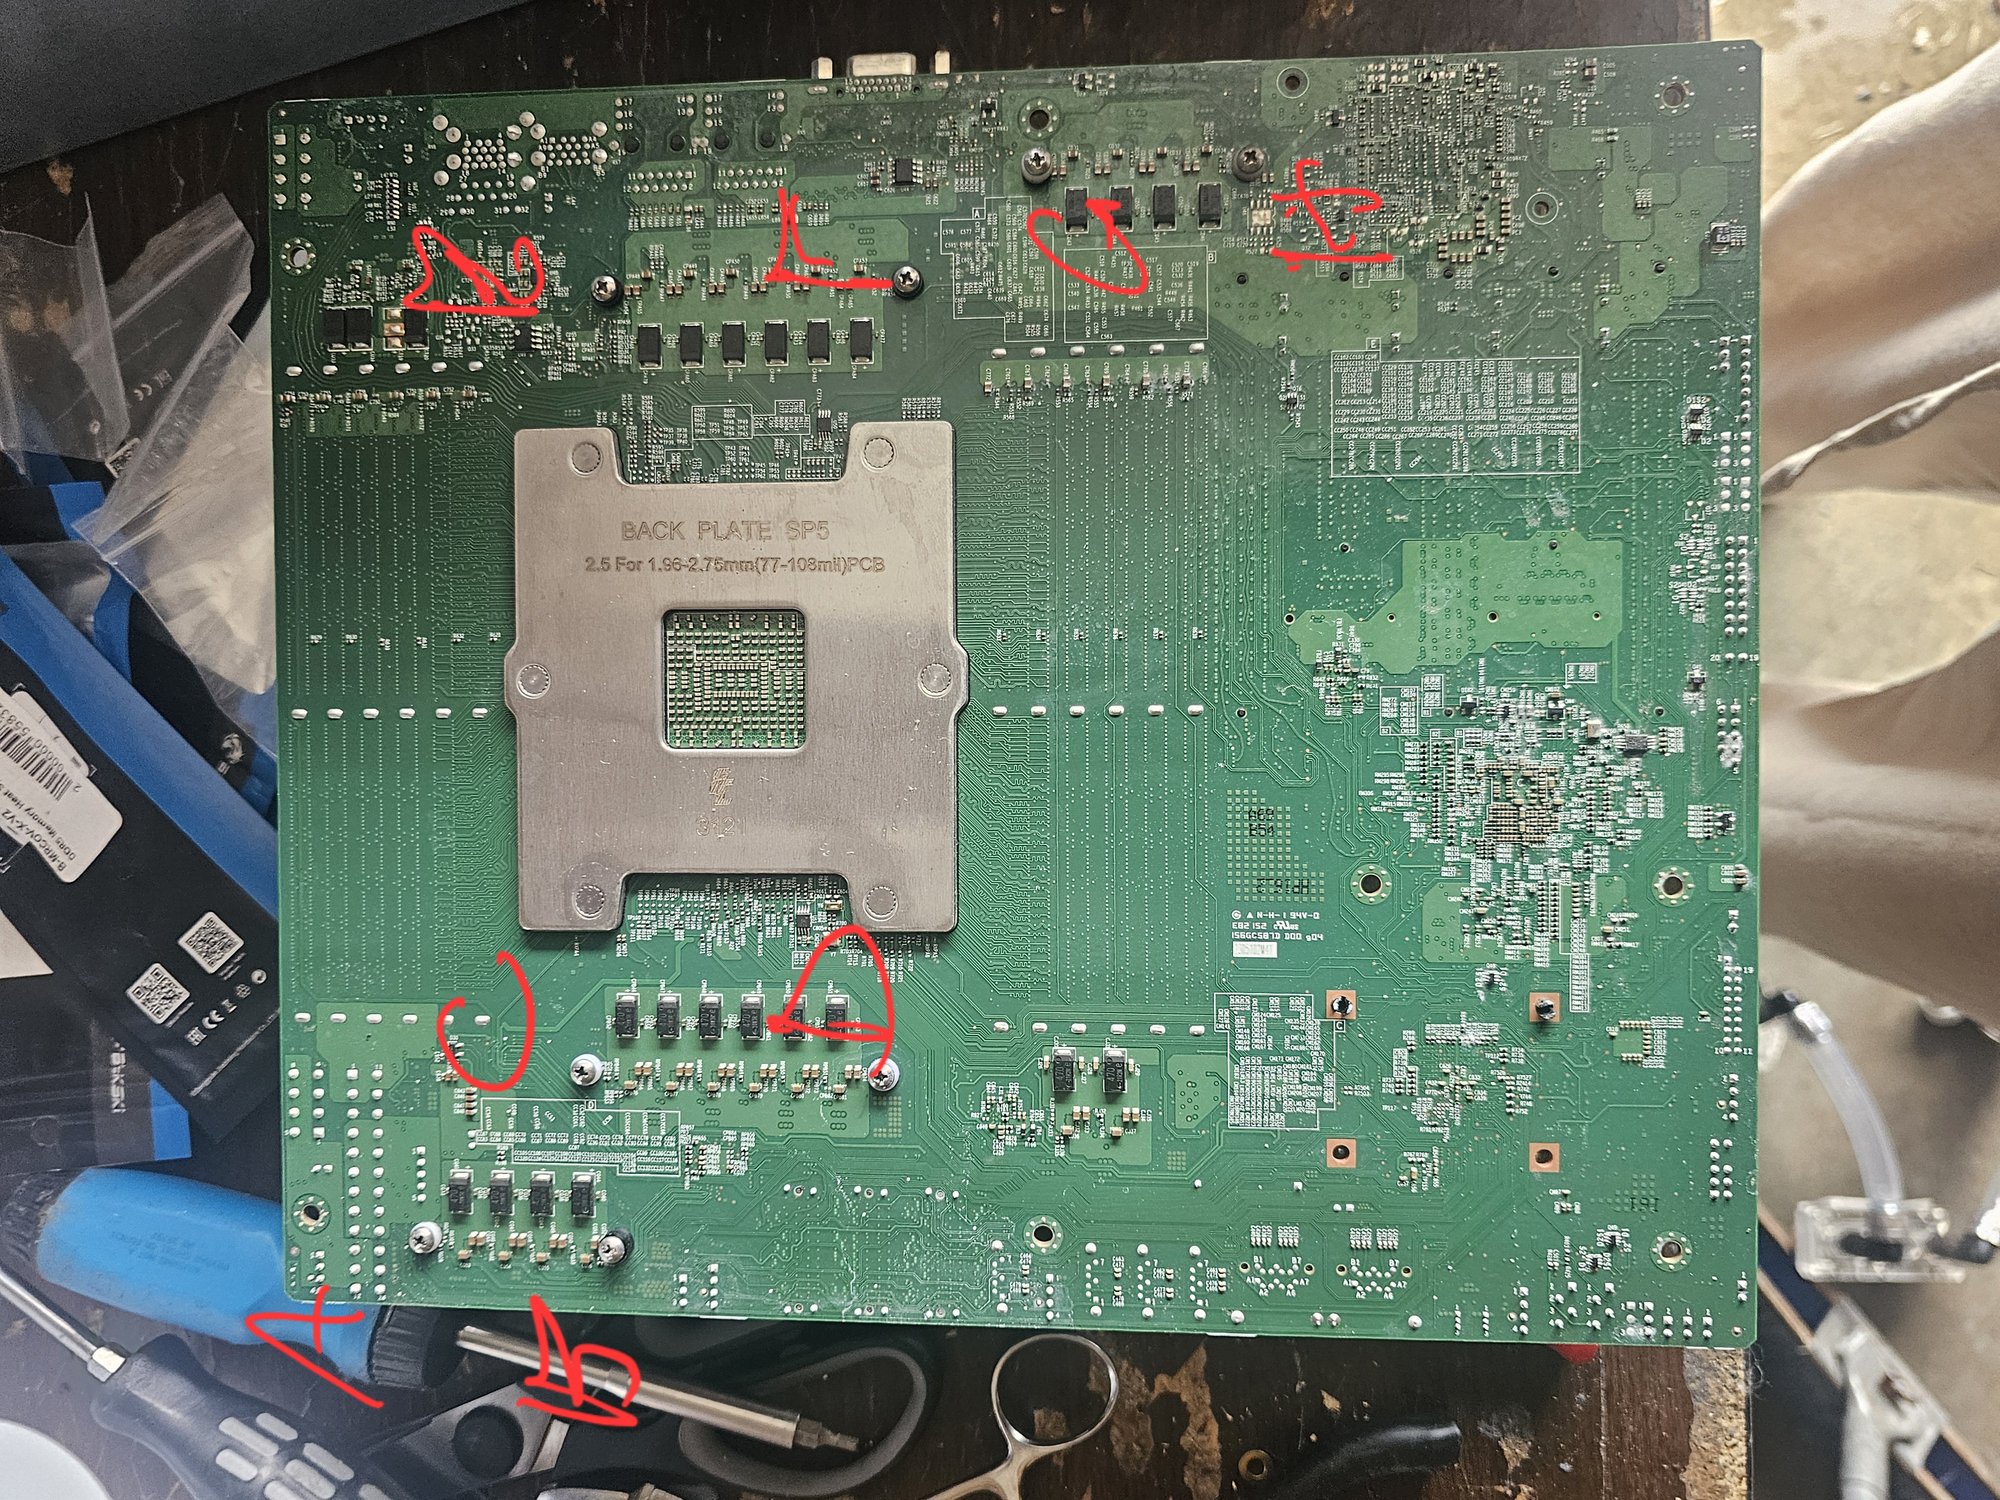
- 4x VRM bank (via copper pipe noodle)
The loop was designed so far as to fit and properly feed the pump from the reservoir while running (pump won't run dry until reservoir is empty). Luckily it worked out in the end, and drains and fills relatively well by flipping the case up on its ends.
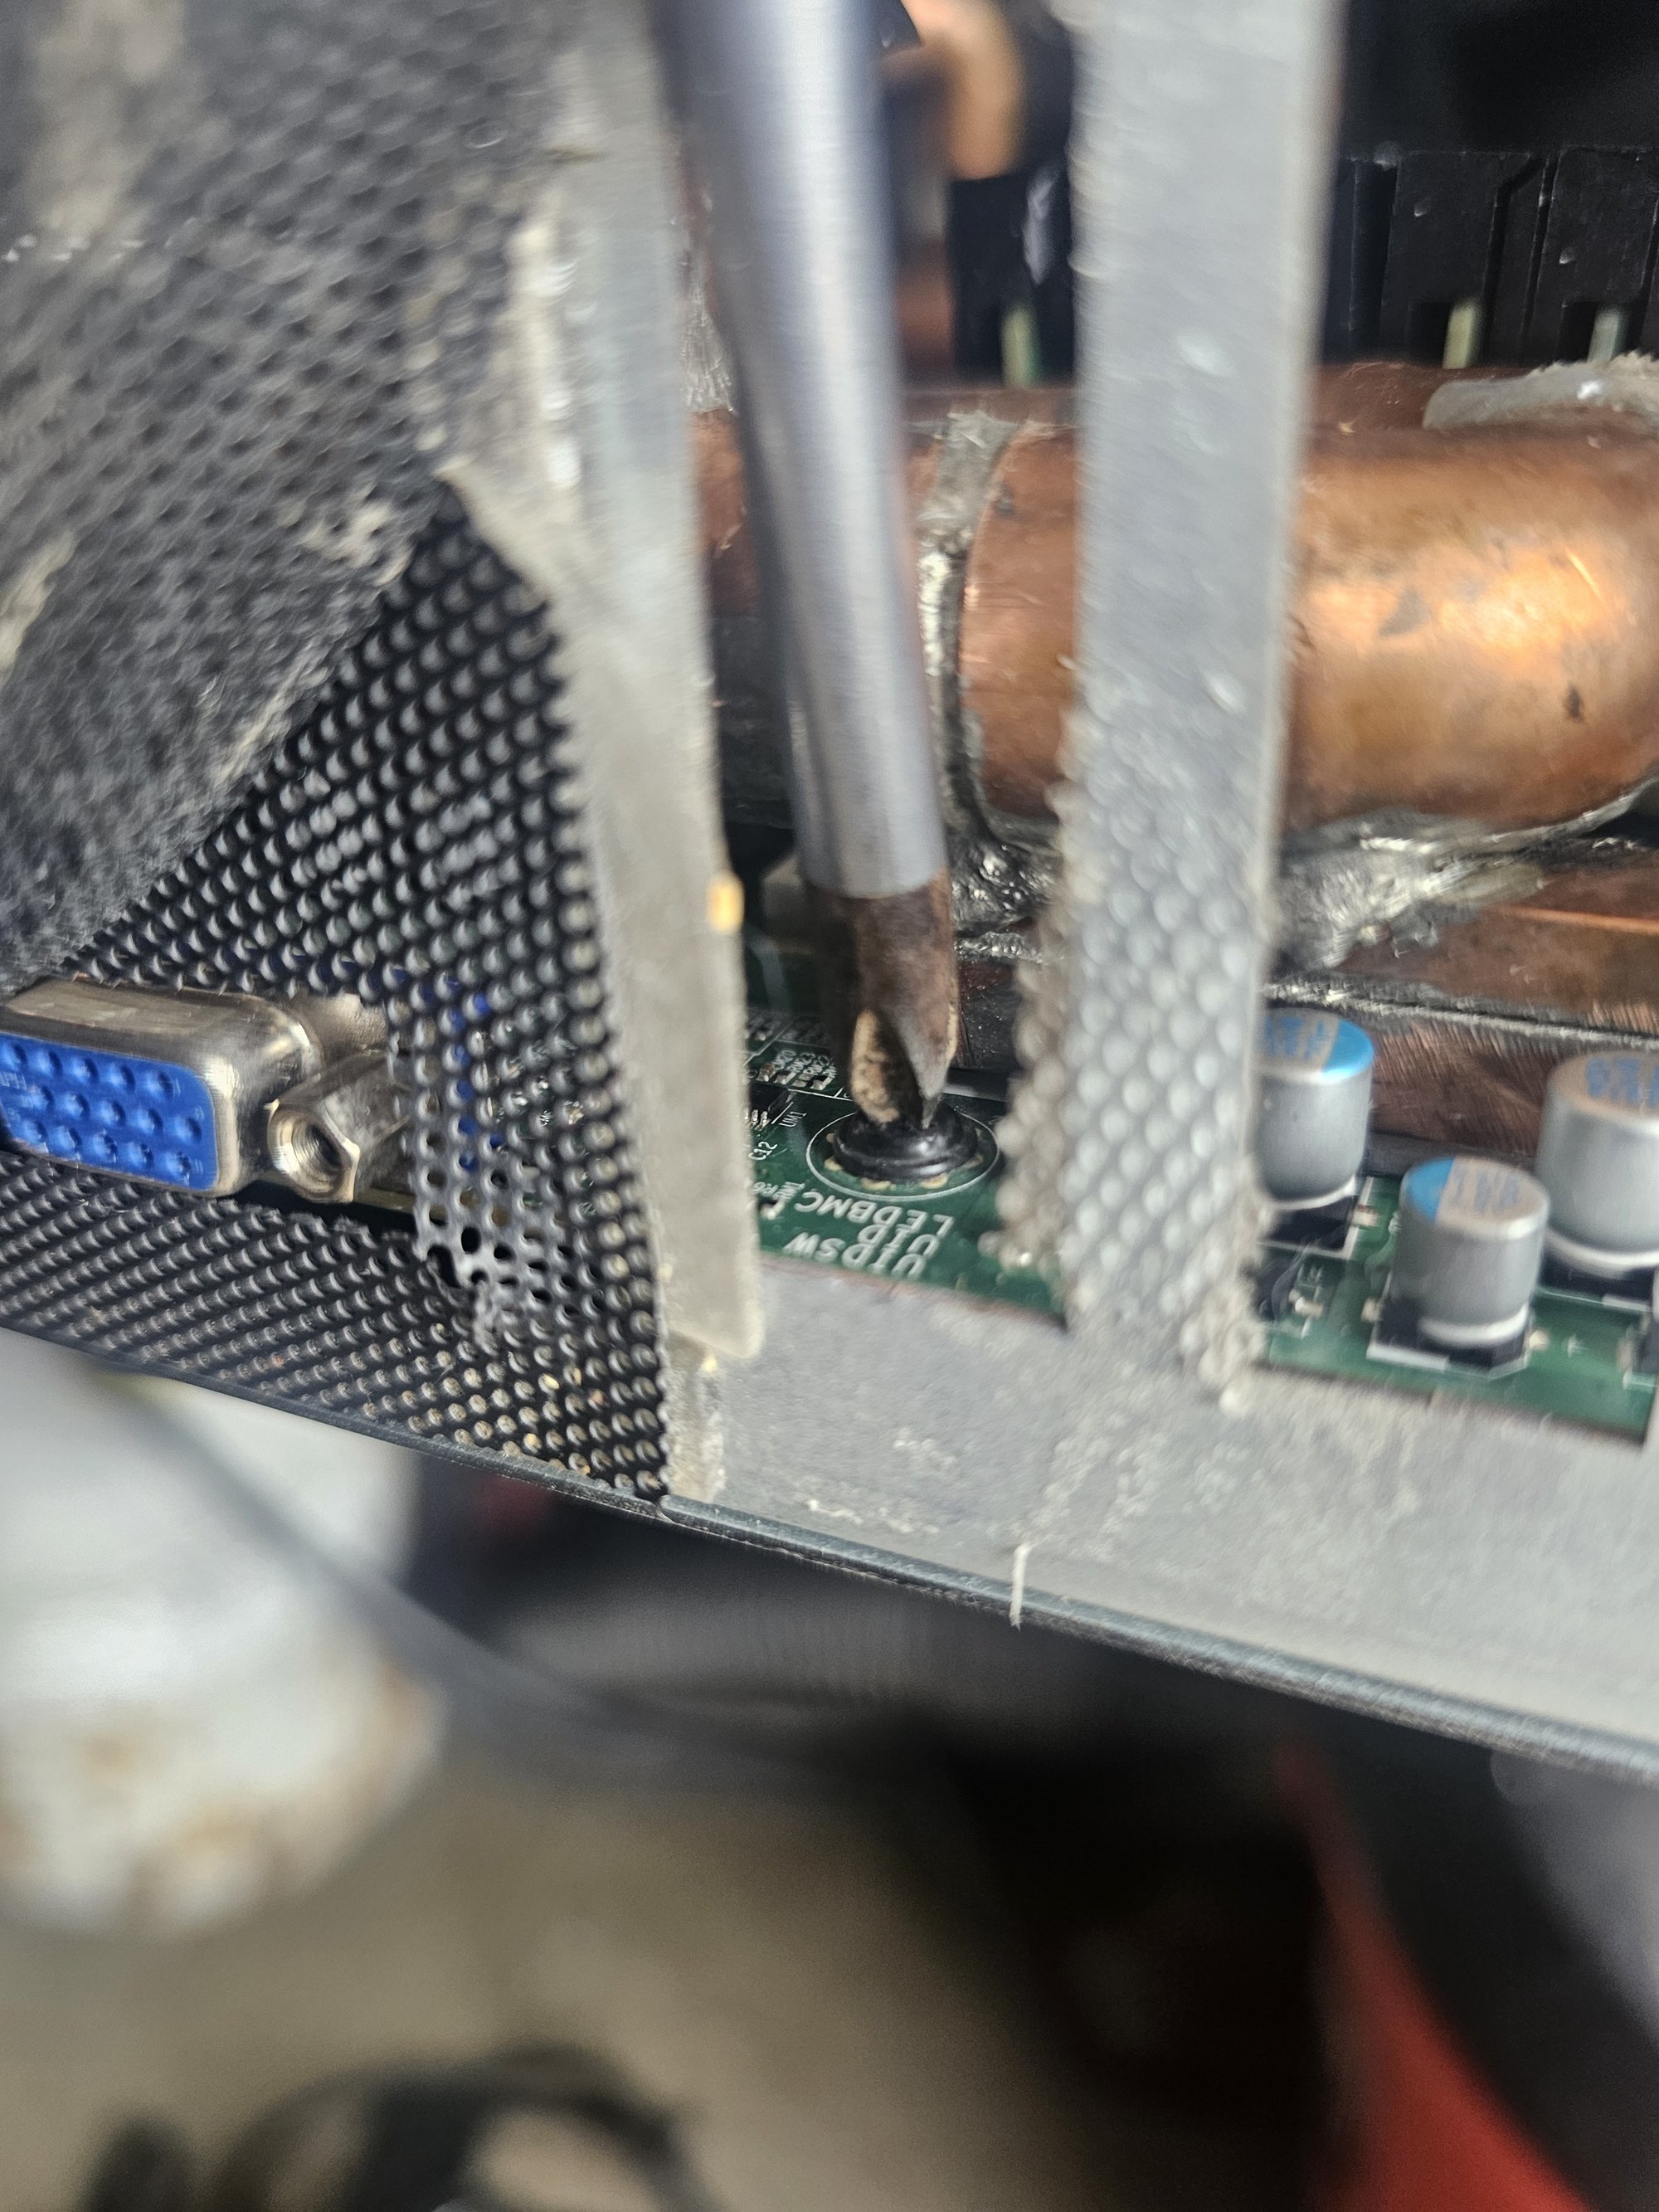
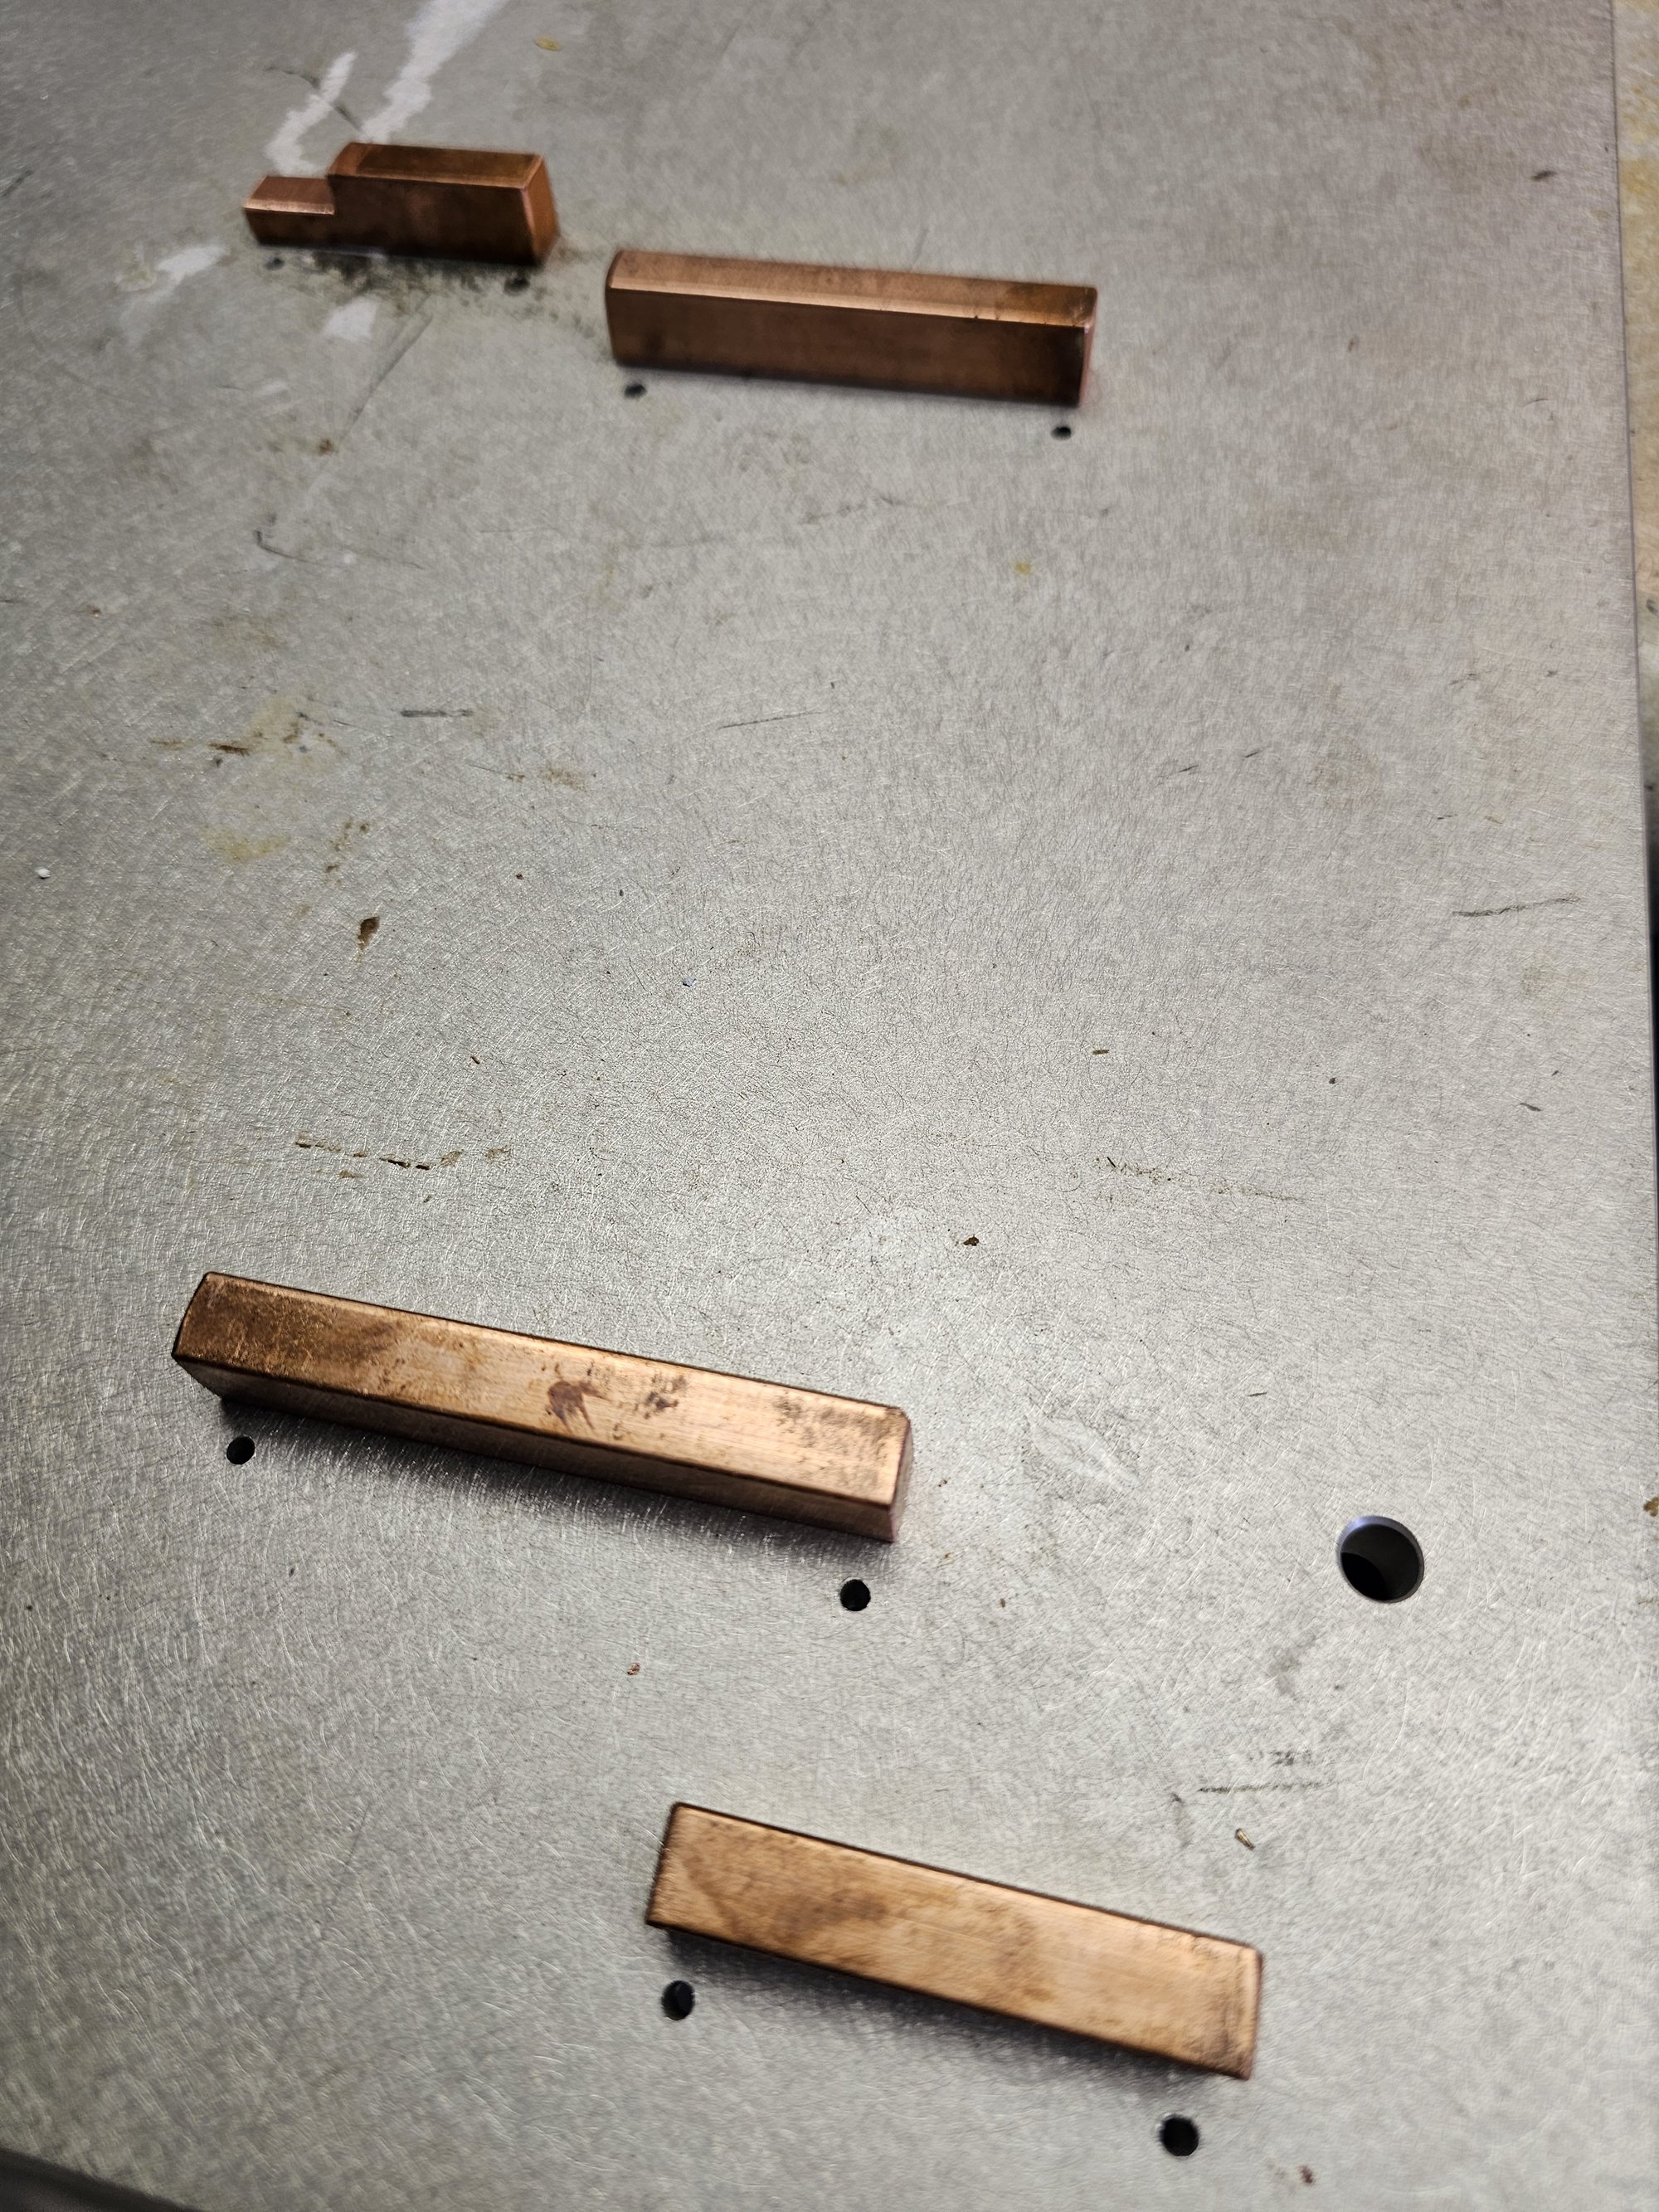
The radiator fans are noctua 3000rpm ippc, though they never need to run at that speed. The VRMs are cooled with a custom "waterblock" made with soldered copper pipe and square barstock. 2x 4-40 blind tapped holes are in each bar to mimic the original plastic quick connects from the old heatsinks. This was accomplished by using the mobo as a stencil against a 1/2in thick plate of aluminum. The barstock pieces were attached and the pipe noodle was built up from there. You need a thick baseplate to prevent heat warping while you solder.
There is a myriad of mixed metal in this loop. Copper, nickel, chrome, silver, and tin are all present. I am using Mayhem's biocide and anticorrosion agents (Hades, Inhibitor+) to combat degredation of the loop and it seems to be working at the 9 month mark. UPDATE: cleaned after over a year, everything is still happy. Noticed a good amount of buildup which I'm almost certain was my overuse of Mayhems. They explicitly say just a couple drops.
The copper noodle has a finishing step where I flushed it with lye to dissolve some of the excess solder. The relative surface area to depth of the solder joints to excess "film" is such that this procedure is extremely practical. I did this to massively lower the surface area contact of the solder to the water to limit the amount of tin and silver that wind up in it.
Attempt 2
I was haphazardly ripping stuff apart late at night and flooded the board (again) which this time managed to kill it (who knew blowing pressurized air on it would force the water into the cpu socket).
I rebuilt everything. The copper noodle got some major adjustments in the new version to fix a ton of clearance issues and other things. It was also soldered properly this time, and polished. The first noodle was my first time ever soldering pipe, and I had too much faith in flux. I redid all the ram so it actually fits. I used MX6 to help gap fill the two ram fins on each stick so both sides conduct well. I messed up and used 1mm pads instead of 0.5mm and had to vise squeeze each stick to thin out so they'd fit next to one another.
I also had the sticks CNC milled to fix a clearance issue. I've learned that ECC DDR5 has huge chokes on the top center on one side and mlc caps on the other, as part of the PMIC (power management integrated circuit) chip. So I had pockets milled in each fin there to clear it. works perfectly.
EDIT: apparently made-to-order custom DDR5 ECC heatsinks with these pockets are a "thing" thats plaguing other people too. Here's an l1techs forum link, and theres a github of stl files too: https://forum.level1techs.com/t/threadripper-trx50-wrx90-cooling-stuff-watercooling-ddr5-rdimm-cooling-etc. I went with having my friend CNC some quick pockets in my bykski heatsinks.
The biggest lesson I got was to use barbs + hose clamps everywhere. compression fittings are for show ONLY.
Everything but the board survived and passes hardware checks.
Pictures in the gallery will show an H13SSL-N rev 2.0. I bought this board from a seller who claimed it was a rev 1.0, and decided I'd try it since it was already unpacked and everything. The old BIOS cannot be flashed to this board. No rev 2.0 BIOS contains the preproduction ucode.